An essential step in developing Internet of Things (IoT) applications is configuring communication between IoT devices and a server or web services.
IoT devices communicate with a web server, service, or API via HTTP requests. An HTTP request is a message sent by a client to a server in the context of the World Wide Web. This allows smart devices to act as web clients, exchanging data and information with servers via the Internet. Many IoT projects are built using Arduino and Arduino compatible boards. Arduino is currently the most popular microcontroller platform for prototyping typical embedded applications, including IoT.
In this article, we will discuss how Arduino and compatible boards are configured and programmed to “talk” over the Internet. Communication can occur thanks to HTTP requests.
 What is an HTTP request?
An HTTP request is a message sent by a client to a server in the context of the World Wide Web. It is the standard way that web clients (web browsers and other web-connected entities such as IoT devices) request data from servers or send data to servers.
These requests are the basis of data communication on the web and operate as part of the Hypertext Transfer Protocol (HTTP) — an application layer protocol in the Internet protocol suite.
An HTTP request includes the following parts.
1. Initial line: contains three elements: the HTTP method, the request destination and the HTTP version. The HTTP method indicates the action to be performed on the resource such as GET, POST, PUT DELETE, etc. The destination of the request is a URL or the path to the resource on the server. HTTP version specifies the version of the HTTP protocol, such as HTTP/1.1.
2. Headers: Contain metadata about the request, such as host, user agent, content type, and other information about the client or data being sent.
3. Empty line: The end of the header section and the beginning of the optional body (HTTP request) are indicated by an empty line.
4. Body: Not present in every request (as with most GET requests), but when it is, it contains the data to be sent with the request. This is typical for POST requests where form data or file uploads are sent to the server.
Whenever you browse a web page, fill out a form, or call an API from a web application, the client sends an HTTP request. After receiving the request, the server processes it and responds with an HTTP response that includes the requested data, the status of the request, and sometimes a body containing additional requested data or the results of the operation.
HTTP Methods
The HTTP method indicates the action to be performed on the resource. There are several HTTP methods, including GET, POST, PUT, DELETE, HEAD, CONNECT, PATCH, TRACE, OPTIONS, LINK, UNLINK, etc.
- The GET method requests data from a resource.
- The POST method sends data to be processed to a specified resource.
- The PUT method updates a specified resource with the given data.
- The DELETE method removes or deletes a specified resource.
GET and POST are the most common HTTP methods used for the World Wide Web and IoT. Contrary to its definition, the GET method can obtain and send data to a web server.
Arduino and HTTP requests
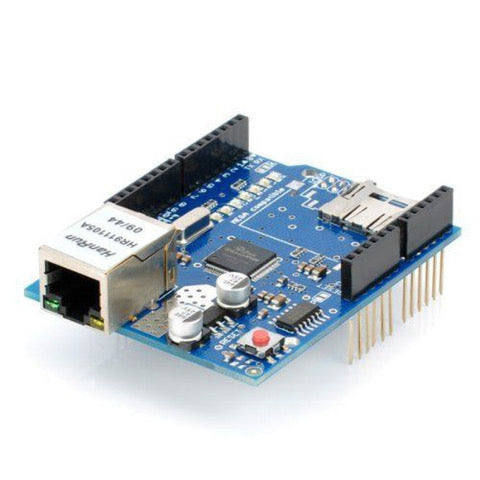
Arduino boards must connect via Ethernet or WiFi to make HTTP requests and communicate with a web server. An Ethernet shield is required to set up communication between the Arduino and the Internet via Ethernet. The Arduino WiFi Shield is required to allow the Arduino to access a WiFi network.
Some breakout boards allow the Arduino to connect to WiFi networks. Several Arduino boards now also come with built-in WiFi functionality, including Arduino Uno WiFi Rev2, Arduino Nano 33 IoT, Arduino MKR WiFi 1010, Arduino MKR1000 WiFi, Arduino Portenta H7, Arduino Yun , Arduino Yun Mini and Arduino Yun Rev2.
ESP8266 and ESP32 are alternative Arduino-compatible microcontroller boards with built-in WiFi and Bluetooth functions. If an Arduino board does not have built-in WiFi functionality, an Ethernet or WiFi shield will be required to connect to the Internet.
How Arduino communicates
When an IoT device built using Arduino or any microcontroller communicates with a web server, service or API, it operates as a web client. The web server, service and API are resources identified by a URL. Communication occurs through HTTP requests to the specified resource URL. It may also contain a query string containing the variables or data to be communicated to the specified resource. Then the specified resource sends an HTTP response. The IoT device (Arduino or any microcontroller) receives and analyzes the HTTP response.
Arduino libraries
There are several libraries available for sending HTTP requests from Arduino. Libraries simplify the process, especially when using network modules like ESP8266 or ESP32, which have built-in WiFi capabilities or Ethernet shields.
Commonly used Arduino libraries for making HTTP requests are as follows.
Ethernet Library: for Arduino boards that connect to the Internet using an Ethernet shield. It allows you to perform all network tasks via Ethernet.
Wi-Fi.h: for Arduino boards with native WiFi support, such as Arduino Nano 33 IoT. It is used to manage WiFi connections and send HTTP requests.
WiFiNINA Library: designed for boards with the u-blox NINA WiFi module, such as Arduino MKR WiFi 1010, Arduino MKR VIDOR 4000 and Arduino UNO WiFi Rev.2.
ESP8266WiFi Library: It is for the ESP8266 module and is often used to manage WiFi connections and perform network tasks, including sending HTTP requests.
ESP32 WiFi Library: Similar to ESP8266WiFi, but designed for ESP32 module. It allows you to connect to a WiFi network and send HTTP requests.
ESP8266HTTPClient Library: for ESP8266, providing additional functionality specifically for creating HTTP requests and handling responses.
HTTPClient Library: for ESP32, providing additional functionality specifically for creating HTTP requests and handling responses.
Ethernet Library
The Ethernet library allows network connection to LAN or Internet using the Arduino Ethernet shield. The library provides client and server functionality. It also connects to a local DHCP network and resolves DNS. The library is compatible with all Arduino platform architectures.
This library can be used with Arduino Ethernet Shield, Arduino Ethernet Shield 2, Leonardo Ethernet and other W5100/W5200/W5500 based devices. It can configure a card as a server accepting incoming connections or a client making outgoing connections. Supports up to eight or four simultaneous connections. The Ethernet shield interfaces with the Arduino via the SPI bus.
The library is imported into a sketch using these instructions:
#include
#include
The library offers six classes:
1. Class Ethernet
2. IP address class
3. Server class
4. Customer class
5. EthernetUDP Class
6. UDP Class
To make HTTP requests using Arduino, methods from the client class are used in the sketch below. The Ethernet client is initialized using the EthernetClient method, creating a client that connects to a specified IP address and Internet port, as defined in the client.connect function.
It has the following prototype.
Ethernet client
The method requires no parameters. A valid example of Ethernet client initialization is as follows.
EthernetClient Client;
The Ethernet library client class provides the following methods…
client.connect : Connects to a specified IP address and port. It also supports DNS lookups when using a domain name. The value returned by the method indicates the success or failure of a connection.
It has this syntax:
client.connect
client.connect(ip, port)
client.connect(URL, port)
It requires an IP and port, or a URL and port, or may require no arguments. IP is the IP address the client will connect to, represented by a 4-byte array. Port is the port to which the client will connect.
For HTTP requests, the port is typically 80. URL is the domain name that the client will connect to. The function returns 1,-1,-2,-3 or -4, where 1 indicates SUCCESS, -1 TIMED_OUT, -2 INVALID_SERVER, -3 TRUNCATED and -4 INVALID_RESPONSE.
client.connected: detects whether the Ethernet client is connected. A client is considered connected even if the connection has been closed but there is still unread data.
It has this syntax:
client.connected
The method does not accept arguments and returns “true” if connected; otherwise it will return “false”.
client.localPort: Returns the local port number to which the client is connected.
It has this syntax:
client.localPort
client.remoteIP: returns the IP address of the client.
It has this syntax:
client.remoteIP
client.remotePort: Returns the port of the host that sent the current incoming packet.
It has this syntax:
client.remotePort
client.setConnectionTimeout: Sets the timeout for client.connect and client.stop. The initial value is 1000 ms, which can be reduced to make the program more responsive.
It has this syntax:
client.setConnectionTimeout (milliseconds)
client.write: writes data to the server the client is connected to. This data is sent as a byte or a series of bytes.
It has this syntax:
client.write(val)
client.write(buf, len)
The method takes a byte value or a buffer containing a byte array as an argument.
print: prints data on the server to which a client is connected. It prints numbers as a sequence of digits – each an ASCII character.
It has this syntax:
client.print(data)
client.print(data,BASE)
The method takes the data to be printed as an argument. It also allows you to specify the base of the numbers indicated as DEC for decimals, OCT for octal and HEX for hexadecimal.
client.println: prints data followed by a carriage return and a newline on the server the client is connected to. It also prints numbers as a sequence of digits – each as an ASCII character.
It has this syntax:
client.println
client.println(data)
client.print(data,BASE)
client.available: returns the number of bytes available for reading from the connected server.
It has this syntax:
client.available
client.read: reads the next byte received from the server the client is connected to.
It has this syntax:
cliente.ler
client.flush: Stops everything until all output characters in the buffer have been sent.
It has this syntax:
client.flush
client.stop : disconnects from the server.
It has this syntax:
client.stop
Making HTTP GET requests using the Ethernet library
To send an HTTP GET request from Arduino using the Ethernet library, you will need an Arduino with an Ethernet shield or built-in Ethernet capabilities, such as Arduino Portenta H7 or ESP8266/ESP32 based boards.
Components
- Arduino board
- Ethernet shielding
- Ethernet cable
- A server to receive the GET request
For demonstration purposes, we will send an HTTP GET request to httpbin.org. To do this, connect the Ethernet shield to the Arduino board and connect the shield to a router using the Ethernet cable. Then, connect the Arduino to your computer and upload the following sketch.
Remember to replace the MAC array with the MAC address of your Ethernet shield, which is usually printed on a sticker on the shield. The server array must contain the domain name of the server you are making the request to. Load the sketch into Arduino and observe the output in the Arduino IDE's Serial Monitor.
Making HTTP POST requests using the Ethernet library
To send an HTTP POST request from Arduino using the Ethernet library, you will need the Arduino with an Ethernet shield or built-in Ethernet capabilities.
Components
- Arduino board
- Ethernet Shield
- Ethernet cable
- A server to receive the POST request
For demonstration purposes, we will send an HTTP POST request to httpbin.org. Connect the Ethernet shield to the Arduino board and connect the shield to a router using the Ethernet cable. Then connect the Arduino to your computer and upload the following sketch.
Remember to replace the MAC array with the MAC address of your Ethernet shield, which is usually printed on a sticker on the shield. The server array must contain the domain name of the server you are making the request to.
In the postData variable, place the data you want to send in the application/x-www-form-urlencoded format, which is the standard format for POST data in web forms. Each key-value pair is separated by an ampersand (&), and each key is separated from its value by an equal sign (=).
Load the sketch into Arduino and observe the output in the Arduino IDE's Serial Monitor. When this sketch runs, it will attempt to post the data to httpbin.org/post, which echoes the posted data in JSON format.
It should be noted that sending HTTP requests using simple Arduino and Ethernet shield is suitable for basic applications, but for more secure communication over the Internet, consider using HTTPS. It is not automatically supported on Arduino, but can be used with additional libraries and hardware such as the Arduino MKR1000 or ESP8266/ESP32.


