Digitization has significantly moved us towards a paperless society, impacting both personal and professional lives. Take restaurants for example, where many establishments now offer digital menus. Providing a digital option offers several advantages for restaurant owners, their customers and the environment. Reduces paper waste by enabling an interactive experience and real-time updates on menu options and prices.
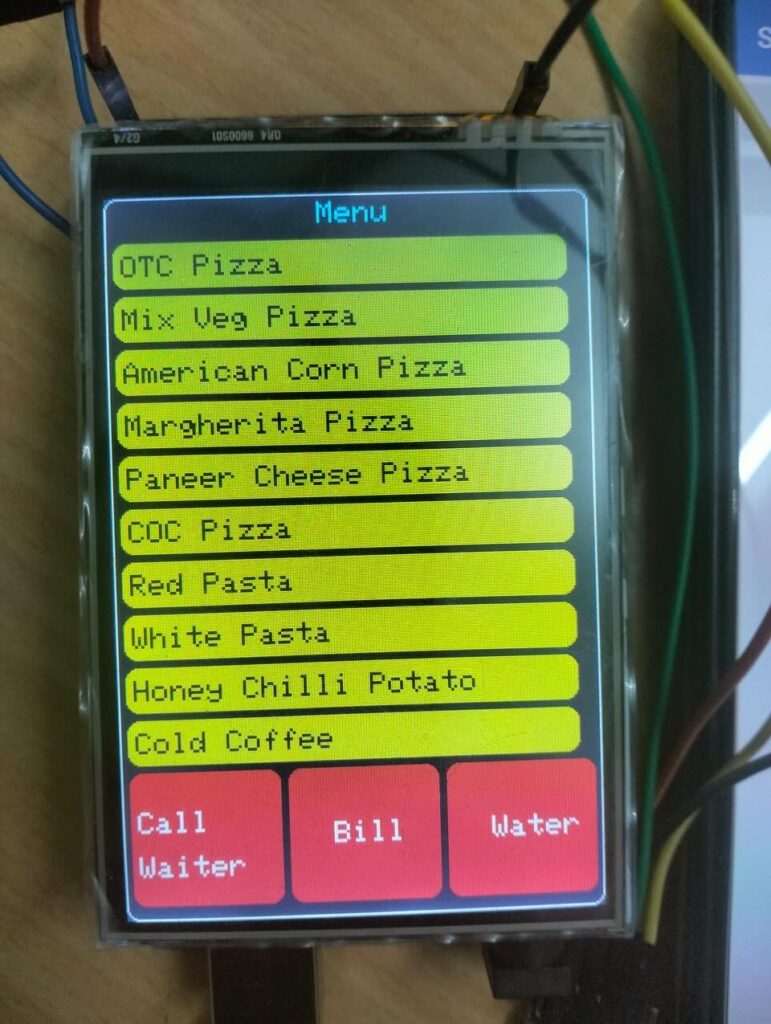
In this project, we will create a digital menu hosted on an Arduino touchscreen shield. Customers can use it to order food, flag down the waiter and request the bill.
This Arduino-based digital device connects to any Android smartphone via Bluetooth so restaurant staff can take customer orders on a mobile app. The mobile app is built on MIT App Inventor.
Required components
- Arduino Mega x1
- 3.5 inch TFT touchscreen shield for Arduino (ILI9486) x1
- HC-05 x1 Bluetooth Module
- Connecting wires/jumper wires
- Smartphone to run the restaurant app x1
Circuit Connections
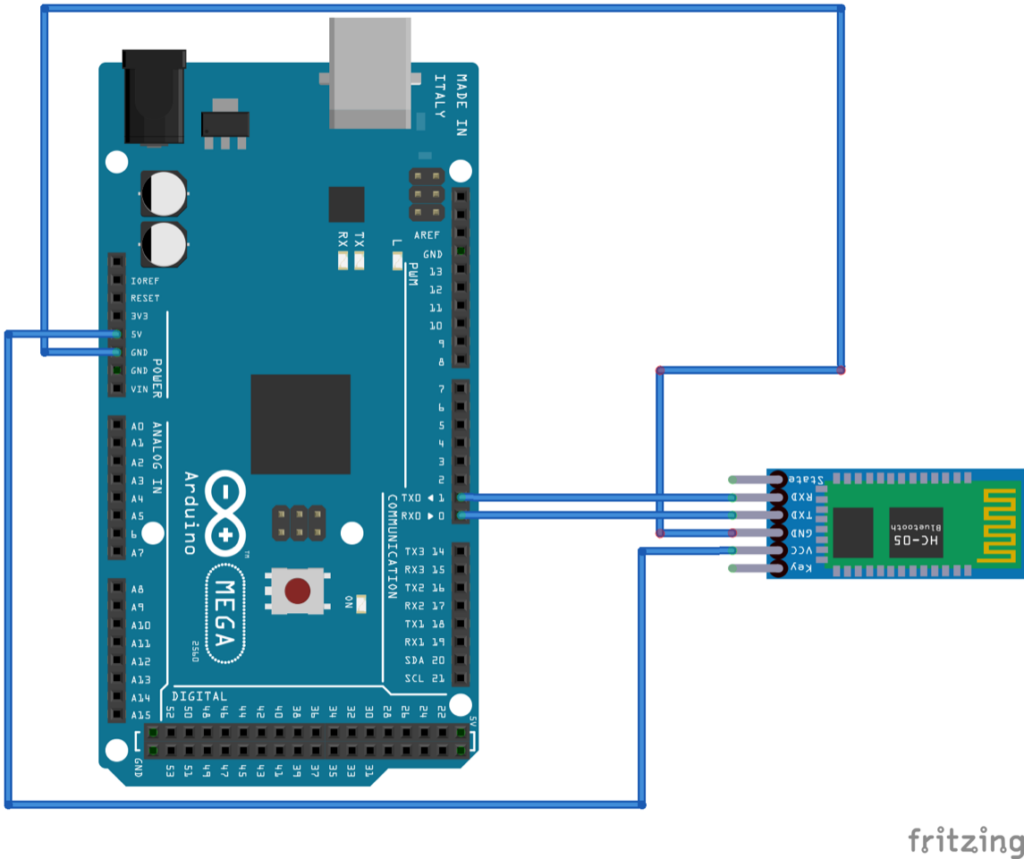
To build a digital menu, we must first interface the 3.5-inch touchscreen shield and the HC-05 Bluetooth module with the Arduino Mega. The touchscreen shield fits onto the Arduino board. To interface the Bluetooth module, connect its TX and RX to the Arduino's RX1 and TX1 pins respectively. Connect the HC-05's Bluetooth VCC and GND pins to the Arduino's 5V output and ground pins.
The Arduino sketch
After completing the circuit connections, upload the following sketch to the Arduino Mega.
The mobile app
To build the mobile app for this project, log in to your MIT App Inventor account. Create a new project by navigating to Projects->Start New Project.
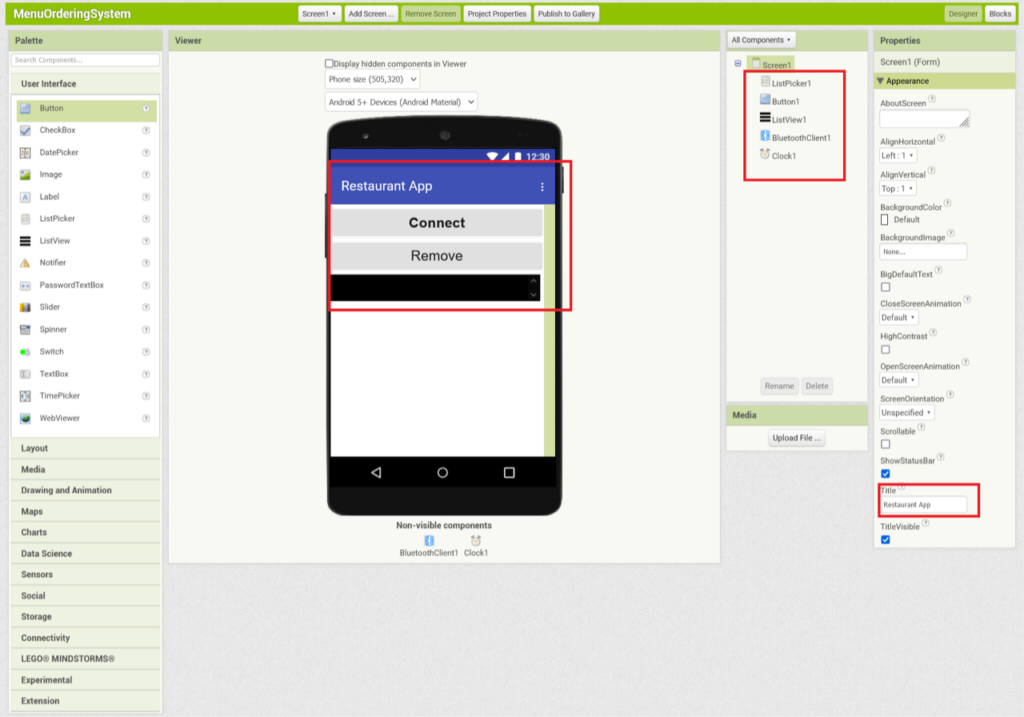
Let's save this mobile app as 'Restaurant_Menu_Ordering_App'. In the designer window, drag and drop a listpicker, button, listview, Bluetooth client, and clock element onto the canvas. Then change the screen title to 'Restaurant App'.
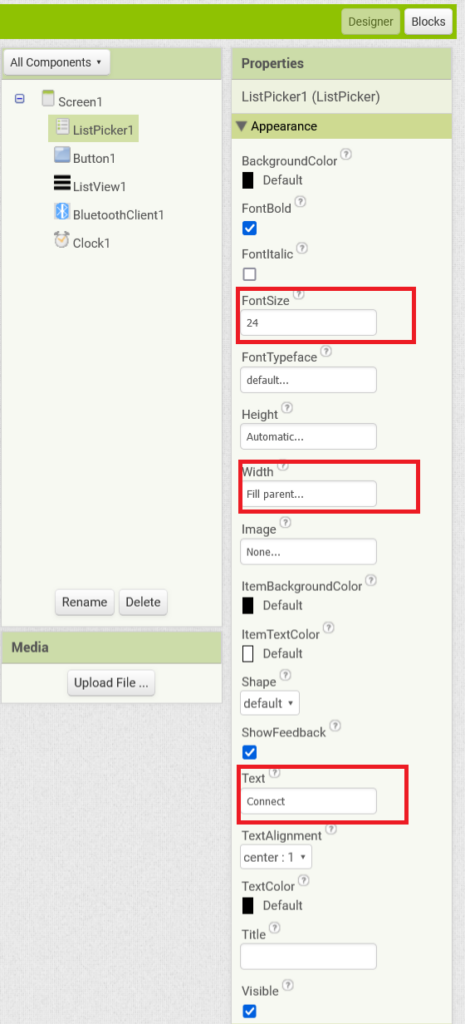
Set the listpicker properties as shown below.
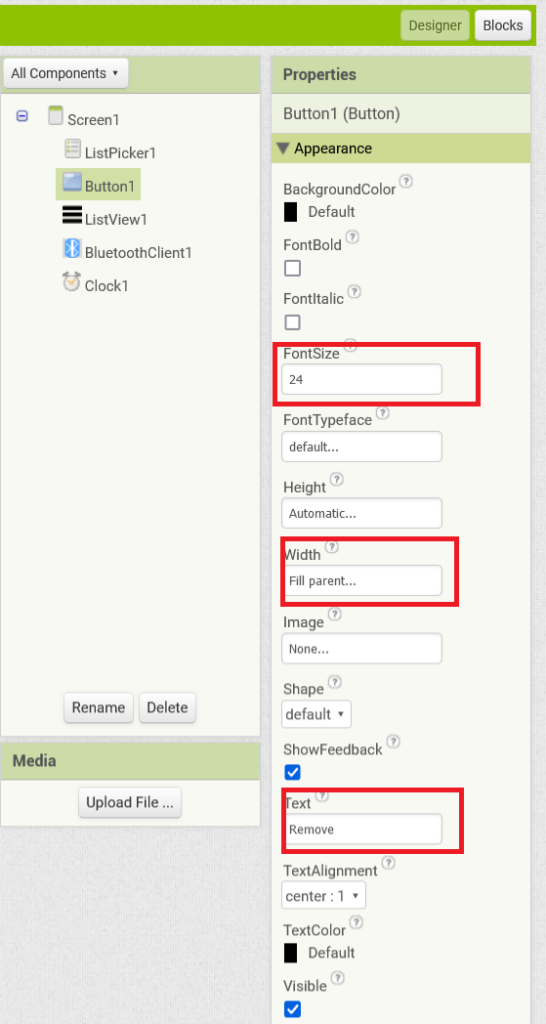
Set the button properties as shown below.
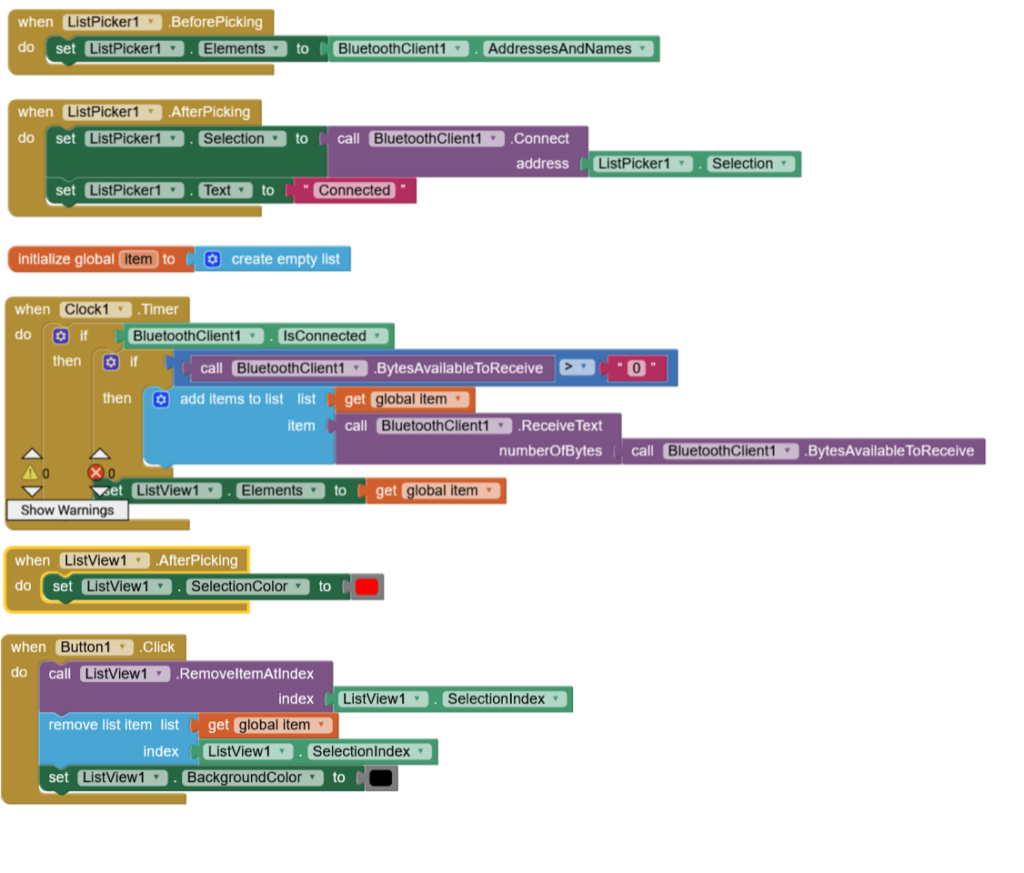
Open the 'Blocks' editor and program the application according to the following logic.
 How it works
The restaurant application, developed for use on a smartphone, is connected to the Arduino via a Bluetooth module. The Arduino displays menu items on a touch screen. When a user touches an item, the Arduino “feels” the pixels corresponding to that item. Then it transmits a related text message over the Bluetooth module.
This text is stored in a list/array and added to the listview element. Any items added to this list correspond to orders or food requests made by the customer. After fulfilling a customer request, the respective list item can be removed from the application by selecting an item and clicking the “Remove” button. This app can handle infinite requests/list items at any time.
The code
The sketch starts by importing the Adafruit_GFX.h, MCUFRIEND_kbv.h, and TouchScreen.h libraries. The Adafruit_GFX.h and MCUFRIEND_kbv.h libraries are required to work with the TFT display module. Touchscreen.h is used for the “touch” function on the screen. This is followed by a declaration of the color constants and the instantiation of a TFT display object.
Next, the variables for configuring the touch function are declared and an object of the touchscreen class is instantiated.
In the setup function, the touchscreen is initialized, reset, and filled with a black background. The baud rate for the serial port and Serial1 (where the Bluetooth module is connected) is set to 9600 bps.
Menu items are displayed on the touch screen by calling the Menu user-defined function. The Menu function has the following code, defining a user interface with the restaurant menu. It fits the 320×480 pixel resolution of the touchscreen.
In the loop function, the Arduino “feels” the touches made by the user on the screen, mapping the corresponding pixels. Based on these pixels, a related text is transmitted through the Serial1 port where the Bluetooth module is connected.
The mobile app receives the text, adds it to the array, and displays it in a listview. (These texts relate to a food order, a request for water or bill, or for the waiter to stop by a specific table.) Any requested items can be deleted by selecting them and clicking the “Remove” button.
Results