316L belongs to austenitic stainless steel, corresponding to the national brand 022Cr17Ni12Mo2, which has good plasticity and corrosion resistance.
The addition of Mo element to this stainless steel greatly improves its corrosion resistance.
Therefore, 316L stainless steel is widely used in petrochemical, pharmaceutical and other industries.
It was found that a 316L stainless steel coil used in a company presented a leak and perforation in the tube wall during use.
The working medium inside the tube is water vapor, with a working pressure of 0.9MPa.
The medium outside the tube is strong alkali and copper powder, with a working pressure of 1.0 MPa.
There is a pressure difference between the inner and outer walls.
The reason for the failure is analyzed and studied experimentally.
1. Macroanalysis
1.1 Visual inspection
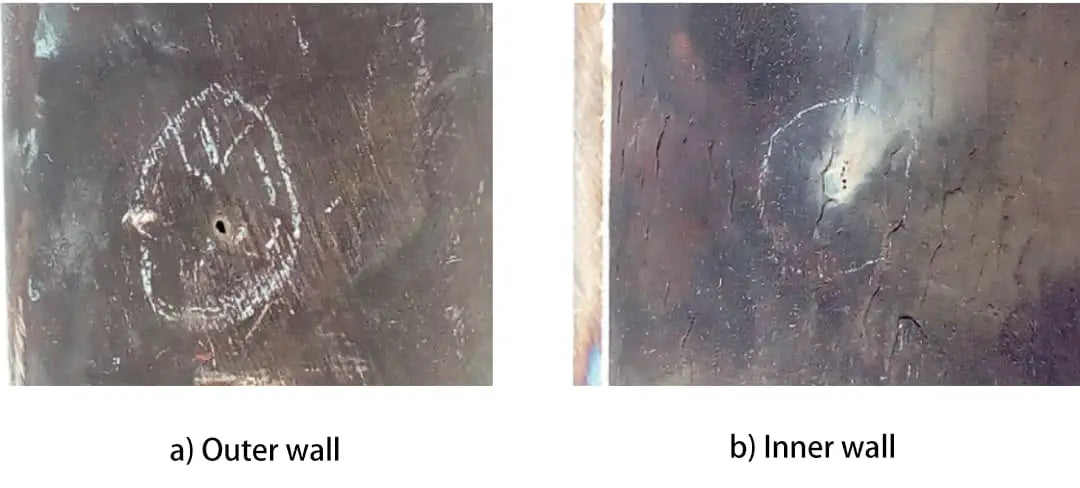
From external macroscopic visual inspection, it is found that the leakage hole is a small hole with a diameter of about 2 mm on the outer wall, as shown in Fig.
On the inner wall, there are four longitudinally arranged small holes with a diameter of about 1 mm, and a large number of “warped skin” cracks can be seen, as shown in Fig.
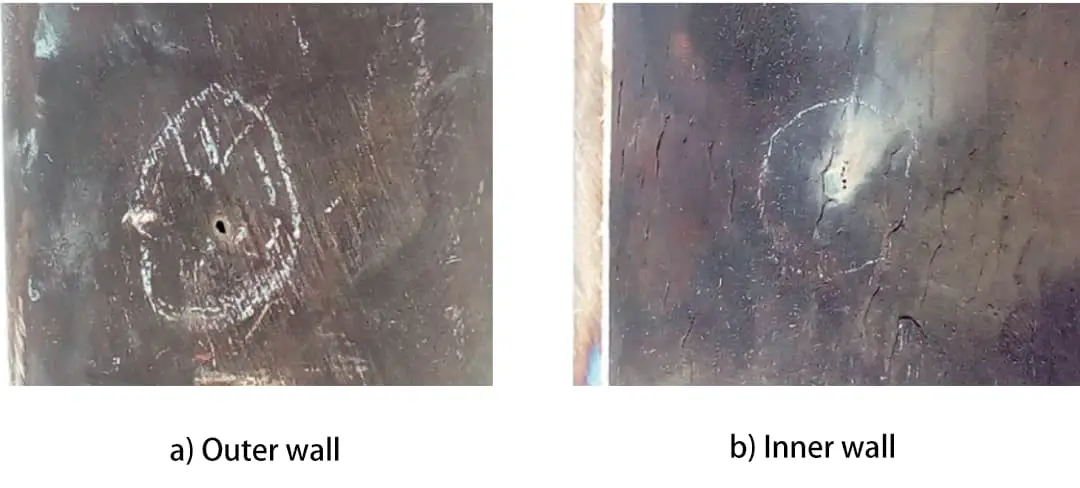
Fig. 1 Leak hole macromorphology
1.2 Extended macro inspection
When observed with a variable magnification stereomicroscope, Fig. 2a is a macro photo of the inner wall leakage hole after 40x magnification;
Fig. 2b shows the shape of the leakage hole after cutting.
The space inside the hole is relatively large, with a total volume of about 4mm 3 .
The wall of the hole is wavy and irregular.
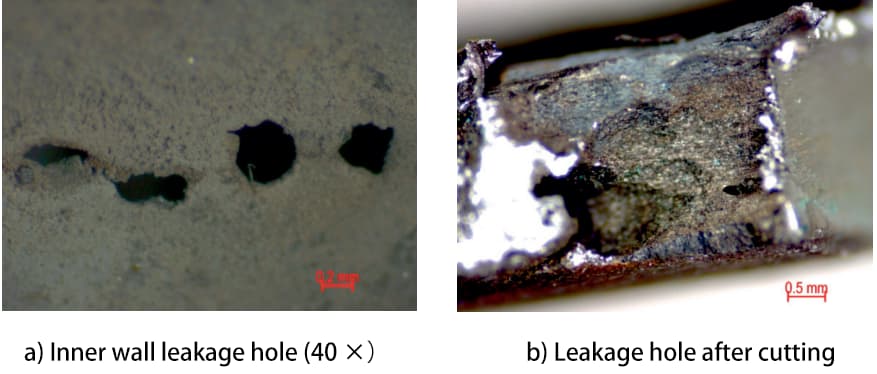
Fig. 2 Leak hole morphology
2. Detection and analysis
2.1 Spectral analysis of chemical composition
The full spectrum direct reading spectrometer is used to analyze the chemical composition of the samples around the pour hole.
The results (average value) are presented in Table 1.
Compared with the material composition TP316L in ASME SA213, it meets the requirements of the standard.
Table 1 Results of chemical composition analysis (mass fraction) (%)
| Type | W | Yes | Mn | P | s | Cr | No | Mo |
| Standard value | ≤0.035 | ≤1.00 | ≤2.00 | ≤0.045 | ≤0.030 | 16.0~18.0 | 10.0~14.0 | 2:00~3:00 |
| Measured value | 0.02 | 0.28 | 0.86 | 0.041 | 0.003 | 16.21 | 10.17 | 2.18 |
2.2 Tensile test
The electronic universal testing machine is used to collect samples from the coil for tensile testing.
The results are shown in Table 2.
The fracture morphology of the sample is plastic fracture.
Through comparison, it can be seen that the tensile strength, yield strength and elongation after fracture of the material meet the ASME SA213 standard.
Table 2 Results of mechanical properties tests
| Type | Tensile strength R eu / MPa | Yield strength R po.2 /MPa | Elongation after fracture A (%) |
| Standard value | ≥486 | ≥170 | ≥35 |
| Measured value | 693 | 476 | 48.5 |
2.3 Process performance test
The electronic universal testing machine is used to perform the flaring and flattening test.
The results are shown in Table 3.
The appearance of the burned sample after testing is shown in Fig.
There are no cracks on the inner wall of the tube.
The morphology of the flattened specimen is shown in Fig.
Cracks are generated on the tensile surface of the outer wall of the flattened sample.
The outer wall of the crack opening end is an old fracture and the crack tip is a new fracture.
It can be seen that there are old cracks on the outer wall of the pipe.
Table 3 Process performance test results
| Burn test | Flattening test | |||
| Β(°) | D(%) | Results | Pressing plate spacing / mm | Results |
| 60 | 15 | No cracks on the inner wall | 29.5 | Cracks in the tensile deformation of the outer wall |
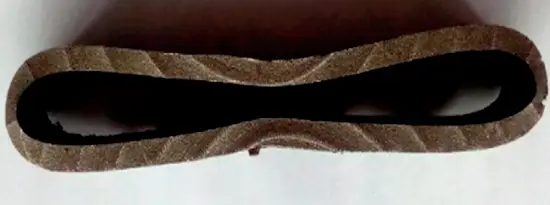
Fig. 3 burned sample
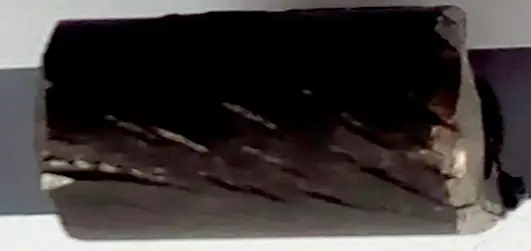
Fig. 4 Crack on the tensile surface of the flattened sample
2.4 Metallographic analysis
Micrometallographic samples will be processed on the internal and external walls and inside the coil.
The cross section of the samples must be sanded and polished and then observed under a metallographic microscope.
It can be seen in Figure 5a that there are “warped skin” cracks on the inner wall of the coil and microcracks in the lower part of the “warped skin”;
It can be seen in Figure 5b that there are a large number of microcracks in the external wall, which originate from defects or corrosion pits and expand along the inclusions;
It can be seen from Figure 5c that there are a large number of granular, band-shaped and massive inclusions inside, with a size of 5 ~ 25 μm.
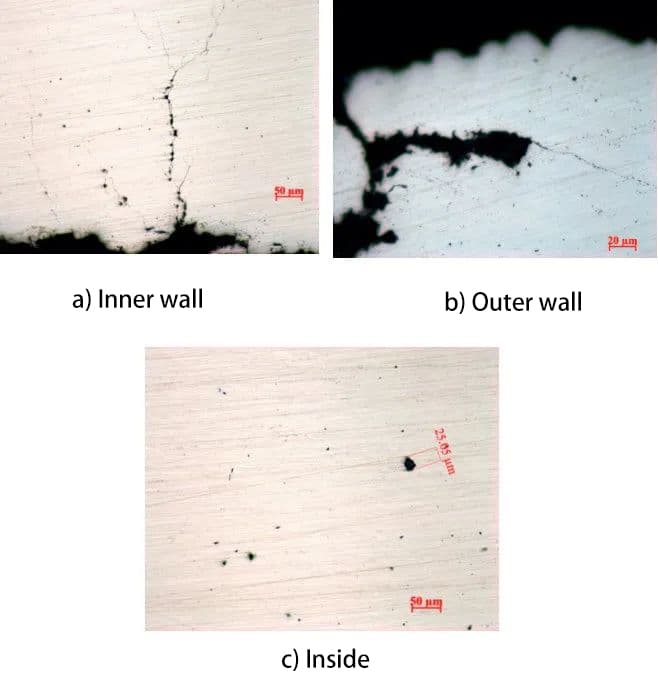
Fig. 5 different areas of coil materials
The microstructure of the corroded sample is austenite with an average grain size of 6.5, and precipitates are found at the grain boundary.
It can be seen in Figure 6b that there are a large number of deformation slip lines on the inner wall, indicating the existence of residual stress;
It can be seen in Fig. 6c that there are transgranular and intergranular cracks on the outer wall.
Figure 6 metallographic diagram
2.5 SEM Analysis
Scanning electron microscope is used to observe crack fracture. Fig. 7a is an old fracture.
It can be seen from the morphology of the inner wall of the leak hole in Fig. 7b that there are “mud pattern” corrosion products on the surface.
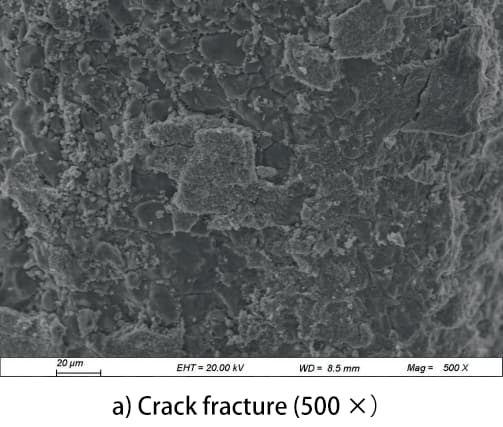
Fig. 7 SEM appearance of the failed part
2.6 And analysis of the energy spectrum
Power spectrum analysis was performed on the old fracture samples in Figure 7a, as shown in Figure 8. The results are shown in Table 4.
Corrosion products are relatively complex, mainly composed of oxides and mixed with Cu, Na, etc.
| W | Mn | Mo | Faith | Cr | No | O | Ass | N/A |
| 8.2 | 0.6 | 1.3 | 41.5 | 17.4 | 5.0 | 22.9 | 0.7 | 1.8 |
Table 4 Results of energy spectrum analysis (mass fraction) (%)
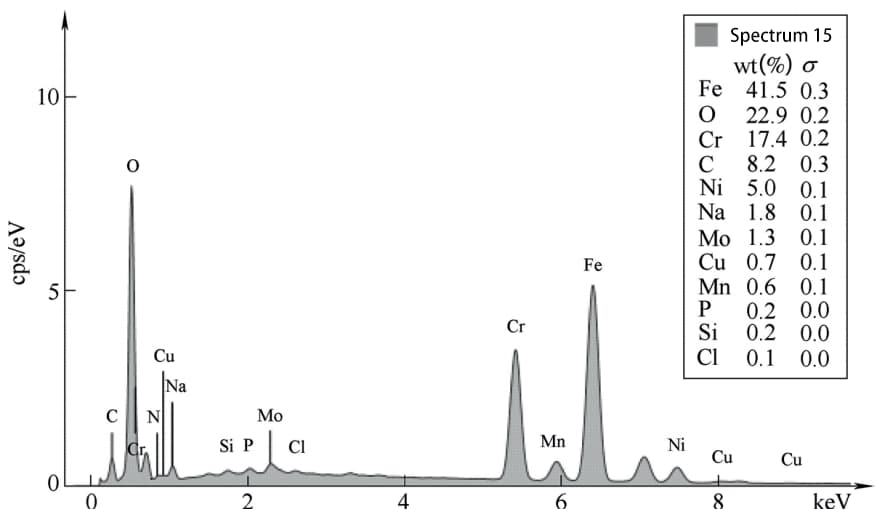
Fig. 8 Energy spectrum of the analysis point
3. Comprehensive Analysis
Based on the above test data, the chemical composition, tensile strength, yield strength and elongation after fracture of TP316L stainless steel coil meet the requirements of ASME SA213.
The flare test is qualified, cracks appear on the tensile surface of the outer wall of the flattened test tube, and the open end is an old crack.
Metallographic analysis and SEM + EDS show that the structure is made of austenitic stainless steel, but there are granular inclusions of different sizes, and there are “mud pattern” corrosion products on the surface, mainly in the casting hole.
The pore wall fluctuates irregularly, and there are a large number of microcracks in the “deformed skin” and they expand along the inclusions.
4. Conclusions and suggestions
The main causes of 316L stainless steel coil leakage are a large number of inclusions, oxide corrosion products and microcracks in the material.
The continuity of the matrix is destroyed due to the presence of inclusions.
Under the joint action of residual stress and pressure difference between the inner and outer walls, cracks are easily generated and expanded in the inclusion.
However, the inclusion comes into contact with the high-temperature vapor medium.
Because the corrosion resistance of the inclusion is much lower than that of the material itself, the inclusion corrodes and eventually holes form in the pipe wall, resulting in perforation of the pipe wall and leakage.
To avoid similar leakage failures, the following is recommended:
1) For the coil service environment, high-quality 316L stainless steel material with few inclusions should be selected.
2) Control the purity of the working medium to avoid the influence of corrosive substances on the pipe as much as possible.
3) Coil components must be heat treated after bending and welding to effectively release residual stress.

