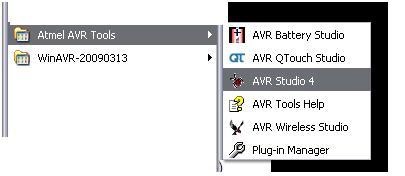
AVR studio is an integrated development environment (IDE) from ATMEL for developing applications based on an 8-bit AVR microcontroller. Before installing AVR Studio you must install the WinAVR compiler. This will allow AVR Studio to detect the compiler.
Step 1:
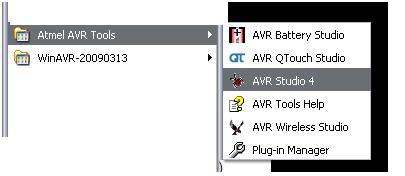
Fig. 1: Screenshot of Windows Start menu navigating to AVR Studio 4
Step 2
Step 2:
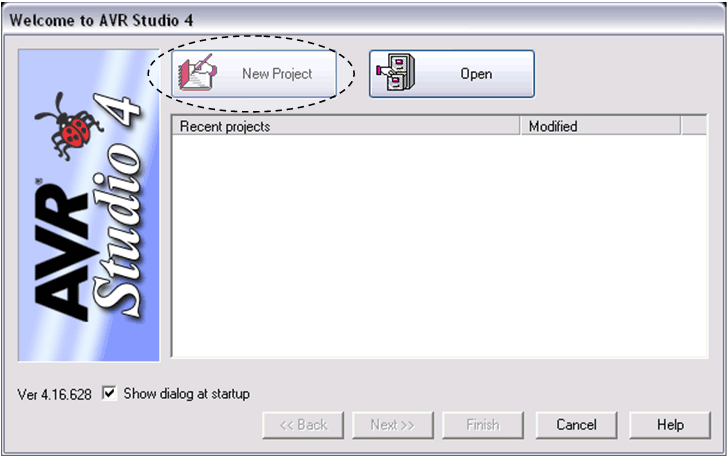
Fig. 2: Screenshot of the New Project window in AVR Studio 4
Click on new project
step 3
Step 3:
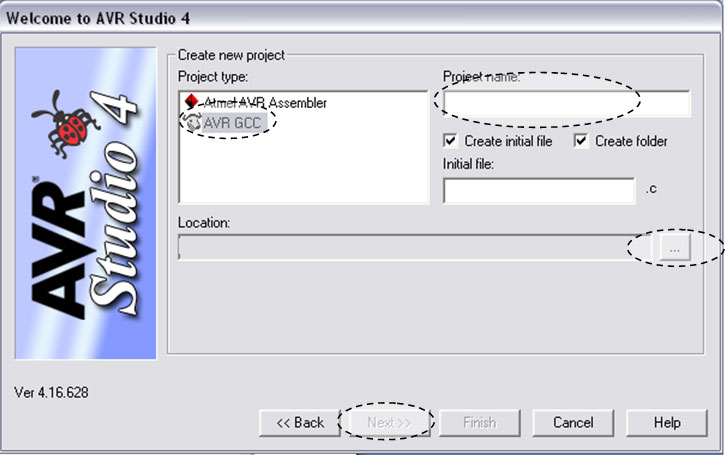
Figure 3: Screenshot of creating a new project in AVR Studio 4
Click on AVR GCC
Write the name of the project
Select your project location.
Click Next >>
Step 4
Step 4:
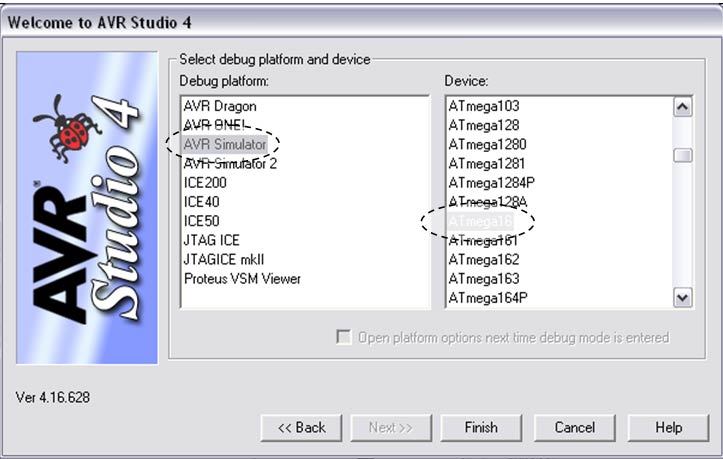
Fig. 4: Screenshot of debug platform and target device selection in AVr Studio 4
Click on AVR Simulator in the left block and select your controller (for example: ATmega16).
Click on the finish button
Step 5
Step 5:

Figure 5: Screenshot of the main AVR Studio 4 window
Write the code in the main body area.
Save the project file.
Step 6
Step 6:
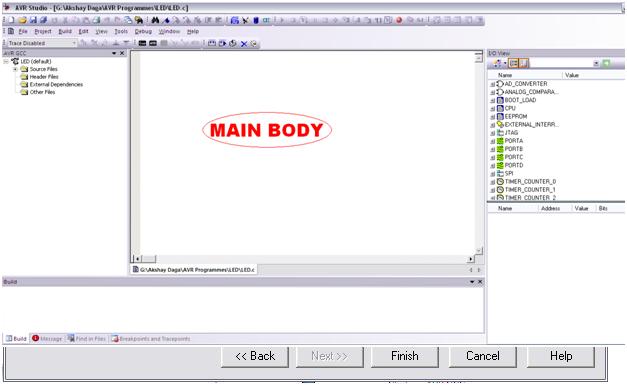
Fig. 6: Screenshot of the Project menu in AVR Studio 4
Go to PROJECT -> Configuration Options
Step 7
Step 7:
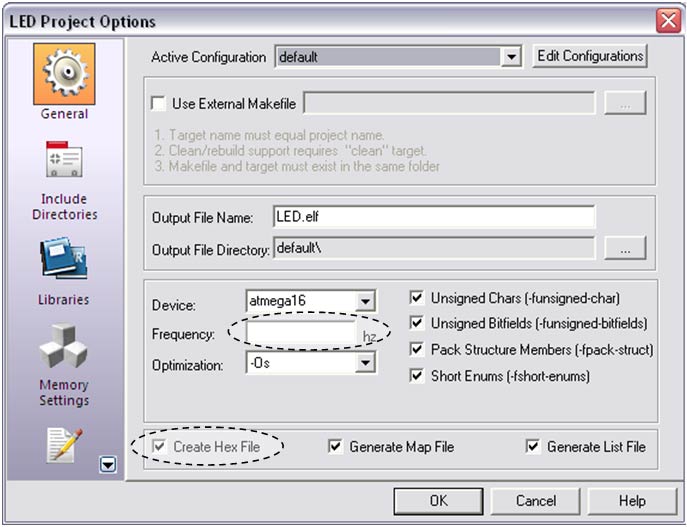
Fig. 7: Screenshot of project options in AVR Studio 4
Write the frequency of the crystal if using external crystal.
Select the check box corresponding to Create hex file and click OK.
Save the project again.
Step 8
Step 8:
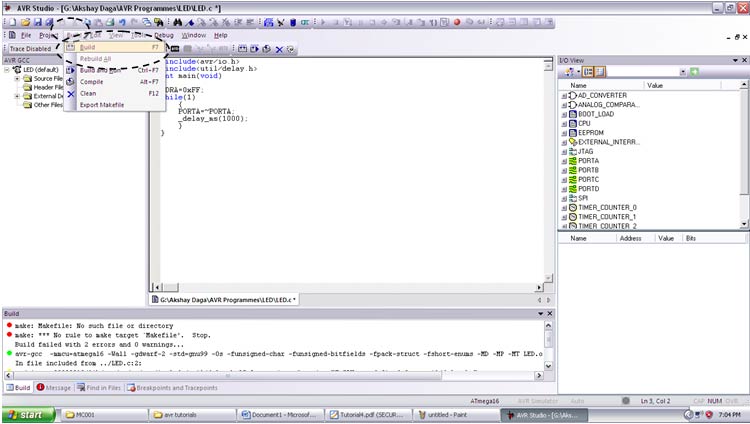
Fig. 8: Screenshot of the Build menu in AVR Studio 4
Go to BUILD -> Compile.
This will compile your code and throw errors if any.
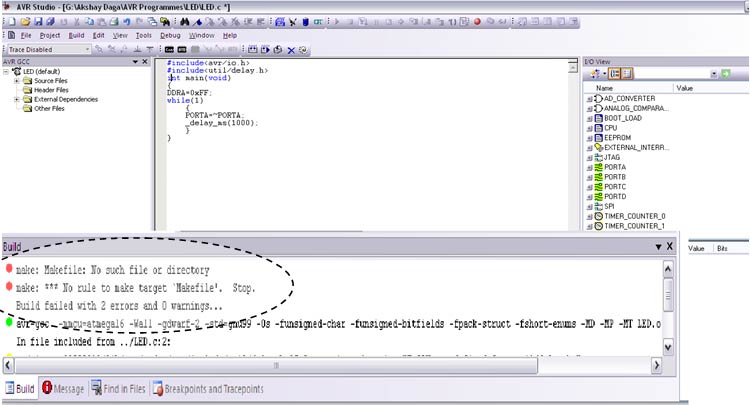
Fig. 9: Screenshot of building a project in AVR Studio 4
For the first time it will generate two errors, ignore them.
Step 9
Step 9:
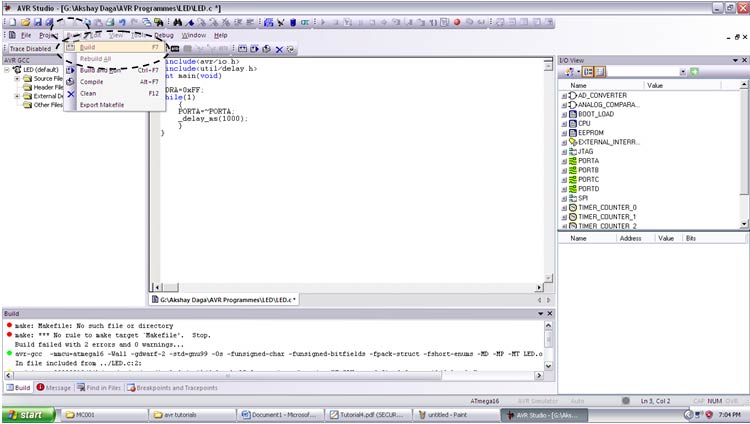
Fig. 10: Screenshot of the Build menu in AVR Studio 4
Again go to BUILD and click Build.
This will generate a hex file of the code.
Use this Hex file to write your microcontroller.
Where will you find the Hex file?
Just go to the location you selected at the beginning. Open this folder and you will find one more folder called Default. This is the default location where the hex file is generated.
While working in real time, if you want to change the code, make the changes and build the file again. This will automatically update the previous hex file.

