Summary:
This article consists of making a gesture to control a robot or car. It will help you build a gesture-based Android controlled robot without any experience in Android app development by providing you the free Android app. This app consists of your robot's touch and voice control interface. It's simple to get started by downloading the app to your phone/tablet and start building your robot by following the steps.
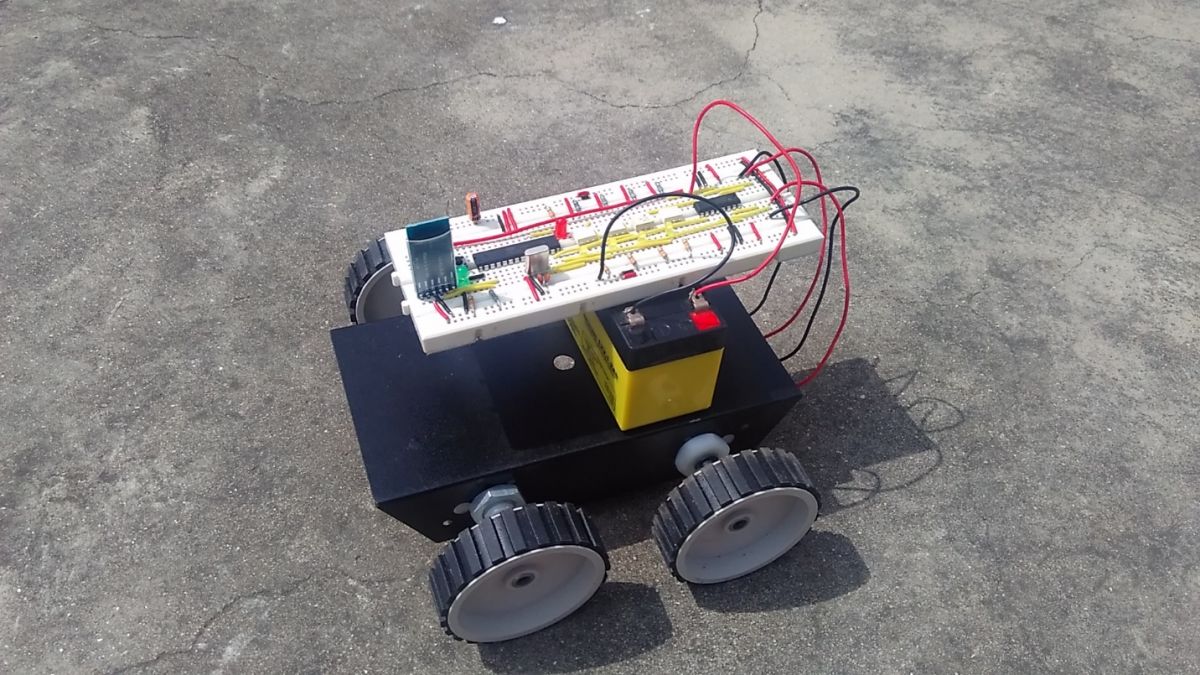
Figure 1: Android phone-based gesture-controlled Arduino robot prototype
Description:
Prerequisites and equipment:
You will need the following:
-
An Arduino board or Arduino clone (here's a guide if you need it)
-
Two DC motors.
-
A 5v TTL-UART Bluetooth module.
-
Robot chassis and wheels that adapt to the size of the chassis and motor.
-
Arduino IDE for programming.
Working principle:
When we start thinking about building a Robot, the first thing that comes to mind is controlling that Robot. Back then we used wired remotes to control the robot which is a bit complicated and there might be wires intertwined which might become the worst part. Nowadays, we are exposed to Android devices which are powerful mobile computers and become increasingly popular smartphones across the world. Because the Java programming language is used in Android, it is easy to start using the Android API and the API is open and allows easy access to hardware components. It also provides numerous communication interfaces such as USB, Wi-Fi and Bluetooth, which can be used to connect to our projects.
Communication between the robot and the Android application is carried out via the Bluetooth link between the phone's Bluetooth and the Bluetooth device on the Robot. The ASCII commands are sent from the phone to the Robot which in turn checks the Arduino control of the wheels according to the commands to move the robot in the desired direction.

Fig. 2: Block diagram of gesture-controlled Arduino robot
App design:
Android app developers generally use JAVA language, but this Android app can also be built without knowing Java language. This application was developed in the online Development Environment developed by MIT called “App Inventor”. This app finder is specially designed for non-programmers who don't know JAVA language. The application shown below has buttons and all the buttons provide different bytes in the output which must be sent to the Arduino using Bluetooth for processing. For example. if we press the next button, the Bluetooth Module will give 1 byte in its output, which is received by the Arduino to process the byte and take necessary action. The application consists of the option of using the Android cell phone's accelerometer or using the buttons to control the Robot. You can find tutorials related to App Inventor on their website.
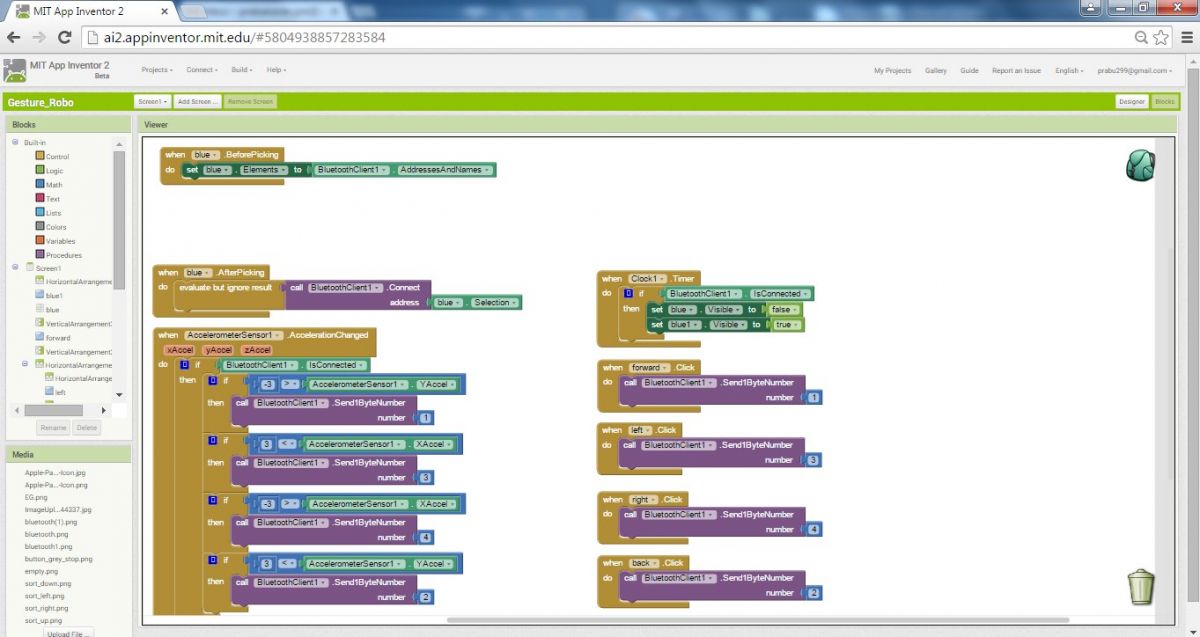
Fig. 3: Screenshot of Android app design designed for gesture-controlled Arduino robot in MIT App Inventor
If you want to edit the application according to your use, here is the Application project file. You can upload this project and use it.
Gesto_Robo.aia.
Hardware assembly:
Make the circuit as shown in the circuit diagram. Assemble the robot with the selected parts and connect the motors to the circuit. Optocouplers are used to protect Arduino from high voltage hazards. Note: The RX of Arduino must be connected to the TX of the Bluetooth module and the TX of the Arduino must be connected to the RX of the Bluetooth module.
Code description:
In the loop section, we are using a switch case to move the robot according to the commands received from the Android application.
Uploading software to Arduino:
If you are new to Arduino, you can start with here . You should start with the Arduino IDE (Integrated Development Environment) . Download the code from the link below and upload it to the Arduino board.
ATTENTION: AS THE BLUETOOTH MODULE IS CONNECTED TO THE SERIAL PINS OF THE ARDUINO, THE MODULE MUST BE REMOVED OR DISCONNECTED WHEN LOADING THE CODE TO THE ARDUINO. THE MODULE CAN BE CONNECTED AFTER THE UPLOAD IS COMPLETED.
Screenshot of Arduino code:
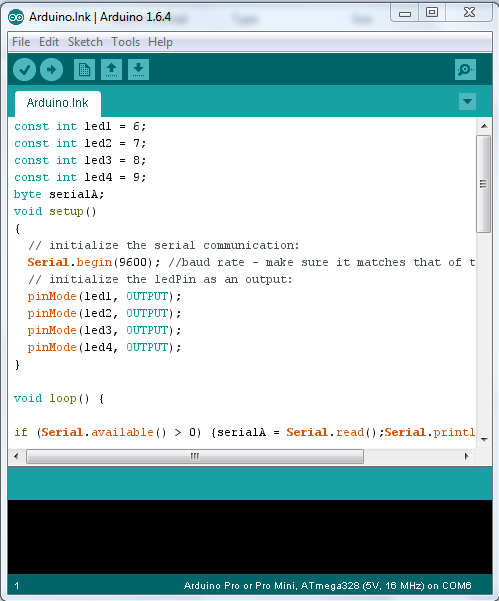
Fig. 4: Screenshot of the Arduino code used to control the gesture-controlled Arduino robot
Downloading the Android app and connecting to Bluetooth:
To download the Android app to your phone, download the app file from the link below, copy the apk file to your phone and install it. Make sure Allow installation of non-Market apps in one of the settings tabs is marked with a check mark. After installing the app, the next step is to connect to your phone's Bluetooth module. For this, you need to power the Arduino and the Bluetooth module and then turn on your phone's Bluetooth and make it visible to other devices. After that, search for new devices on Bluetooth, you can find your Bluetooth module in the list, enter the pairing code which is usually '1234' or '0000' when prompted.
Download app
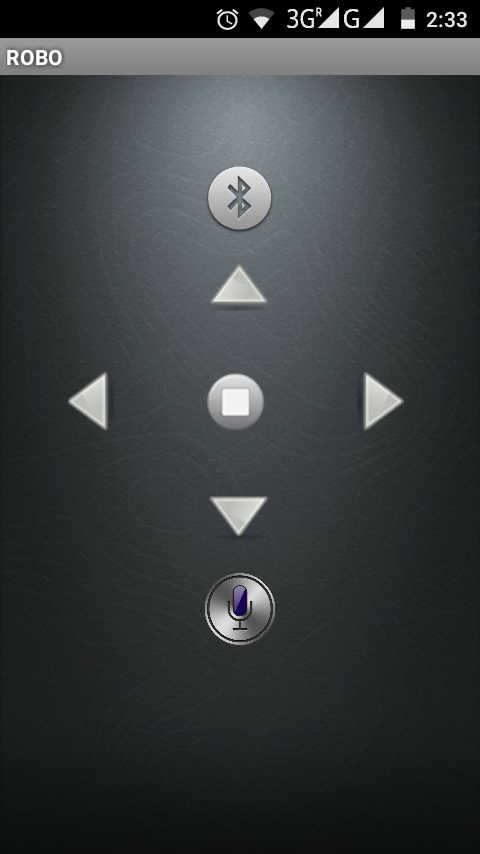
Fig. 5: Screenshot of the Android app UI used to maneuver the gesture-controlled Arduino robot
Write down the name of your device, in this case it is “HC-06”. After pairing with the robot, go to the “GESTURE-ROBO” app and tap the Bluetooth button to select the paired device now the Bluetooth button color will change for successful connection. After that, the phone will connect to your robot and by clicking the respective buttons, the robot will move accordingly. You can also tilt your phone to move the robot respectively. Tilting the phone forward will move the robot forward, etc.
Circuit diagrams
| Circuit-Diagram-Control-Circuit-Used-Gesture-Controlled-Arduino-Robot | 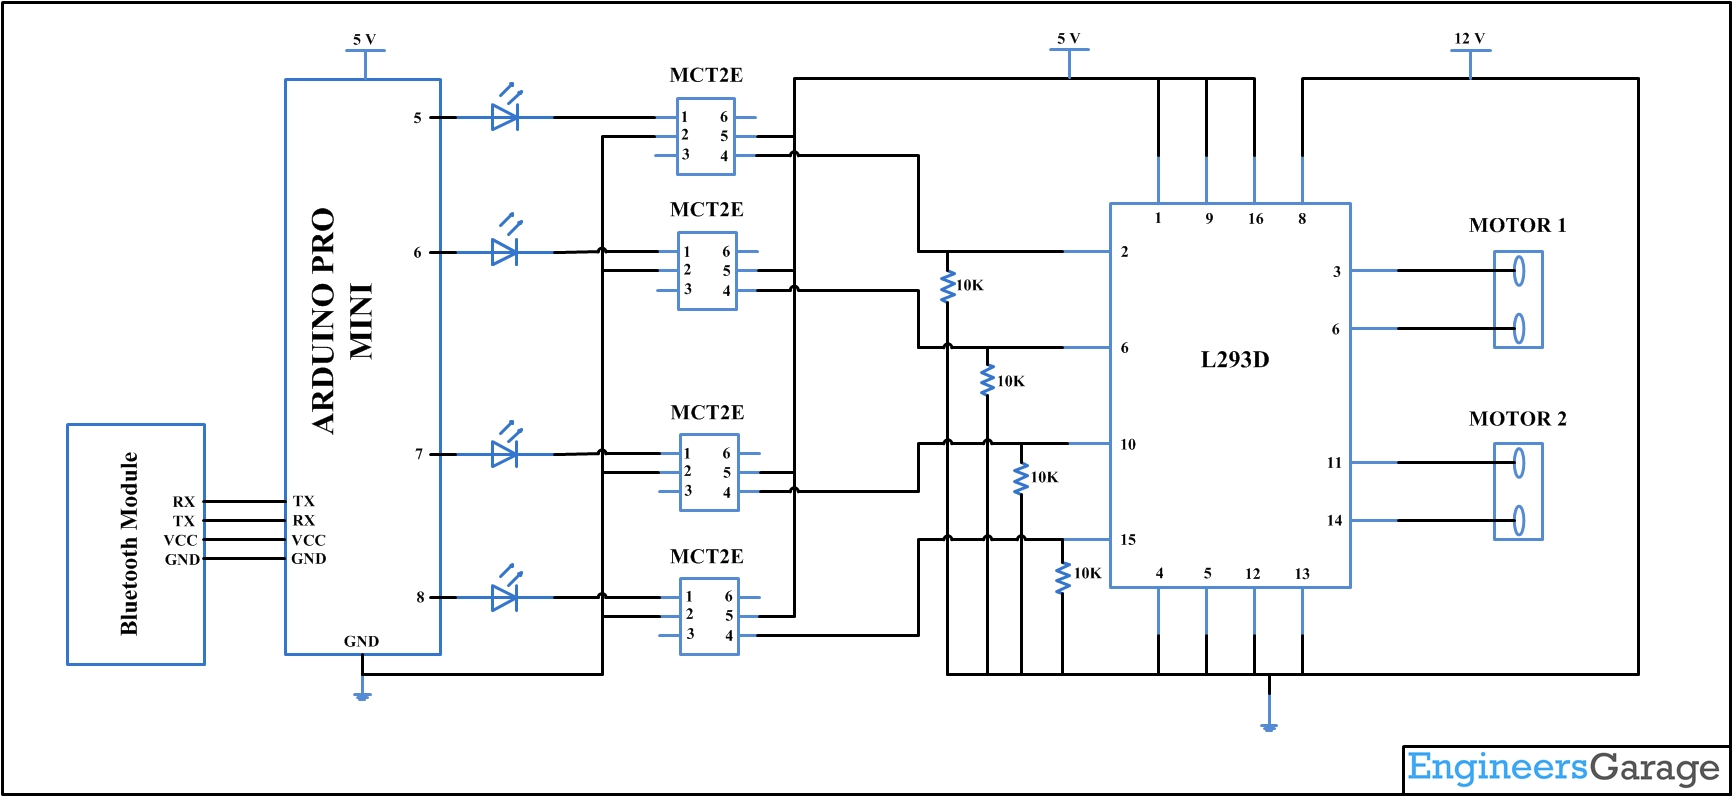 |
Project video

