Many IoT applications are controlled with the help of a web page or HTML website running on a local area network (LAN) or wireless local area network (WLAN). Some examples of such IoT applications include home automation, office automation, and smart agriculture. The HTML page or website that controls things is hosted on a microcomputer or microcontroller. WiFi development boards like ESP8266 and ESP32 provide a WiFi network interface where the board can act as a WiFi station or as a WiFi access point. Check out how to connect the ESP8266/ESP32 to a WiFi connection using the MicroPython network module. Whether configured as a WiFi station or a WiFi access point, MicroPython ports, including ESP8266 and ESP32, can host HTML pages using the MicroPython socket module. You can check how to configure ESP8266/ESP32 or other MicroPython ports as TCP server and TCP clients. As a TCP server, ESP8266/ESP32/any MicroPython port can host a web page.
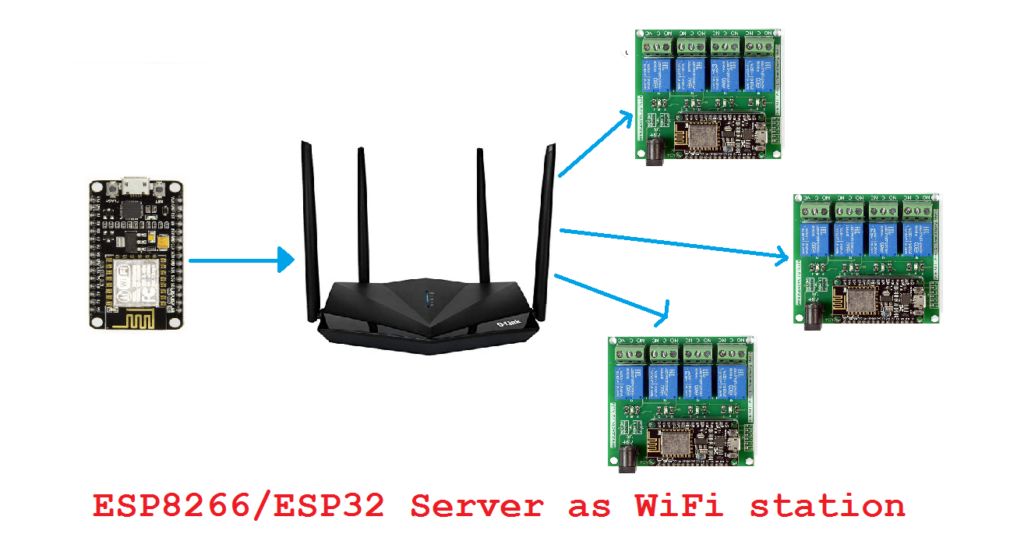
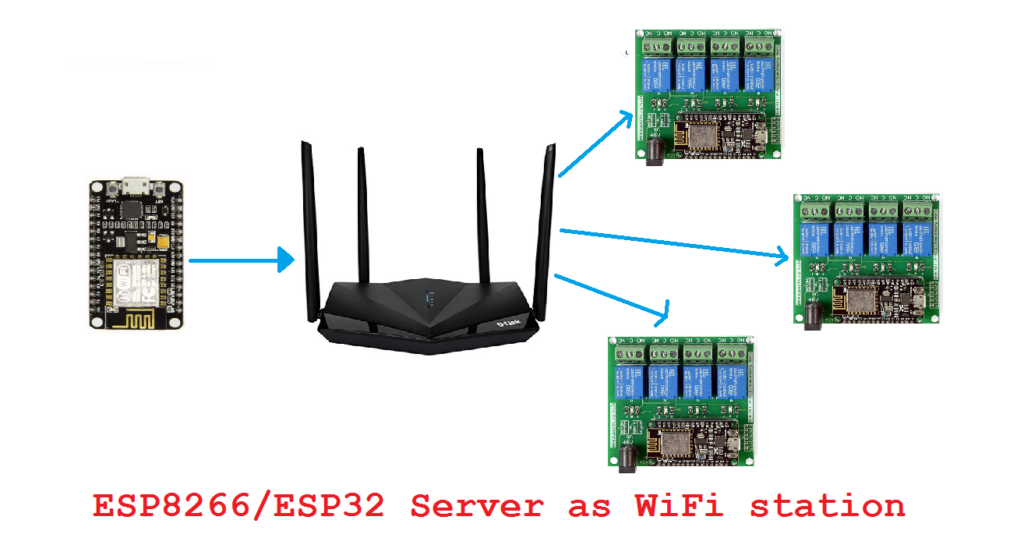
As a TCP server, we connected the ESP8266/ESP32 to a WiFi modem/router where other devices could access the page hosted by the ESP8266/ESP32 via the internet. Devices can receive commands or sensor data from the ESP8266/ESP32 hosting server across the internet. In this case, the web host application for home automation or any IoT project is routed through the modem/router between the ESP8266/ESP32 server and the other nodes in the IoT network.
For an IoT application in which all IoT network nodes are deployed locally or are within LAN or WLAN range, this network configuration can lead to a preventable failure. In case the modem/router malfunctions or the Internet connection from your Internet Service Provider (ISP) is suspended due to some failure, the complete IoT application will terminate because the IoT devices will not be able to communicate with each other in the absence or failure of internet connection.
However, we can avoid such a failure by making the ESP8266/ESP32 or other MicroPython port as an independent WiFi access point that hosts the web application, so that multiple nodes can access the IoT application directly with the hosting server (i.e. ESP8266 /ESP32, rather than accessing the IoT application over the internet).
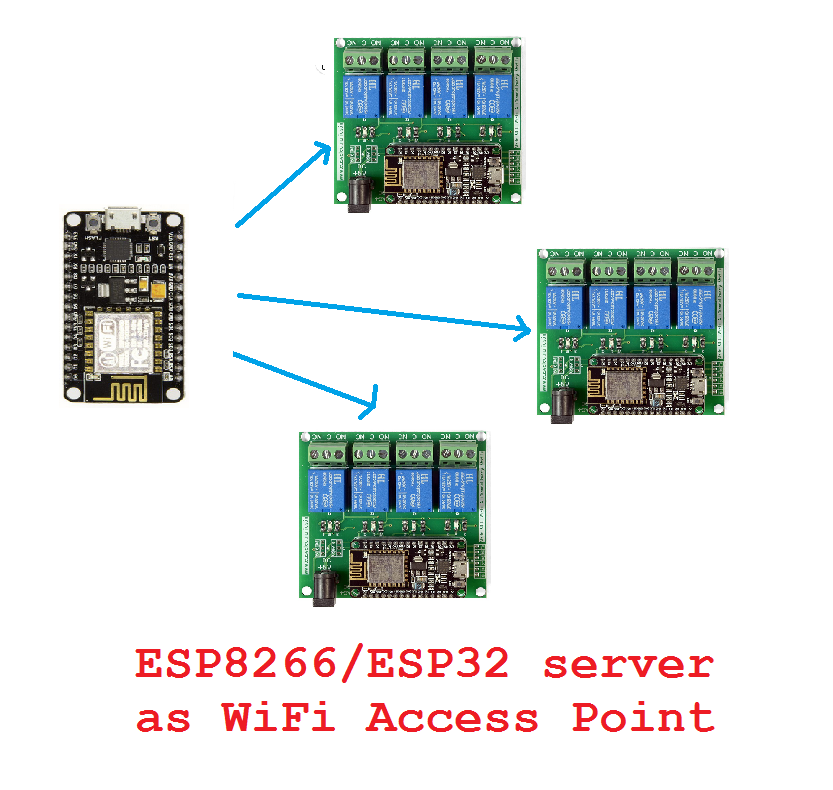 In this project, we will demonstrate how to configure the ESP8266/ESP32 or any MicroPython port as a WiFi access point and host a web page directly from the access point.
Required components
- ESP8266/ESP32 x1
- ESP8266/ESP32 USB cable x1
- Computer/Laptop (for ESP programming) x1
- Smartphone (to access the web application) x1
Circuit Connections
You don't need to make any circuit connections. You just need to have a MicroPython software development tool like uPyCraft IDE or Thonny IDE ready and upload the MicroPython firmware for ESP8266/ESP32. Finally, you need to upload this project's MicroPython script to ESP8266/ESP32. The script itself will take care of both creating the ESP8266/ESP32 as a WiFi access point and hosting an HTML page. Once the script is loaded, the card can be secured in a case and deployed in an IoT application intended to run over WLAN.
Preparing ESP8266/ESP32
Before proceeding, you must have a MicroPython IDE ready to write, edit, and upload code. You can use uPyCraft IDE or Thonny IDE for software development. With the help of the respective IDE, you must have loaded the MicroPython firmware for ESP8266 or ESP32. See how to prepare the uPyCraft IDE and upload MicroPython firmware for ESP8266/ESP32.
MicroPython Script
How the project works
With the help of a network module, the ESP8266/ESP32 is configured as a WiFi access point instead of a WiFi station. When the ESP8266/ESP32 is configured as a WiFi access point, the board can be directly accessed by others IoT nodes using a WiFi network interface instead of accessing the board over the Internet.
A sample HTML page is designed inside the MicroPython script. The HTML page is stored as a string enclosed in double quotes. Since double-quoted strings in standard Python and MicroPython are immutable, we can host static web pages using these MicroPython frameworks. So the only way to make an HTML page interact with the hosting server is by using HTML form elements such as buttons.
Finally, the ESP8266/ESP32 access point is configured as a TCP server using sockets that delivers the web page whenever the local IP address of the ESP8266/ESP32 is requested using an HTTP header by an ESP8266/ESP32 access point connected to the device .
The code
The MicroPython script starts with importing the socket module if the socket module is not found. Next, the network module is imported to configure the WiFi interface on the ESP8266/ESP32. The esp module is imported and debug is set to none using the esp.osdebug method. The gc module is imported and garbage collection is explicitly enabled using the gc.collect method.
The SSID and password variables are defined to store the SSID and network key of the ESP8266/ESP32 server. A WiFi network interface object ap_if is instantiated using the network.WLAN method, which is configured for the WiFi access point. The network interface is activated by calling the active method and configured to create the SSID and password using the config method . Now any device can connect to the ESP8266/ESP32 access point with the provided SSID and network key. You can choose any SSID and network key you prefer. The SSID and network key are assigned 'MicroPython-AP' and 'eeworldonline' respectively in this project. Note that both the SSID and password are given mutable strings. The SSID will be displayed as a WiFi connection in the WiFi tab of computers and smartphones. Embedded devices can connect to the ESP8266/ESP32 access point by explicitly programming them to connect with the provided SSID and password.
The script runs until the WiFi access point is activated. Once the access point is activated, a 'connection successful' message will be printed on the console. Immediately afterwards, the access point's network parameters are printed to the console using the ifconfig method.
The web_page function is defined to deliver the HTML page hosted by the ESP8266/ESP32. In this function, the HTML code of the web page is stored as an immutable string in an HTML variable. A socket object is instantiated with the socket.socket method to use the IPv4 Internet protocol and TCP networking at the network layer of the TCP/IP stack. The socket is bound to localhost and port number 80 using the socket.bind method. The socket is enabled to listen for incoming TCP connections using the socket.listen method.
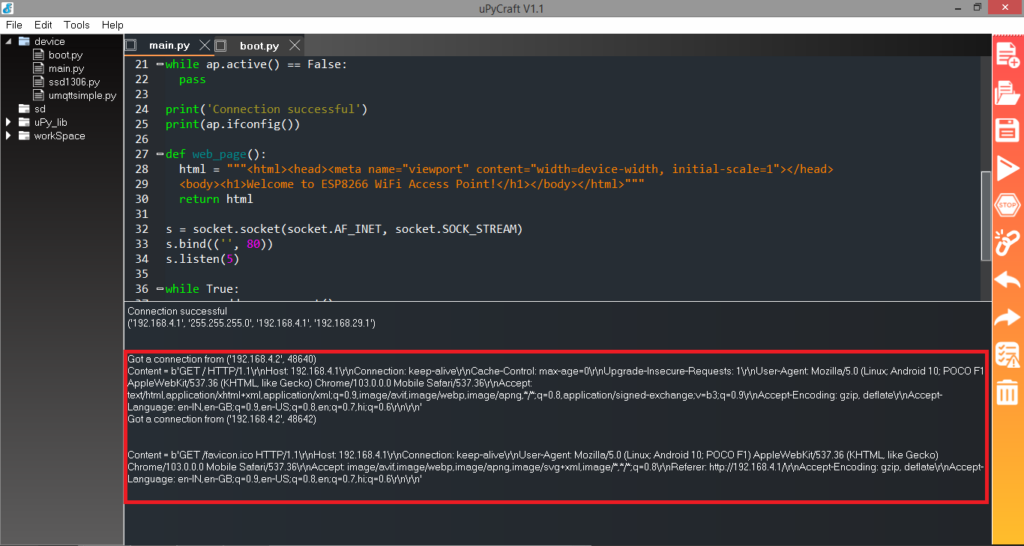
In an infinite while loop, the socket is made to accept connections from devices connected to the access point using the socket.accept method. As the ESP8266/ESP32 server accepts a connection, the IP address of the connecting device is printed on the console. The HTTP GET request received from the accepted connection is stored in a request variable. The HTTP request received from the accepted connection is also printed to the console. The web page returned by the web_page function is stored in a response variable and sent to the requesting connection using the send method. The connection is closed using the close method. The loop continues infinitely, searching for new devices requesting a connection to the ESP8266/ESP32 TCP server and delivering the web page as localhost, the connected device requests the IP address.
Result
Load and run MicroPython code as a main.py file for ESP8266/ESP32. When running the ESP8266/ESP32 access point, it is displayed as one of the WiFi connections available on a smartphone or computer, as shown in the image below.
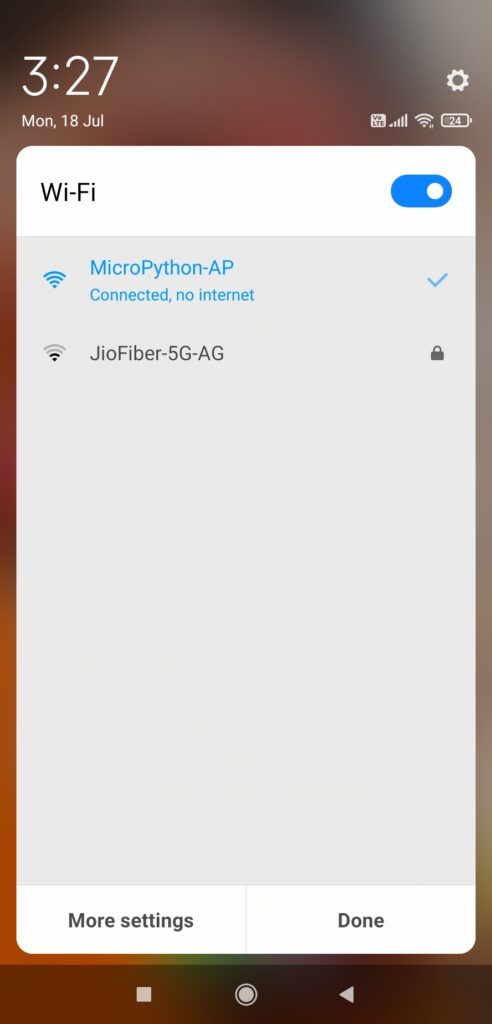
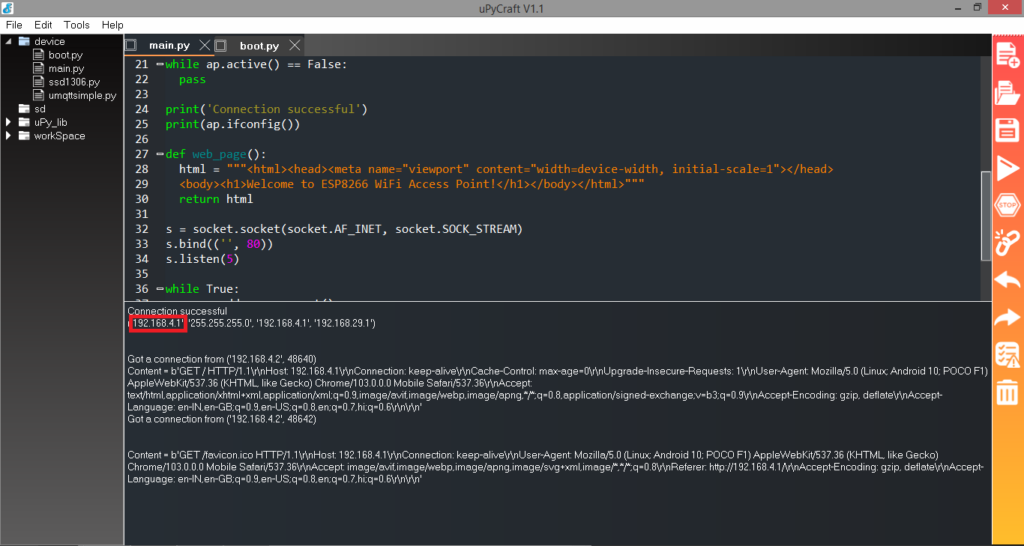
Connect the access point by entering the network key defined in the MicroPython code. The ESP8266/ESP32 server printed the localhost IP address to the console as shown in the image below.
To open the page hosted by the ESP8266/ESP32 TCP server, open a web browser and write the IP address of the ESP32/ESP8266 in the address bar and press Enter. This will send a request from the smartphone or computer's web client (browser) to the ESP8266/ESP32 server, as shown in the image below.
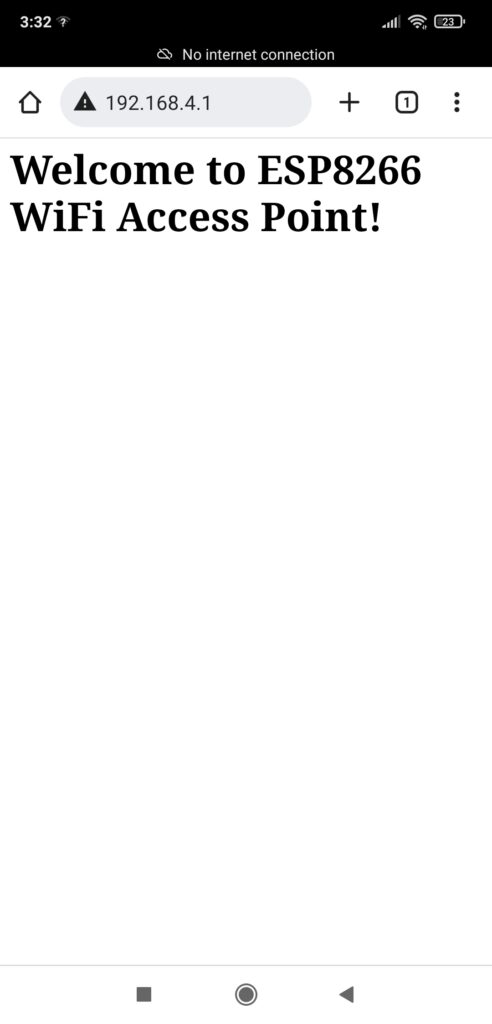
Responding to the request, the ESP8266/ESP32 sends the web page to the smartphone/computer's web client (browser), which will be loaded as follows.
Please note that a WiFi access point on the ESP8266/ESP32 using MicroPython cannot operate as a WiFi repeater. MicroPython does not support NAT or IP routing.

