A real-time clock (RTC) is a computer clock for keeping time and is one of the most popular microcontroller features. Microcontrollers without integrated RTC require an external RTC chip to keep time. Typically, mid-range to high-end microcontrollers have a built-in RTC because time keeping is necessary for many embedded applications.
RTCs count seconds, minutes, hours, days, months and years. They can also be used for the current date and to measure time intervals.
The MicroPython machine module provides an RTC class that configures and uses an integrated port with RTC support. MicroPython also provides a “ntptime” module that synchronizes time with the help of a clock source or server.
In this article, we will explore MicroPython's RTC module and learn how to set and get time on ESP8266 and ESP32.
Machine Module
MicroPython consists of several hardware-specific modules. The machine module is the most important because it manages the basic hardware functionalities and integrated hardware peripherals of the supported ports.
The module has several classes to control digital input/output, output signals from external devices, pulse width modulation, analog to digital conversion, ADC peripherals, UART, SPI, I2C, I2S, timer, RTC, watchdog timer and card SD.
RTC Class
The MicroPython machine module for the RTC class is used to configure and manage the real-time clock of supported ports. It is imported into a MicroPython script using this instruction:
of import of rtc machine
Alternatively, the RTC class is automatically imported when the machine module is imported as follows:
import machine
After importing the module, you have to instantiate an object of the RTC class with the help of the constructor method. The constructor method of the RTC class has this prototype:
class machine.RTC(id=0,…)
The constructor uses the “id” parameter, which identifies the integrated RTC (if there are multiple RTCs on the supported port). If there is only one, there is no need to pass the id as an argument. The remaining parameters of the constructor method used to set the time in the RTC are optional.
This is a valid example of instantiating an RTC object:
rtc = machine.RTC
The RTC class provides these methods for maintaining date and time settings…
RTC.init(datetime) : used to initialize the RTC object. Takes the current date and time as an argument. The data time is passed as an 8-tuple with this format: (year, month, day (, hour (, minute (, second (, microsecond (, tzinfo)))))). The tuple must have the elements year, month and day. The rest are optional and may or may not be approved depending on the application.
RTC.datetime((datetimetuple)) : used to get or set the RTC date and time.
- If called without arguments, this method returns the current date and time maintained by the RTC in the form of an 8-tuple.
- If used to set the date and time, the method takes an 8-tuple as an argument.
The tuple must follow this format: (year, month, day, day of the week, hours, minutes, seconds, subseconds). Depending on the port, the subseconds in the tuple can be milliseconds or microseconds.
RTC.deinit : Resets the RTC time to January 1, 2015 and restarts the RTC.
RTC.now : Gets the current date and time of the RTC, which is returned as an 8-tuple.
The RTC class provides these methods for configuring alarm settings…
RTC.alarm(id, time, *, repeat=False) : used to set the alarm in RTC. The id must be passed as an argument if there are multiple RTCs integrated into a port; otherwise there is no need. The time can be passed as the millisecond value or as the date-time tuple. If time passes in milliseconds, the alarm can be repeated by setting the repeat keyword argument to True. Milliseconds are counted from the current RTC date and time.
RTC.alarm_left(alarm_id=0) : returns the number of milliseconds of the alarm.
RTC.cancel(alarm_id=0) : used to cancel a running alarm.
The RTC class provides these methods for configuring an interrupt…
RTC.irq(*, trigger, handler=None, wake=machine.IDLE) : creates an interrupt object that is triggered by the RTC alarm. Three parameters are required: trigger, handler and wake. The trigger is always set to RTC.ALARM0. The handler is a callback function that runs as an interrupt service routine. The wake specifies the sleep mode from which the RTC interrupt can wake the port.
Time synchronization using ntptime
The time in RTC does not always need to be set manually. MicroPython provides the ntptime module, which is useful for synchronizing time, maintaining the UTC standard, and providing accurate time. The module is based on the Network Time Protocol (NTP).
The NTP protocol synchronizes the RTC time of a computer/controller with a server or remote clock source. The module facilitates accurate RTC time calibration. However, the card must be connected to the internet via Ethernet or WiFi to join the NTP server.
The module is imported into a MicroPython script using this instruction:
import ntptime
The module provides these methods…
ntptime.settime : Used to synchronize the local time maintained by RTC or an internal clock source with the UTC standard time. Some port-specific MicroPython ntptime modules allow the settime method to take two arguments, time zone and server. The ntptime module of the official MicroPython firmware does not accept any arguments. The UTC standard epoch is January 1, 1970 00:00:00. The host server used by the MicroPython ntptime module is “pool.ntp.org”
ntptime.time : Returns the number of seconds that have elapsed since the UTC epoch. The returned value is an integer.
Again, make sure the card is connected to the Internet via Ethernet or WiFi to access the NTP server.
RTC on ESP8266 and ESP32
ESP8266 and ESP32 have unique built-in RTCs. Below is a valid example of instantiating an RTC object, setting the time, and retrieving the current date and time on ESP8266 and ESP32.
RTC on ESP8266 and ESP32
ESP8266 and ESP32 have unique built-in RTCs. Below is a valid example of instantiating an RTC object, setting the time, and retrieving the current date and time on ESP8266 and ESP32.
import of RTC machine
rtc = RTC
rtc.datetime((2022, 7, 25, 1, 1, 30, 42, 0)) # set date and time
print(rtc.datetime ) # get date and time
Here is a valid example of setting RTC time using NTP server on ESP8266 and ESP32:
import of RTC machine
import network
import ntptime
station = network.WLAN(network.STA_IF)
station.active(True)
station.connect(ssid, password) #replace with your WiFi SSID and password
rtc = RTC
ntptime.settime
print(rtc.datetime )
Displaying local time using ESP8266 module
The time returned by the NTP server is UTC time. To change the time, convert the UTC timestamp to the local timestamp. Since MicroPython is a subset of Python, it does not have a direct function or method to convert UTC time to another time zone. Therefore, it is necessary to use the MicroPython firmware timing module.
For this project, we will display UTC and local time with the help of MicroPython and ESP8266.
Required components
1. ESP8266/ESP32 x1
2. Computer/laptop x1
3. USB cable (to connect the ESP board to a computer) x1
Circuit Connections
There are no circuit connections for this project. Simply connect the ESP8266/ESP32 to your computer using the USB cable. Also, make sure uPyCraft IDE or Thonny IDE is installed on your computer and load the MicroPython firmware for the ESP8266/ESP32 (learn how here).
Then launch the uPyCraft IDE. Select the serial communication port by navigating to Tools->Serial and select the board by navigating to Tools->Board. After uploading the MicroPython firmware, you should have boot.py in the device tab.
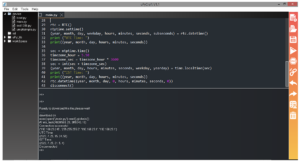
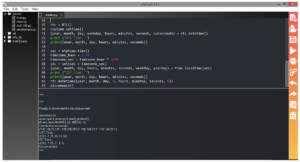
Create a new file by navigating to File->New and save the file as main.py. Copy the script below to main.py. Click the 'Download and Run' button to run the script.
MicroPython Script
How the project works
ESP8266 connects to the NTP server and obtains the UTC time, which is used to set the RTC date and time. The UTC time is then converted to local time (IST in this case) using functions from the time module. The local time is printed by the console. Finally, the RTC is updated with local time.
The code
The MicroPython script imports the RTC class from the machine, network, ntptime, and time modules. Next, an object of the WLAN class of the network module is instantiated.
The user-defined function, connect , is set to connect to WiFi. The disconnect function is set to disconnect the ESP8266/ESP32 from WiFi. To understand these functions, check out How to Connect ESP8266 and ESP32 with WiFi .
The ESP8266/ESP32 connects to WiFi by calling the connect function. You must pass the SSID and network key/password of your personal WiFi as arguments.
An object of the RTC class is instantiated using the machine.RTC method. The current UTC time is set for the ESP8266/ESP32 RTC by calling ntptime.settime . The UTC time set on the RTC ESP8266/ESP32 is retrieved in a tuple and displayed on the console.
To convert UTC to local time, use MicroPython's time module (learn more here) . MicroPython is a subset of the standard Python time module and contains some functions applicable to embedded applications.
The UTC time is obtained in seconds from the UTC epoch by calling the ntptime.time method. The current UTC time is stored in a sec variable. The time difference of the time zone is stored in the timezone_hour variable. You can change the time zone time difference value in hours according to your country or time zone.
See how:
- The time zone difference is converted to a value in seconds and stored in the timezone_sec variable.
- The local time in seconds is obtained by adding the time difference of the time zone in seconds to the UTC time obtained from the RTC.
- The local date and time is then obtained by passing the updated seconds as an argument to the time.localtime method.
- The time returned by time.localtime is stored in a tuple.
- The tuple is used to display the local time in the console. The tuple is then reformatted and used to update the RTC date and time to local time.
- Lastly, disconnect the ESP8266/ESP32 from WiFi by calling the disconnect function.
Results


