Camera streaming systems have become popular, allowing users to record and/or broadcast live video over the Internet. The Raspberry Pi (RPi) camera is widely used for its streaming feature as it easily captures live images and videos. Furthermore, it is easy to connect the RPi camera with the Raspberry Pi 2/3/4 – or any other microcomputer.
For this project, we are designing an online home surveillance system using the Raspberry Pi Camera V2 and Raspberry Pi 4B (note that the RPi now also offers a high-quality camera for high-resolution images). You will be able to view the camera's live video, which is streamed online, from any web browser.
The camera module is easily controlled with clean Python codes. The only condition is that the RPi and the device that opens the browser are connected to the same network.
Required components
1. Raspberry Pi 2B/3B/4B x1
2. Raspberry Pi Camera V2 x1
3. Ribbon cable for connecting Raspberry Pi x1 camera
Circuit Connections
To design this project, you need to interface the Raspberry Pi camera module with RPi. Fortunately, the RPi already has a camera serial interface (CSI).
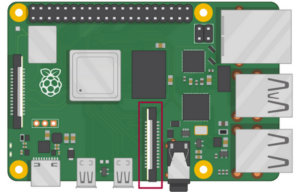
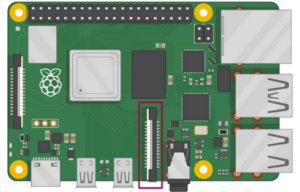
The CSI port on the Raspberry Pi 2/3/4.
First, locate the CSI port on the Raspberry Pi by carefully removing the plastic clip from the port. Insert the flat cable from the camera module into the CSI port so that the connectors on the bottom of the cable face the contacts on the port.
Then put the plastic clip back so that the ribbon cable is secured. Once connected to the RPi, the camera module should look like the illustration below.
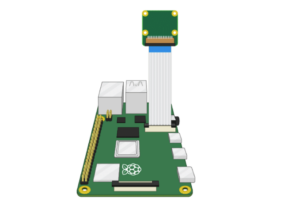
Attaching the ribbon cable to the RPi's CSI port.
The device is now ready for operation. You can protect the entire assembly in a Raspberry Pi camera case, as shown here…
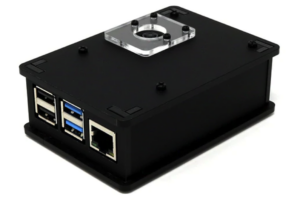
The Raspberry Pi camera case.
Configuring Raspberry Pi
Before using your home surveillance camera system, there are some additional steps:
1. Enable the CSI port on the Raspberry Pi.
2. Write Python code for live streaming from camera module.
3. Find the IP address of the RPi to access the live stream.
4. Configure the RPi to automatically run Python code on startup.
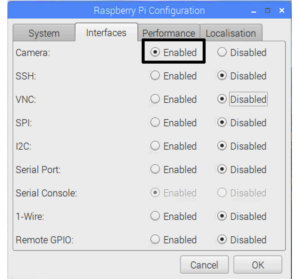
By default, the camera module is disabled on Raspberry Pi. To enable the CSI port, go to the main menu and open the Raspberry Pi Configuration tool. You can also open this tool in the terminal by typing: sudo raspi-config .

In the configuration tool, select the interfaces tab, making sure the camera is enabled. The Raspberry Pi will restart with the camera activated.
The Python code is provided and explained below. You can write the code using Thonny IDE on Raspbian OS by saving the script file with a suitable name.
To check the IP address, open the bash terminal and run this command: pi@framboesa:~ $ ifconfig
This command lists several network interface parameters. One of these parameters is the network IP address, ensuring that the RPi is connected.

For this project, the IP address is 192.168.29.242. As the RPi live stream will be available on port 8000, it can be accessed via the HTTP link:
For us, this is 192.168.29.242:8000. However, the video stream can be captured on any device running a browser via the HTTP link above.
Since we would like the Python script to start any time the RPi starts, open the profile file in the Bash terminal by running this command: sudo nano /etc/profile
Save the Python script with the name: onlineHomeSurveillance.py . To do this, go to the end of the file and add the following lines:
sudo python /home/pi/ onlineHomeSurveillance.py &
Note the ampersand at the end of the line, which allows the script to run repeatedly without stopping.
Python script…
How the project works
The Raspberry Pi Camera is connected to the CSI port of the Raspberry Pi (RPi). With the support of the picamera library, the camera module can be configured to webcast video captured by the module.
The code for this project is a recipe from the picamera library. It uses Pytho's built-in http.server module to use RPi as a video streaming server. Video is transmitted in MJPEG format.
You can find more picamera recipes in the official library documentation .
How the code works
The Python code runs a “try and exception” handler with an instantiated object of the PiCamera class. It captures a streaming output using the StreamingOutput class in an “Output” variable.
Here's what happens next:
- The StreamingOutput class uses the IO library functions to capture the raw video stream.
- The start_recording method is called, which starts recording the camera object (the video stream).
- The “object server” (from the http.server module) is instantiated on the socketserver using the StreamingServer class.
- The video streaming server is configured using the StreamingHandler class.
- The server_forver method is called on the server object to run the video streaming server indefinitely.
Take a closer look at the following lines of code:
with picamera.PiCamera(resolution='640×480′, framerate=24) as camera:
output = StreamingOutput
#Uncomment the next line to change your Pi's camera rotation (in degrees)
#camera.rotation = 90
camera.start_recording(output,format='mjpeg')
to try:
address = (”, 8000)
server = StreamingServer(address, StreamingHandler)
server.serve_forever
finally:
camera.stop_recording
The results
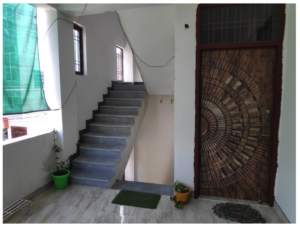
Camera installation location.
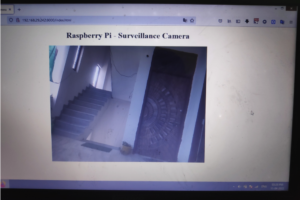
Live video footage from the RPi camera stream.

