MQTT (Message Queuing Telemetry Transport) is a simple messaging protocol often used in IoT applications. The protocol is based on a publish-subscribe system where both types of devices that publish and subscribe to MQTT messages are called MQTT clients. The exchange of messages between publishers and subscribers is done with the help of a broker, which must be running on a computing device that must remain active for an indefinite period of time.
In large IoT projects, a cloud system or service is often assigned as an MQTT broker. Cloud services have almost 100% availability and can be accessed from anywhere. Therefore, cloud-based MQTT brokers can connect MQTT publishers and subscribers around the world. For local or small-scale IoT projects such as home automation or industrial automation, cloud services for MQTT brokers are more than sufficient, but not cost-effective. For such applications, it is much more economical to use microcomputers or single-board computers. Microcomputers like the Raspberry Pi can be connected all the time with low energy consumption and operating costs. These microcomputers can easily connect to WiFi networks, facilitating an IoT network that spans a wide area network (WAN). Even WiFi networks used by microcomputer brokers can be easily extended using WiFi repeaters or access points whenever necessary. With many MQTT brokers, it is even possible to connect with MQTT clients around the world, even if the broker is installed on a personal computer.
In this article, we will discuss the role of a broker in the MQTT publish-subscribe system and discuss how a Raspberry Pi can be configured as an MQTT broker.
What is the MQTT protocol?
MQTT) is a messaging protocol designed for low-bandwidth Internet connections, suitable for exchanging data between constrained devices, such as those often deployed in IoT networks. The protocol allows data communication to multiple devices simultaneously. Additionally, multiple devices can transmit data at the same time.
MQTT is completely different from typical Internet protocols, in which data is often communicated peer-to-peer in a client-server model. Instead, MQTT follows a publish-subscribe system. In MQTT, both types of devices that transmit data and those that receive data are MQTT clients. Customers can publish data on a specific topic and receive data on a specific topic. Otherwise, they may only be publishing data on specific topics or receiving data on subscribed topics. Even one device can publish and subscribe to messages on the same topic. MQTT data published to or received by an MQTT client is always in the context of a specific topic. The MQTT broker defines the topics and manages all data communication between MQTT clients.
How it works
The MQTT publish and subscribe system through which the MQTT broker defines specific topics. Topics are represented by strings separated by a slash that serves to separate topic levels. The following is a valid example topic for a home automation system.
house/room1/fan
The string 'home/bedroom1/fan' is topic specific. The strings 'home', 'bedroom1' and 'fan' are different topic levels. The slash is the topic level separator. MQTT devices/clients that need to publish messages/data related to a topic are registered as publishers for the specific topic in the MQTT broker. MQTT devices/clients need to receive messages/data related to a topic and register as subscribers to the specific topic with the MQTT broker. For example, a remote control or mobile device used to control the fan will be registered as a publisher in the 'home/room1/fan' topic. While a device that controls the fan regulator will be registered as a subscriber to the 'home/bedroom1/fan' topic. Whenever the publisher (remote control) transmits a message related to the topic, it will be forwarded to the subscriber (fan regulator circuit) by the MQTT broker. The editor can sign messages as “on”, “off” or speed levels as “1”, “2”, “3” etc. to control the fan.
It is important to note that topics are case sensitive. A topic ' home/bedroom1/fan ' is different from ' Home/bedroom1/fan ' or ' home/bedroom1/Fan ' and so on. Often in small IoT networks such as home automation, WiFi development boards such as ESP8266, ESP32 or specific automation control platforms are configured as editors.
Messages are textual data communicated about specific topics and may contain data from sensor nodes or commands from a control device. Devices that need to transmit sensor data over the IoT network or those that need to communicate control commands always register as publishers. MQTT clients that need to act on data from remote sensors or remote commands are registered as subscribers.
As already mentioned, an MQTT device or client can publish and subscribe. However, a device can also publish and subscribe to the same topic. The case may be that a device is publishing messages for certain topics and may have subscribed to receive data for other topics. This all depends on the nature of the application.
Some topics can be defined so that many MQTT clients can subscribe to them. In this case, when the message related to that topic is published, it is received by all subscribers. For example, in a smart home, there may be smart clocks in every room. A specific MQTT client can publish messages to topics such as 'date-time', 'temperature' and 'humidity'. All smart watches can be subscribed to these topics and can receive messages for them simultaneously.
All messages between MQTT clients are managed by an MQTT broker, which can run on a personal computer or cloud platform. MQTT brokers running on microcomputers are even capable of communicating messages to IoT devices that are not part of the local network using the Internet. One of the important things for an MQTT broker is that it must have 100% uptime because MQTT clients can publish data at any time and may need data on subscribed topics at any time.
Applications of the MQTT protocol
Interestingly, MQTT started out as an IBM proprietary protocol for communicating with SCADA systems in the oil and gas industry. It later became an open source protocol maintained by the Organization for the Advancement of Structured Information Standards (OASIS). Currently, some of the notable applications of the MQTT protocol include home automation, smart metering, remote sensing, smart agriculture, and wearable IoT. Even Meta uses the MQTT protocol for its Facebook Messenger and Instagram chats.
MQTT Brokers
In an MQTT publish-subscribe system, the broker acts as a server for MQTT clients. The broker is responsible for receiving messages published by MQTT clients, filtering the messages, discovering subscribers, and communicating messages to subscribed MQTT clients. MQTT brokers are basically server programs designed to manage MQTT communication. Some of the best MQTT brokers include Mosquitto, Cassandana, Hive MQ, EMQ Fly Pulse.
Preparing Raspberry Pi for MQTT broker
Raspberry Pi is a great option for installing an MQTT broker. This single board computer can stay on all the time without any hassle, just like a modem or router stays on all the time. The card consumes very little power and can reliably continue running a high-end application without failure. The board can also be easily connected to a display for troubleshooting or as a graphical user interface for an IoT application.
Firstly, you need to set up your Raspberry Pi and install Raspbian on the board, configuring it as a desktop system. Check out this tutorial to install Raspbian and prepare your Raspberry Pi. The MQTT broker that we will install on the Raspberry Pi is Mosquitto.
Installing Mosquitto Broker on Raspberry Pi
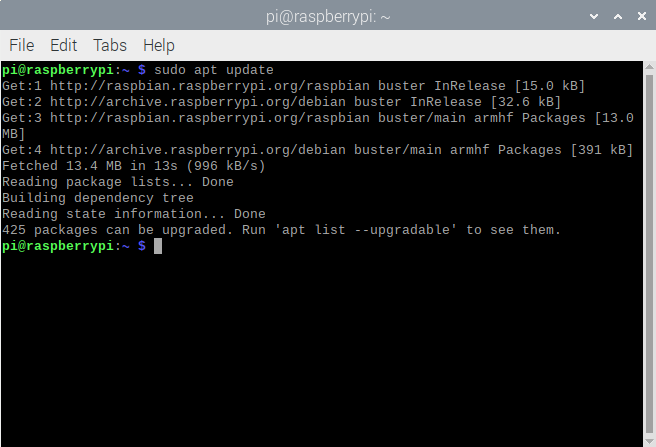
After preparing the Raspberry Pi with Raspbian installed, you can install the MQTT broker on it. Open the terminal window by navigating to Accessories->Terminal or clicking the Terminal icon. Run the following command to update the system.
sudo apt update
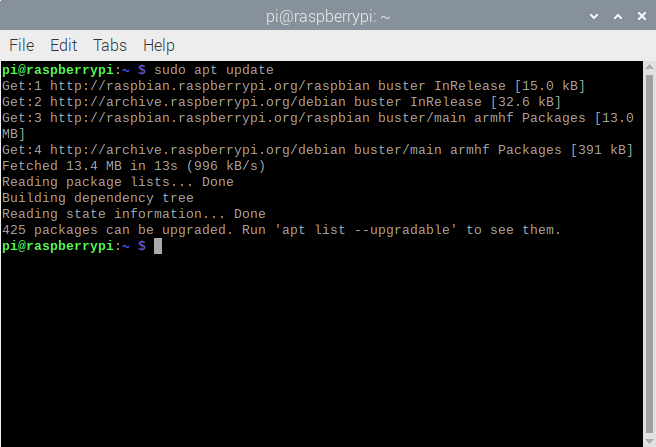
After updating the Raspberry Pi, update the system by running the following command.
sudo apt update
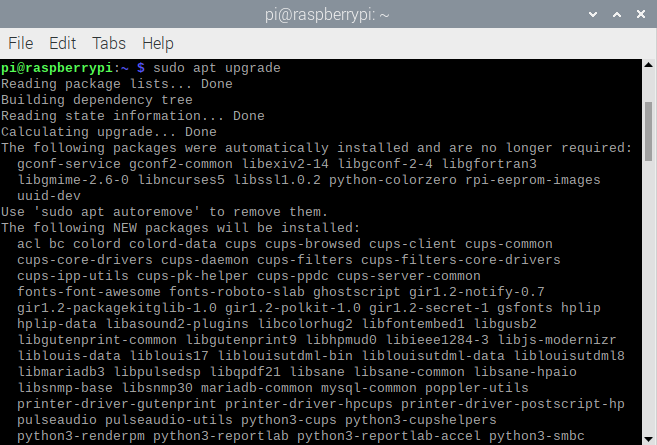
Updating Raspberry Pi
Press Y and Enter when prompted to download packages. Updating your Raspberry Pi will take 10 to 20 minutes. Now install Mosquitto Broker by running the following command.
sudo apt install -y mosquito mosquito-clientes

Verify your Mosquitto installation by running the following command. The command will return the version of the Mosquitto installation.
mosquito -v

You can make Mosquitto Broker run on startup by running the following command.
sudo systemctl enable mosquito.service
Enabling remote access on Raspberry Pi
MQTT clients cannot communicate with Mosquitto Broker on the Raspberry Pi until remote access is enabled on the personal computer. In Mosquitto 2.0 and higher, you need to explicitly choose authentication options before connecting MQTT clients. In previous versions, clients connect to the broker by default without authentication.
To enable remote access, you need to create or edit a configuration file. To open the Mosquitto configuration file mosquitto.conf in nano editor, run the following command in Terminal.
sudo nano etc/mosquitto/mosquitto.conf
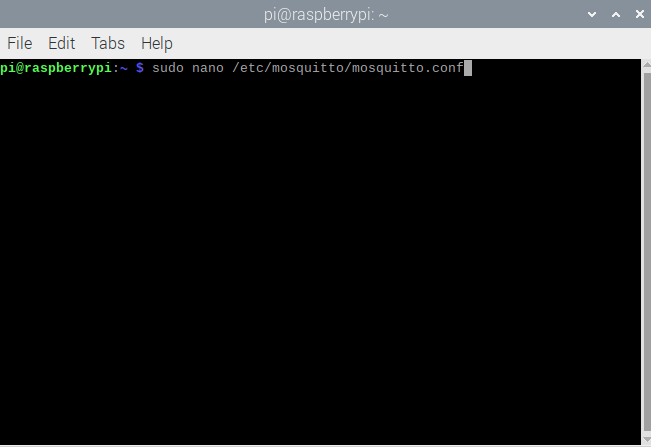
Editing mosquitto.conf on Raspberry Pi to allow remote access
This will open mosquitto.conf in nano editor as shown in the image below.
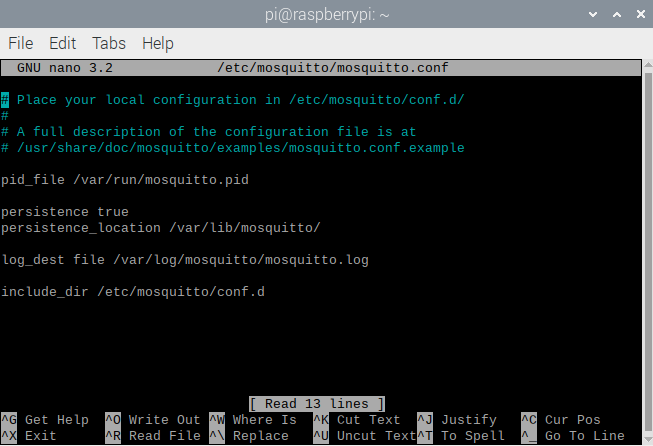
Editing mosquitto.conf on Raspberry Pi to allow remote access
Go to the end of the file using the arrow keys and type the following lines.
listener 1883
allow_anonymous true
Close the file by pressing Ctrl + X and save the changes by pressing Y and Enter.
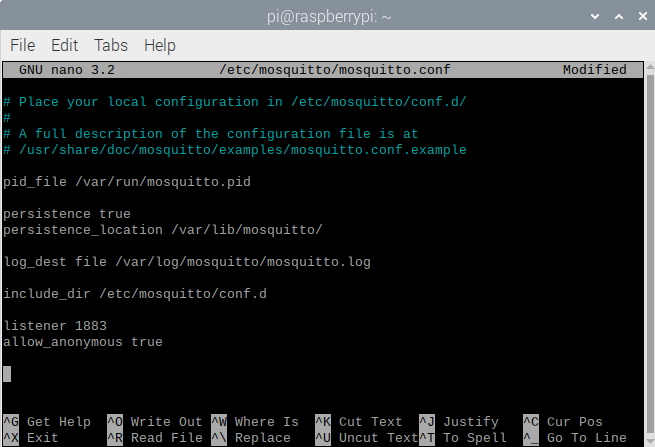
Editing mosquitto.conf on Raspberry Pi to allow remote access
After saving the file, restart Mosquitto Broker by running the following command in Terminal for the changes to the mosquitto.conf file to take effect.
sudo systemctl restart mosquito

Enabling authentication on the MQTT broker
To add user/password authentication to Mosquitto Broker, run the following command in Terminal.
sudo mosquitto_passwd -c /etc/mosquitto/passwd USERNAME
Please note that you will need to replace 'USERNAME' with your desired username. When you press Enter, you will be prompted to create a username and enter a password. When entering the password, no characters will be displayed. You will be asked to re-enter your password. Enter the same password again and press Enter. Again, no characters will be displayed when entering the password. A passwd password file will be created in the /etc/mosquitto directory.
Now to allow authentication with this username and password, you need to modify the mosquitto.conf file. Open the mosquitto.conf file in nano editor by running the following command in Terminal.
sudo nano /etc/mosquitto/mosquitto.conf
Add the following lines to the top of the file.
per_listener_settings true
The above lines must be added at the top of the file. Otherwise, these lines will have no effect. Then add the following lines at the end of the file.
allow_anonymous false
listener 1883
password_file /etc/mosquitto/passwd
If the mosquitto.conf file was previously edited for remote access without authentication, remove the following lines before adding the lines mentioned above.
listener 1883
allow_anonymous true
The mosquitto.conf file will look like the one shown in the image below after editing.
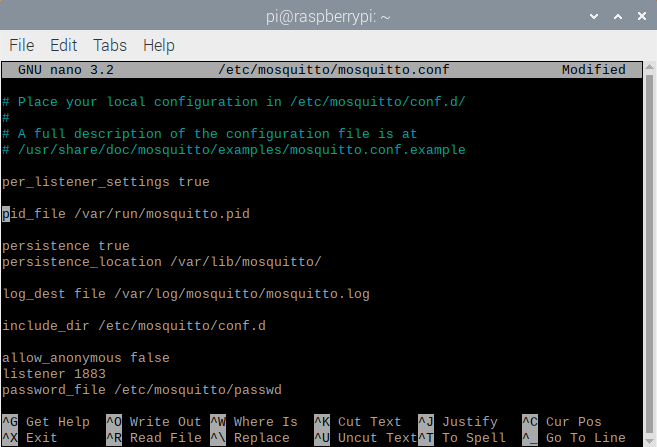 Close the file by pressing Ctrl + X and save the changes by pressing Y and Enter. After saving the file, restart Mosquitto Broker by running the following command in Terminal for the changes to the mosquitto.conf file to take effect.
sudo systemctl restart mosquito
Once username and password authentication is enabled, any MQTT client willing to communicate with the MQTT Broker will need to provide them for authentication.
You can change the password for your existing username by running the following command in Terminal.
mosquito_passwd
For example, run the following command to change the password for the username created with the passwd file. Replace USERNAME with your own username.
sudo mosquitto_passwd /etc/mosquitto/passwd USERNAME
You will be asked to enter a new password. No characters will be displayed while you enter the password. After entering the desired password, press Enter. You will now be asked to re-enter the password. Enter the same password and press Enter. Again, no characters will be displayed when entering the password.
After already creating a username, to add more username-password, run the following command in Terminal with a different password file.
mosquito_passwd
For example, you can create another password file passwd2 as follows.
sudo mosquitto_passwd /etc/mosquitto/passwd2 USERNAME
Note that you need to replace USERNAME with your own username in the above command. You can configure Mosquitto Broker to use the new username-password by modifying mosquitto.conf and adding the following line at the end of the file.
password_file /etc/mosquitto/passwd2
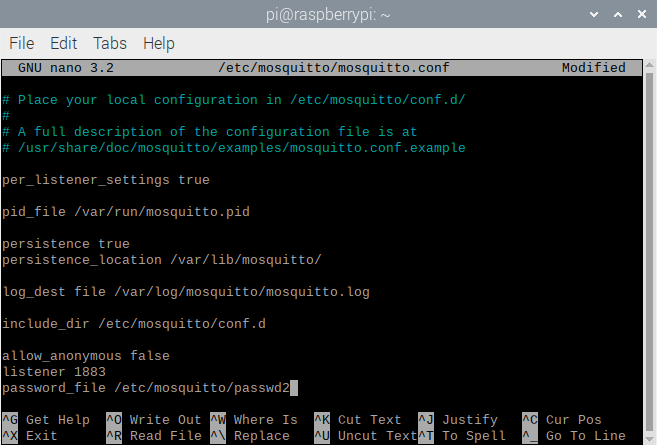
Accessing Raspberry Pi over WLAN
In addition to the username and password (if authentication is enabled), MQTT clients need to know the IP address of the Raspberry Pi to connect to the broker. The IP address of the Raspberry Pi can be found by running the following command in Terminal.
hostname -I
This will return IPv4 and IPv6 addresses. The first address returned is the IPv4 address. Only the IPv4 address can be found by running the following command in Terminal.
hostname -i
Testing the Mosquitto broker on the Raspberry Pi
The broker itself can also publish messages. Therefore, if the Mosquitto client is also installed on the Raspberry Pi, it is useful to test Mosquitto Broker on the Raspberry Pi. We had already installed the Mosquitto client by running the following command in Terminal.
sudo apt install -y mosquito mosquito-clientes
First of all, you need to run Mosquitto Broker in the background by running the following command in Terminal.
mosquito -d
Now we can subscribe a test topic to the Mosquitto client by running the following command in Terminal.
mosquito_sub -d -t testTopic
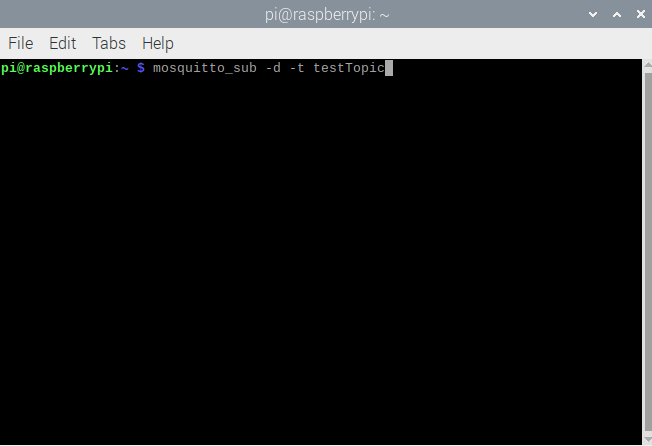
Subscribe to the MQTT topic on Raspberry Pi
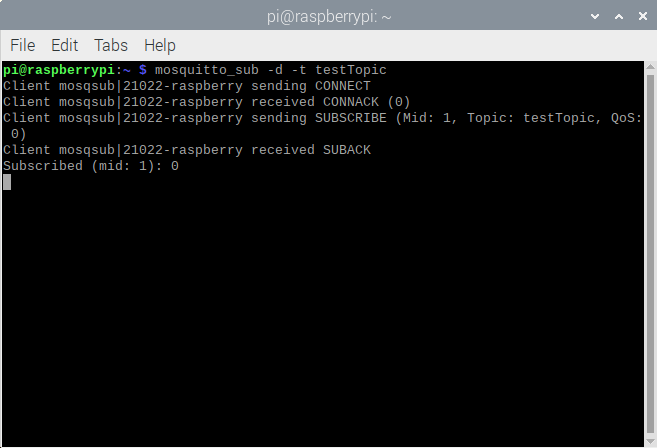 Next, open a new Terminal window and run the following command in the new window to post a message about the test topic.
mosquitto_pub -d -t testTopic -m “Welcome to the MQTT protocol!”
If Mosquitto Broker is installed successfully, you may notice that it is receiving the published message, as shown in the image below.

Since we also installed the Mosquitto client on the Raspberry Pi, we can receive a message published both on the broker and on the MQTT client. Open another Terminal window and run a Mosquitto client by running the following command in that window.
mosquito_sub -d -t testTopic
Now again post a new message by running the following command in the second Terminal window.
mosquitto_pub -d -t testTopic -m “another message”
You can see that both the broker and the customer through the broker receive the message, as shown in the image below.

Conclusion
The MQTT broker acts as a server in the MQTT publish-subscribe system and is responsible for communicating messages between MQTT clients. It is quite convenient to use Raspberry Pi as an MQTT broker in small-scale IoT systems such as home automation, office automation or industrial automation. MQTT brokers like Mosquitto can be easily installed and configured on Raspberry Pi. The Raspberry Pi can stay on indefinitely, so MQTT clients connected through it can communicate at any time. Since we can also install Mosquitto client on Raspberry Pi along with Mosquitto Broker, testing the broker is very simple and does not require other devices like ESP8266, ESP32 or Arduino to connect as MQTT client.

