In previous tutorials, MQTT protocol packages and MQTT security mechanisms were discussed. Now it's time to start getting your hands dirty. To create a communication network in which multiple IoT devices can communicate with each other through an MQTT agent, it is important to configure the IoT devices as MQTT clients. MQTT is built on top of the TCP/IP stack, so devices must have a TCP/IP stack with them if they want to communicate with each other through the MQTT broker.
In this tutorial, a Smartphone and a PC will be configured as MQTT clients. To create an MQTT client for Android smartphone, MQTT dashboard application which is an Android application can be used. This Android application supports the MQTT protocol to communicate with other MQTT clients. To configure the PC as an MQTT client, the MQTT lens can be used, which is a Chrome add-on that also supports the MQTT protocol. After the mobile phone and PC are configured as MQTT clients, they can communicate via MQTT Broker.
Configuring the cell phone as an MQTT client –
To configure a mobile device as an MQTT client, any MQTT-compatible application can be downloaded or a custom application that supports the MQTT protocol can be created. There are many Android apps available on the Google Play Store that can be used to create an MQTT client for Android phone. In this tutorial, IOT MQTT Dashboard application is used.
Download and install the application. After installing on Android phone, open the app. A dashboard window will open. In this window, tap the plus sign.
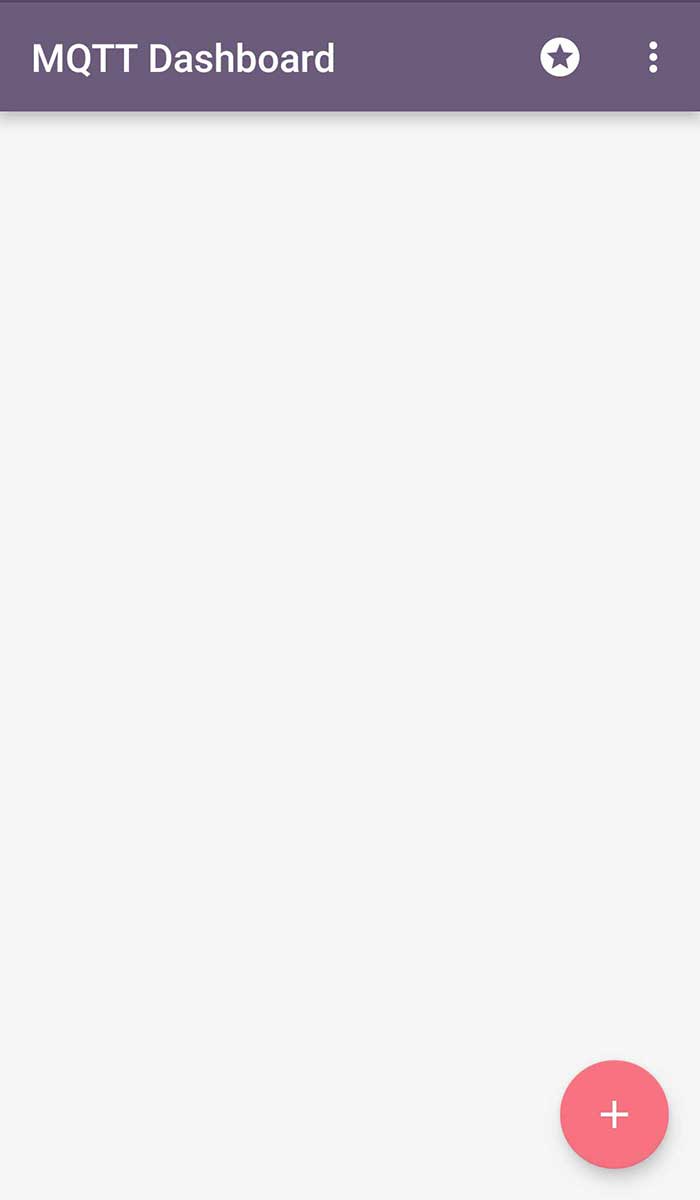
Figure 1: Mobile screenshot of main activity in IoT MQTT dashboard
A new window will open to establish a connection.
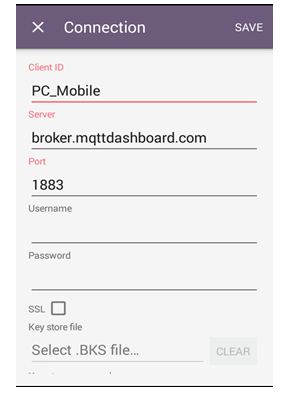
Fig. 2: Mobile screenshot of new connection activity in IoT MQTT dashboard
In the Client ID field, define a unique name (a string) so that when the mobile client connects to the MQTT broker, the MQTT broker can easily identify and send or receive the packet data only to that specific client. The two clients must not have the same name. Therefore, the customer name must be unique. The client ID can be a maximum of 24 bytes.
After the Client ID field, the MQTT broker must be mentioned. In this tutorial, HiveMQ is used as an MQTT broker. Any other broker like Mosquitto, Eclipse Paho or CloudMQTT can also be used. The server field must contain the domain name or public IP address of the MQTT broker/server. The domain of the HiveMQ broker is -broker.mqttdashboard.com.
Then define the port number of the public intermediary on which it can communicate. Port 1883 is used for no security, while port 8883 is used to enable TLS/SSL transport security. Here data is sent on port 1883 which is an unencrypted channel.
Then set the username and password to connect to the MQTT broker. However, it is not mandatory to mention username and password. Since port 1883 is used, which is an unencrypted port, there is no need to set SSL to 1 because SSL should be set to 1 only if the encrypted channel or port is used.
Save the configuration by tapping the create button. The mobile client will send a request to the public broker and the broker will listen to this request and provide a connection to the MQTT client.
This way, the cell phone can be configured as an MQTT client. The MQTT client can now be connected to the MQTT broker and the connection status will be visible in the application.
Configuring the PC as an MQTT client –
To configure the PC as a client, a browser plugin – MQTTlens – is used. It has the ability to connect to the MQTT broker and can communicate with other MQTT clients. This plugin is available for the Chrome browser and can be added to it from the Chrome Web Store. The MQTT lens supports some extra functionality to initiate the connection with the broker. With this complementary PC connection as MQTT client can be easily configured.
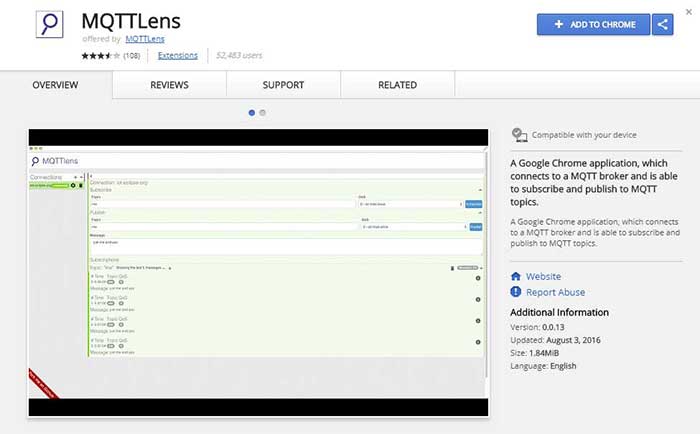
Fig. 3: Screenshot of the MQTTLens Chrome extension to configure the PC as an MQTT client
After adding the extension, a dashboard window will open. Tap the plus sign to create a connection.
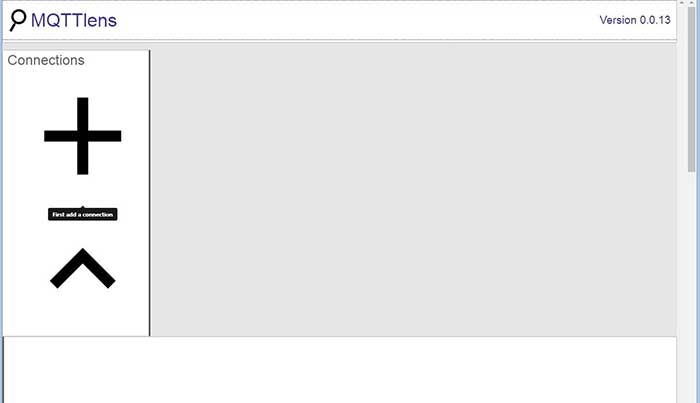
Figure 4: Screenshot of the MQTTLens main window
A pop-up window will open to add a new connection.
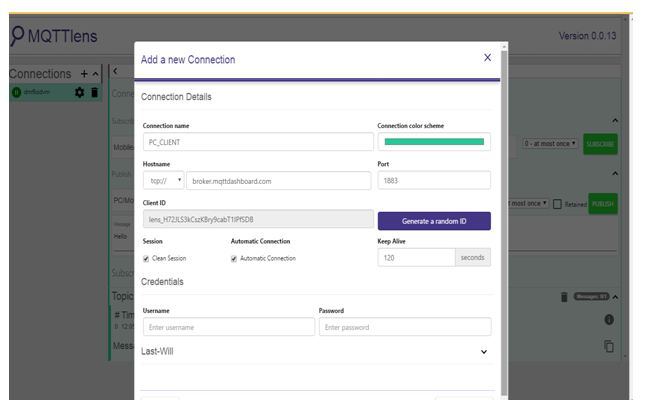
Fig. 5: Screenshot of the new MQTTLens connection window
In the connection name field, write any name (it does not have to be unique). Just like PC_CLIENT can be used as a connection name. Then set the domain name of the MQTT broker so that the PC client can initiate the connection with the broker. The same broker (HiveMQ) used on other client devices (mobile client in this case) must be used as communication between these two clients will be established through the MQTT broker, which must be the same for both devices. Next, set the port on which the public broker is connected, i.e. 1883.
To identify the PC as a unique client, MQTTlens itself generates the unique client ID. Each time the client establishes connection with the broker, the client generates a random client ID. MQTTlens has clean session, auto connect, keep alive and last connect facility.
The clean session is set to 1 so that the server can discard any information and data from the previously connected client and thus treat the new connection as clean. Each time the PC client connects to the server, it treats the connection as a new connection and does not store any previous signatures and messages.
Next, auto connect is 1 to automatically connect the PC to the broker. Keep Alive seconds are set to 120 seconds, which is the maximum time the client and broker can stay connected, even if they are not exchanging data with each other.
The Username and Password fields are not required fields, but can be defined if desired. They are not defined here. The next last will topic and last will message can be set if desired. When the last will topic and last will messages are defined, if the MQTT broker is sending a message to the subscribed client and the connection between the two is suddenly closed, the message will be sent as a last will message to that topic. If the last will is not set, if the connection between the client and the server is suddenly disconnected, the message packet will be lost and the client will not receive anything.
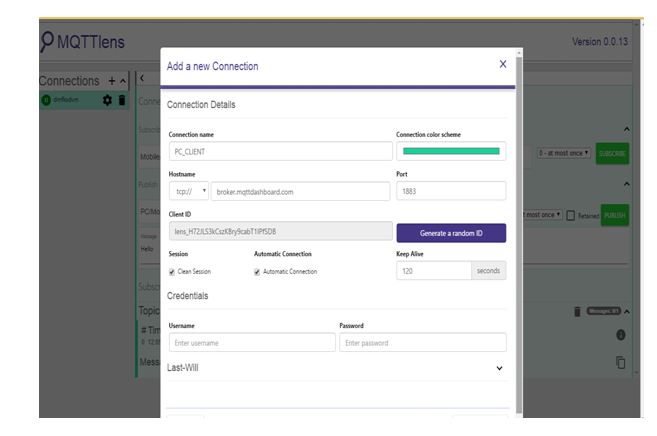
Fig. 6: Screenshot of the new MQTTLens connection fields
Save the settings by clicking the 'Create connection' button. After saving the configuration, the MQTT client can be connected to the MQTT broker and the connection status will be visible in the application.
This way the PC will act as an MQTT client through the browser plugin. Now the PC is set as an MQTT client and can connect to other clients through the MQTT broker.
In this tutorial, an Android smartphone and a PC were defined as MQTT clients with HiveMQ broker without security. The next tutorial will discuss how to define topics and messages on the publisher and subscriber side. After that, the two clients can communicate through the MQTT broker (public).

