Nadella casters are essential components for enabling sliding and rotating movements in many industrial and mechanical applications. These casters are designed to move heavy loads and offer greater stability and flexibility in transport and handling operations. In this practical guide we will provide you with step-by-step instructions for the correct installation of Nadella casters, ensuring optimal and safe operation.
Step 1: Preparing the tools
Before starting the installation, make sure you have the necessary tools available. Typically, you will need a wrench, a screwdriver, and a tape measure to measure the required dimensions and distances.
Step 2: Removing the Existing Caster (If Equipped)
If you are replacing an old wheel, start by removing the existing one. Use the wrench or screwdriver to loosen the mounting bolts or studs that hold the wheel securely to the frame. Remove the wheel and set it aside.
Step 3: Cleaning and Inspection
Before proceeding with the installation of your new Nadella caster, carefully clean the mounting area and inspect the frame to ensure there is no damage or deformation that could affect correct installation.
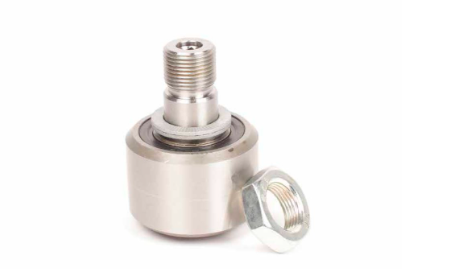
Step 4: Check dimensions and maximum load
Before proceeding with the installation, carefully check the specifications of the Nadella wheel you purchased. Make sure the caster size is appropriate for your application and that the maximum load listed is sufficient to support the expected weight.
Step 5: Positioning the wheel
Place the Nadella wheel in the desired position in the mounting area. Make sure the wheel axle is correctly aligned with the intended direction of movement. Use the measuring tape to measure and check that the wheel is positioned in a balanced and stable manner.
Step 6: Attaching the wheel
Once the Nadella wheel is positioned correctly, proceed with fixing it. Use the wrench or screwdriver to firmly tighten the mounting screws or bolts, ensuring the caster is securely attached to the frame. Check that the wheel is stable and does not move excessively.
Step 7: Test the movement
After installing the wheel, perform a movement test. Make sure the wheel moves freely without obstacles or friction and that the movement is smooth and fluid. Also check that the wheel is locked when necessary, for example with a braking or locking system.
Step 8: Maintenance and lubrication (if applicable)
Depending on manufacturer specifications and application needs, periodic maintenance and lubrication of Nadella casters may be required. Consult the owner's manual or manufacturer's recommendations to determine if the wheel needs lubrication and what type of lubricant to use. Carefully follow the instructions provided to ensure proper maintenance and optimal functioning of the casters.
Step 9: Monitoring and Replacement
Regularly monitor the condition of your Nadella wheels for wear and integrity. If you notice signs of damage, excessive wear or other problems, consider replacing the wheel to avoid breakdowns or dangerous situations.
Conclusions
By carefully following these steps, you will be able to successfully install Nadella casters in your industrial applications. Always remember to follow the manufacturer's specific instructions and carry out the necessary checks to ensure a safe and efficient installation. Nadella casters offer a reliable, quality solution for sliding and rotating movements, helping to improve the performance of your applications.