Bearings are critical components of bicycles and over time they can become worn or damaged due to wear, moisture or contamination. Timely bearing replacement is essential to ensure optimal performance and a safe, smooth ride. This article will explore when you need to replace your bike's bearings and provide guidance on how to do it correctly.
Signs of bearing wear
Before replacing your bicycle's bearings, it is important to recognize signs of wear or damage. Here are some signs that may indicate the need to replace your bearings:
- Abnormal noises, such as clicking or squeaking, coming from the wheels, hubs, bottom brackets, or steering.
- Feeling of looseness or irregular movement in bicycle components.
- Difficulty turning wheels or components.
- Lubricant leaks or obvious bearing damage.
If you notice one or more of these signs, it may be time to replace your bike's bearings.
When to replace bearings
How often you need to replace your bearings depends on several factors, including bike usage, environmental conditions, and the quality of the bearings themselves. However, here are some general guidelines:
- Preventative maintenance: In general, it is advisable to carry out regular preventative maintenance on your bearings, checking and lubricating them according to the manufacturer's recommendations.
- Periodic Check: Inspect bearings regularly for signs of wear or damage and replace if necessary.
- After accidents or extreme conditions: After accidents or exposure to extreme conditions such as heavy rain or mud, carefully check the bearings to ensure they have not been damaged and replace them if necessary.
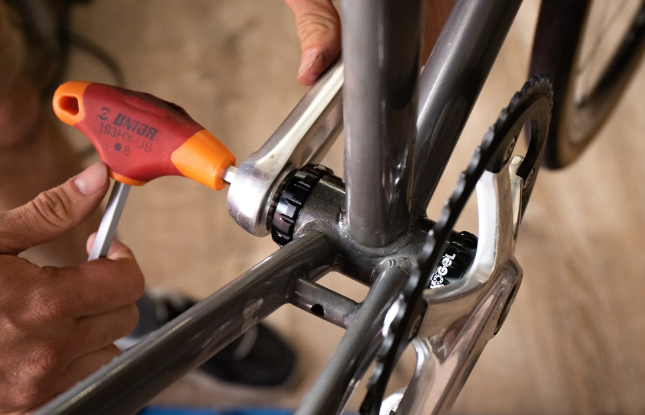
How to replace bearings
Bearing replacement requires attention to detail and use of the correct tools. Here's a general guide on how to replace your bike's bearings:
- Bearing identification: Identify the type and size of bearings to be replaced, taking into account your bicycle components such as wheels, hubs, bottom brackets or steering.
- Disassembly: Disassemble the components that house the bearings to be replaced using the appropriate tools, such as wrenches, pullers or presses.
- Removing old bearings: Use a puller or suitable tool to safely and accurately remove old bearings, avoiding damage to adjacent components.
- Cleaning and Preparation: Thoroughly clean the bearing seats and surrounding components to remove any dirt, dust or lubricant residue.
- Installing New Bearings: Install new bearings using an appropriate tool and ensure they are seated and aligned correctly.
- Lubrication and Assembly: Lubricate new bearings with grease or oil specifically formulated for bicycles and reassemble components safely and accurately.
- Adjustment and Control: Check that new bearings are installed correctly and adjust any play or alignment to ensure optimal operation.
- Maintenance and Monitoring: Once the replacement is complete, carefully monitor your bike's performance and continue to perform regular maintenance to ensure the life of your new bearings.
Conclusions
Replacing your bearings in a timely manner is critical to ensuring optimal performance and a safe ride on your bike. With a clear understanding of signs of wear, replacement deadlines, and the correct replacement steps, you can keep your bike in tip-top condition and make the most of your adventures on two wheels. If you don't feel confident performing the replacement yourself, don't hesitate to turn to an experienced mechanic for professional assistance.