
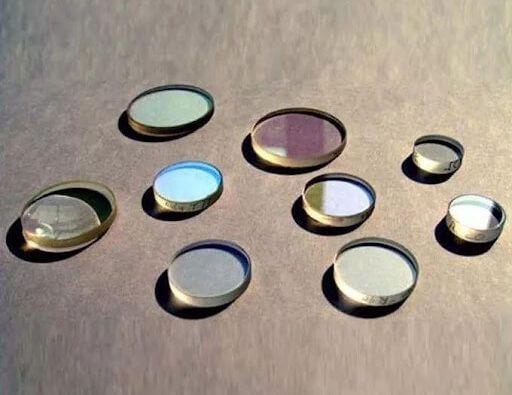
How to Clean and Maintain Laser Lenses
In the optical path system of a laser cutting machine, the protective lens is a consumable component. To minimize usage cost, it is necessary to clean the lens strictly according to specifications.
During the cleaning and replacement process, it is important to handle the protective lenses carefully, taking care to avoid contamination or damage.
Once new lenses are installed, it is crucial to inspect and clean protective lenses regularly to ensure optimal performance.
Lens cleaning
Different cleaning methods can be adopted for cleaning lenses depending on the level of pollution. Here are some suggested methods:
(1) Flexible cleaning for lenses with light pollution (dust, fiber particles);
To clean the surface of the lens, use a clean airbag or a jet of clean air to blow away pollutants scattered on it. It is important to avoid using air tubes typically found in repair shops, as they often contain oil and water that can further contaminate the lenses.
These pollutants can form a harmful absorption layer on the surface of the lens if not cleaned.
(2) Flexible cleaning for lenses with light pollution (smudges and fingerprints);
Take a special unused cotton swab and dip it in a cleaning agent such as acetone or absolute ethanol. Gently wipe the lens surface without rubbing vigorously. Slowly drag the damp cotton pad across the surface of the lens so that any liquid left behind can evaporate immediately without leaving a trace.
Please note that only pure paper swabs such as Q-tip brand swabs or polyester fiber swabs should be used for this purpose.
For cleaning agents, it is recommended to use reagent grade acetone and absolute ethanol.
(3) Medium intensity cleaning for lenses with moderate contamination (saliva, oil);
Soak an unused cotton swab with 6% distilled white vinegar and use it to clean the surface of the lens with light pressure. Then, wipe off any excess vinegar on the surface of the lens with a clean, dry cotton swab. Then, wet a cotton swab with acetone and gently wipe the surface of the lens to remove all acetic acid residue.
For heavily polluted or dirty lenses, optical polishing fluid can also be used to remove pollutants from the lens surface.
The steps are as follows:
(1) Before use, shake the polishing liquid container well. Pour four to five drops of polishing liquid onto a cotton ball.
Gently move the cotton ball in a circular motion over the surface of the lens to be cleaned. Do not press the cotton ball. Rotate the lens constantly to avoid excessive polishing in one direction.
The time required to clean the lens should not exceed half a minute. If the color of the lens surface changes during this step, this indicates that the outer portion of the lens film has been corroded and cleaning should be stopped immediately.
(2) After using the polishing solution, dip an unused cotton swab in distilled water. Gently wipe the surface of the lens to thoroughly wet it and remove as much polishing solution residue as possible.
Do not let the lens surface dry as this will make it more difficult to remove polishing fluid residue.
(3) Quickly wet a stack of cotton swabs with absolute ethanol. Use them to gently and thoroughly clean the lens surface. Cover the entire surface with the tip of a cotton swab and remove as much polishing fluid residue as possible.
(4) Moisten the stack of cotton swabs with acetone and wipe the surface of the lens with them to remove all anhydrous ethanol and polishing fluid residue left during the cleaning process.
When performing the final cleaning with acetone, gently drag the cotton swab across the surface of the lens to wipe off the original traces until the entire surface is clean. Do the last cleaning action with a cotton swab and move it slowly to ensure that the surface behind the swab can dry immediately, which can eliminate the stains on the surface.
Some types of contamination or damage (such as metal spatter, holes, etc.) cannot be removed.
If the surface of the lens has pollution or damage above and cannot be cleaned and restored, abandon cleaning and replace it with a new lens to ensure cutting quality.
Lens maintenance
The following measures can be taken for daily maintenance:
(1) Before removing the protective lens, make sure that the area around the shaving head protective lens is clean and that no fan is directed at the shaving head to avoid introducing dust and internal contamination when removing the protective lens.
(2) Avoid touching the lens with your bare fingers. Instead, use powder-free finger guards or rubber/latex gloves when installing the lens.
(3) When handling the lens, avoid touching the film and mirror. Hold the edge of the lens and place it on the lens cleaning paper.
(4) Do not speak above the lenses and maintain a pollution-free working environment by keeping all pollutants away.
(5) When cleaning the lens, operate it in a dust-free environment. Absolute ethanol and other cleaning agents can dissolve dirt without damaging the lens.
How to antifreeze maintenance of laser equipment in winter
Winter temperatures can cause the laser and water cooler temperatures to drop excessively, leading to possible freezing of the water cooler piping.
Because ice has a lower density than water, piping can break or deform due to volume expansion within the water cooler and laser, causing significant damage to critical components.
Therefore, it is essential that companies prioritize anti-freeze maintenance of their laser equipment during the winter.
Trick 1: Pay attention to drainage
If the water cooler and laser have not been used for a long time, it is necessary to check the drainage condition of the equipment to ensure that the water in the water box, piping, water pump and other parts of the cooler of water are completely drained. This is important to avoid freezing.
The drainage method is as follows:
(1) Water tank drainage method:
To drain the water from the reservoir, open the drain valve located at the bottom of the reservoir.
If necessary, tilt the water cooler at a specific angle to ensure the drain outlet is at the lowest point.
(2) Drainage in the pipeline:
Open the water pipe interface and use compressed air to blow air through the inlet and outlet of the low-temperature water and high-temperature water until all residual water in the water cooler has been removed. Note that the pipeline structure must be taken into account and adjusted as necessary.
(3) Open the water tank cover and observe whether there is residual water in the water tank.
In this case, tilt the water fountain slightly to drain the water or blot the water with a dry towel.
(4) Draining the water pump head:
There is a drain screw located on the bottom of the head of each water pump.
When shutting down or transporting the water cooler for a long period, it is recommended to open the pump head drain screw to drain the water from the water pump (ideally, it should be blown out with compressed air), and then tighten with secure the drain screw.
Trick 2: the water fountain doesn't stop
To ensure normal operation of laser equipment, it is important to maintain an ambient temperature of 5°C or higher.
In situations where the ambient temperature cannot be maintained at or above 5°C, it is recommended to keep the laser water tank running at all times. The water tank constant temperature system will help maintain the temperature of the laser waterway system at the set tank temperature.
Note: In case of power failure, it will be found in time.
Trick 3: selection of antifreeze
To fill the water tank with Antifrogen N antifreeze (ethylene glycol), use a mixture in a ratio of 3:7 (3 parts antifreeze and 7 parts water).
Once antifreeze is added, it can withstand temperatures as low as -20°C without freezing. However, it is important to note that antifreeze is somewhat corrosive. Therefore, it is recommended to clean the entire water circuit and replace it with normal cooling water after winter.


