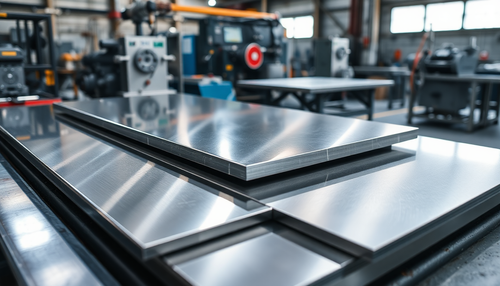
With the advancement of 10,000 watt fiber laser technology, 10,000 watt fiber laser cutting equipment is gradually becoming popular in the market, providing a better solution for thick plate cutting.
However, some laser cutting machine manufacturers are not very familiar with the configuration and operation of 10,000 watt ultra-high power fiber laser cutting machines.
Therefore, our senior cutting applications engineer has systematically compiled the relevant information and shared it with you.
In this post, we will mainly cover the selection, installation, maintenance and precautions of 10,000 watt laser cutting head.
1. 10,000 watt shaving head model selection
Lens aspect ratio:
It is recommended to use a 100/200 ratio or an adjustable zoom head for the collimation lens and focus a 10,000 watt cutting head. This is because the plate cutting thickness of a 10,000-watt fiber laser covers a wide range, and the focus adjustment range is also wide.
Connector Model:
Currently, the main types of output heads for 10,000-watt fiber lasers are LOE, Q+, and QD. It is important to select the appropriate cutting head, which must be consistent with the chosen output head type.
10,000 Watt LOE Type Fiber Laser Output Head
2. Installation and maintenance of 10,000 watt cutting head
Installation environment and requirements
Environmental requirements:
Cleanroom or dust-free bench above 1000
Tools:
More than 100x microscope
Auxiliary accessories :
Anhydrous alcohol or IPA, cleaning swab, dust-free cloth, masking tape, complete hex socket set, screwdriver, art knife
Other requirements :
1. Before installing the 10 watt fiber laser output head to the cutting head, it is crucial to ensure that the inner cavity, lens, crystal and surrounding area of the laser output head are completely clean.
2. Installation of the 10,000 watt fiber laser output head on the cutting head and cleaning inspection must be carried out in a dust-free environment with a cleaning level greater than 1000 and examined under a microscope with a magnification of at least 100x.
Installation process
1. Make sure to clean the inside of the shaving head.
2. Remove the protective cover from the laser output head.
3. Firmly position the laser output head sideways and align it with the microscope.
4. Clean the outer surface of the laser output head.
5. Adjust the microscope to clearly view the end face of the crystal.
6. Thoroughly examine the entire end face of the crystal. If there is any dirt, gently wipe it off with a cotton swab dipped in anhydrous alcohol.
7. After checking that the crystal on the laser output head is clean, align the output head sideways with the cutter head hole.
8. Firmly secure the shaving head and seal the connection with adhesive tape.
9. The cutting head moves at high speed during operation, so make sure there is no dust on the lens by checking the reflection of red light through the laser.
10. Make sure the cutting head is clean and installed correctly before starting laser cutting.
Maintenance
1. To prevent dust from entering the cutting head during maintenance, it is recommended to wrap a layer of adhesive tape around the cutting head before use (ensure removal of the tape without residue).
2. If the inner lens of the 10,000 Watt shaving head is dirty or damaged, it must be replaced. It is not advisable to remove it for cleaning to avoid secondary and more serious pollution.
3. When operating the 10,000 watt cutting head on the cutting machine, the lower protective lens can be replaced. However, replacing the upper protective lens and collimating focus lens requires a dust-free environment above 1000.
4. To check the 10,000 watt cutting head lens, first check for black dots in the red light of the 10,000 watt fiber laser using white paper. Then emit the laser with low power and check the light spot for dots with black photosensitive paper. Finally, inspect the lens under a microscope.
3. 10,000 Watt shaving head testing process
1) Is the servo calibration normal?
2) Is the focus adjustment consistent with the actual monitoring focus?
3) Is the actual focus zero position within ±1mm of the focus position?
4) Is the cutting effect normal for sheets with different thicknesses and materials?
5) Are the lens and cutting head temperatures stable? Is there thermal distortion in the lens? Is the cutting effect consistent?
4. 10,000 Watt cutting head cooling
Cooling Setting:
The diameter of the water pipe connecting the water cooler to the cutting head must be larger than the diameter of the cutting head water cooling interface (8 mm diameter). The water flow must be at least 4 liters per minute and the water temperature must be between 28 and 30 degrees Celsius.
Water flow direction:
High temperature water outlet from the water cooler → Output head of a 10,000 watt fiber laser → Cavity of a 10,000 watt cutting head → High temperature water inlet to the water cooler → Cavity at the bottom of a 10,000 watt shaving head.
Cooling scheme:
To ensure stable and long-term processing and avoid the impact of the high temperature of the cutting head on subsequent operations, it is recommended to install a water cooling module, as some brands of cutting heads have a cavity at the bottom without any cooling device.