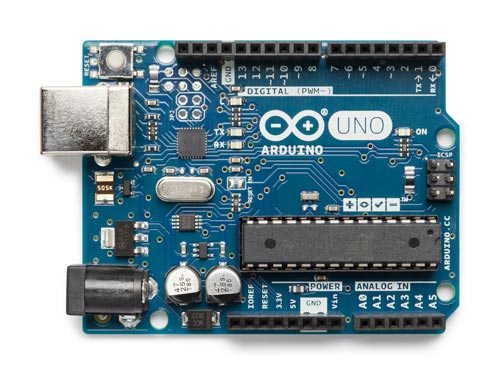
Arduino is an open source electronics prototyping platform based on flexible hardware and software, where the standard schematic can be used by anyone to make their own version of an Arduino board. An Arduino contains a programmable physical circuit board called a microcontroller and software called an IDE (Integrated Development Board). All Arduino boards must be compatible with this IDE which is used to load computer code onto the physical board.
In addition to the cost factor, there are some unique characteristics that contribute to its exponential growth in the world of electronics. No separate hardware is required to load the code onto the board. Instead, this can be done simply with a USB cable. Furthermore, its IDE uses a simplified version of C++ that allows beginners to familiarize themselves with programming in a convenient way. Furthermore, microcontroller functions are accessible to users in an affordable package.
Arduino Applications
The main goal of developing Arduino was to make it accessible to a wide range of users interested in working on electronic projects. Anyone from artists, designers, hobbyists, hackers, and beginners can create interactive objects using the Arduino hardware and software platform. It is easy to work with, programmable, free and can work with buttons, LEDs, speakers, GPS units, motors, cameras, smartphones or even a television set.
From turning on an LED to connecting your home with sensors and then controlling the appliances; an Arduino can act as the brain of any electronics project. Some examples of Arduino-based projects include 3D printers, video games, robots, home automation systems, breathalyzers, etc. Due to the use of this platform on such a large scale, there is a large community of users who continue to contribute their codes and instructions. . As a result, beginners will always have a large database to reference.
You can also read: Basic Arduino Projects
What does the Arduino board contain?
There is a wide variety of Arduino boards available to users depending on the nature and needs of electronic projects. However, there are certain elements that are common across most categories. They are explained below –: 
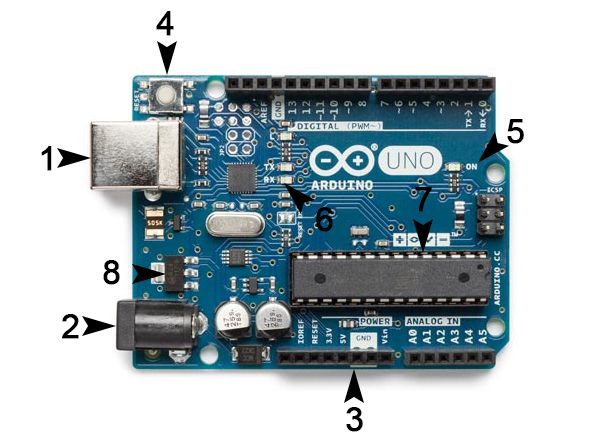
1. USB input
The Arduino is connected to a computer via a USB cable to provide power and also to load the code onto the board.
2. Barrel Jack
The Arduino board is connected to a wall power supply that terminates in a barrel connector.
3. Pins
There are different pins on the board where wires are connected to form a circuit and each of them has a different function. Each pin has a black connector where the user can connect the wire. These pins are of the following types –:
4. Reset Button
Pressing this button temporarily connects the reset button to ground and can be used to reset any code loaded into the Arduino. It is useful in cases where a code needs to be tested multiple times.
5. Power LED Connector
This LED lights up whenever the Arduino is connected to a power source. If it doesn't light up, it's a clear indication that something is wrong with the circuit.
6.RX TX LEDs
TX and RX mean transmit and receive respectively. These LEDs act as a visual indication while the card is transmitting or receiving data.
7. Main IC
The black bar on the board with metal legs is the Integrated Circuit which can also be considered the brain of the Arduino. It varies depending on the type of board.
8. Voltage Regulator
It acts as a gatekeeper to regulate the voltage flow to the Arduino board. It works by turning off an extra amount of voltage to prevent the board from being damaged.
Types of Arduino
There are many categories of Arduino boards with different functions. Furthermore, as it is an open source platform, many changes are changing with these boards that add even more features and forms. To be more precise, beginners should know the following types of Arduino –:
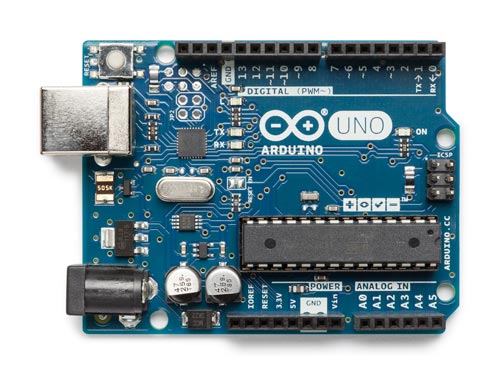
Arduino Uno (R3)
This is an ideal choice for first-time users as it contains everything that is important for a beginner. An Arduino Uno board contains 14 digital input/output pins, of which 6 can be used as PWM outputs. In addition, it has 6 analog inputs, USB connection, power connector and reset button. You can connect it to your computer via a USB cable or an AC-DC adapter.
LilyPad Arduino
These types of Arduino boards are mainly designed to be used in wearable projects so that they can be sewn onto clothes with the help of conductive threads. They are washable and have their own family of input, output, power and sensors that are intended for use in electronic textiles.
Arduino Mega (R3)
It is the larger version of the Uno containing multiple digital input/output pins, 14 of which can be used as PWM. In addition, it has 16 analog inputs, power connector, USB connector and reset button. A large number of pins present on this board makes it an ideal platform for projects that involve many LEDs or buttons.
Arduino Leonardo
This is the first Arduino development board with an integrated USB microcontroller. Since the board handles USB directly, there are code libraries that allow the board to emulate keyboard, mouse, and so on. In detail, it has 20 digital input/output pins, of which 7 are PWM and 12 are analog inputs. In addition, it has 1 16 MHz crystal oscillator, micro USSB connection, ICSP header, power connector and USB connection.
Downloading Arduino
The software for this open source platform can be downloaded for free from the official Arduino website. It is available for all devices consisting of Windows, Mac, and Linux.
Visit the Arduino website to download the software for your device.
There is a different procedure for all devices. However, if you are using Linux on your device, you can check the detailed procedure here.
Programming on Arduino
The most basic Arduino-based project is to code a blinking LED. Check out this tutorial to understand programming a basic Arduino project.
You can read our blog and articles section for more topics on electronic engineering, industry and technology.
(tagsToTranslate)Arduino

