PWM with NRF24LE1
Have you ever thought that the light on your phone, when turned on, doesn't always stay on? It fluctuates at a frequency to save energy that our eyes cannot sense. It's cool to save battery, but how is it done? The answer is PWM.
PWM is an important technique to produce analog voltages using digital voltages and control LEDs, DC, servo motor, etc.
In this article, we will discuss about PWM signal generation using NRF module.
There are two ways to generate PWM signals with NRF2LE1:
1. Use delay to generate pulses of the desired width.
2. Use built-in PWM hardware pins.

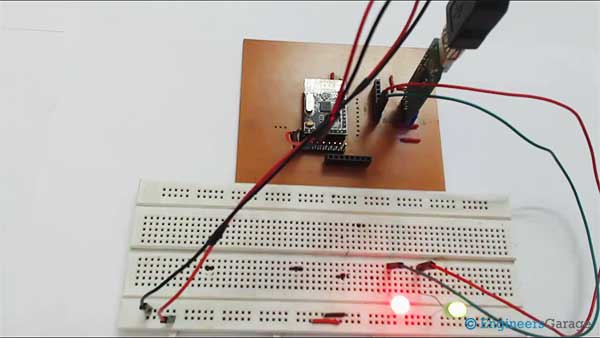
Fig. 1: PWM generator prototype based on NRF24LE1 module
We will cover both methods one by one.
First method:
This method focuses on using delay to control pulse width. Let's understand this in simple steps.
1) First, the output pin is set to HIGH.
2) Then a delay is given to keep the output HIGH for a specified time. This is done to generate a HIGH pulse.
3) The output pin is LOW.
4) Delay is provided to keep the output LOW.
5) Steps 1 to 4 are repeated.
The time period of the generated wave will be the sum of the delay for the HIGH pulse and the delay for the LOW pulse. The reciprocal of time will give us the frequency of the signal produced. We can change the duty cycle by changing the ON and OFF pulse delay time. Delay can be created using built-in timers or we can use already defined delay functions. Delay functions are provided by built-in libraries.
Second method:
In this method we will use the built-in PWM functionality of the NRF24LE1 to produce signals. This method is more convenient than the other as it removes the reliability of delay functions. A restriction of this method is that the PWM signal output can only be obtained on PWM-enabled pins.
Some features of built-in PWM are:
• Two channel output. PWM0 and PWM1
• Frequency range from 2 KHz to 254 KHz when the MCU is clocked at 16 MHz.
On the NRF24LE1 there are two dedicated pins for PWM, PWM0 and PWM1. PWM0 is pin 3 of port 0 and PWM1 is pin 4 of port 0.
PWM is controlled through three registers:

Fig. 2: Table Listing NRF24LE1 Registers used for PWM Generation
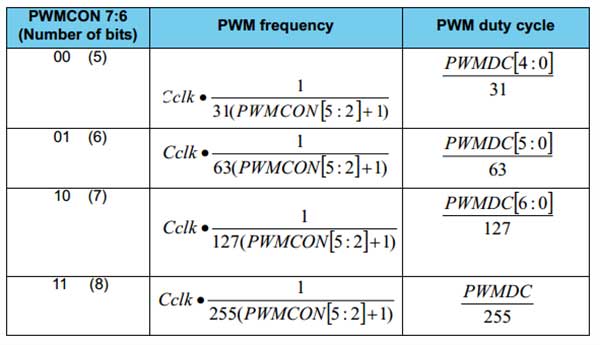
An image has been attached to understand the PWM frequency and duty cycle setting.
Simple steps to create PWM signals are:
1. Select the period length by writing bit7:6 of PWMCON.
2. Choose the prescaler for PWM frequency using bit5:2 of PWMCON.
3. Enable PWM0 or PWM1 using bit1 and bit0 of PWMCON.
4. Select Duty Cycle using PWMDC1 and PWMDC0.
A code was written to understand the PWM creation process.
Project source code
###
//Program to#include"reg24le1.h" // I/O header file for NRF24LE1
###
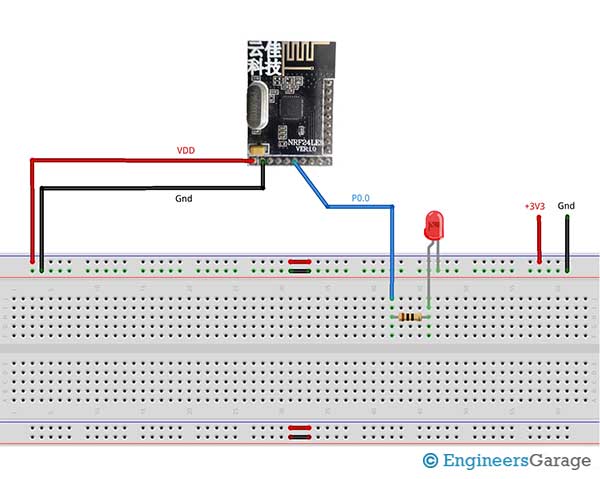
Circuit diagrams
| Circuit Diagram-NRF24LE1-Module-PWM Generator |  |
Project video

