
As a result, we have compiled a set of basic electronics skills for beginners that act as a prerequisite to ensure success. Furthermore, you can use them when repairing a simple device or working on your dream project. Basically, handling electronics for practical purposes can be very difficult if you don't know how to handle the components involved.
So without beating around the bush, let's take a look at these 10 basic electronics skills for beginners -:
1. Knowledge about Basic Components

A circuit has many components categorized as active and passive. The former supply and control current, while the latter respond to voltage flow and dissipate/store energy. Mainly, every electronic circuit has the following components -:
2. Breadboard

You can have a detailed look at the different parts and workings of a breadboard here .
As mentioned above, a breadboard is the most basic component of a circuit and is used for solderless prototyping, which is particularly useful for beginners. Prototyping creates a preliminary model that is later used for testing followed by the development of the final model. Breadboards can easily accommodate a wide variety of circuits, from the simplest to the most complex.
So, after starting a project, the first thing you need to learn is to arrange the components on a breadboard along with the connecting wires.
3. Schematic Drawing

Schematics act as universal pictograms for understanding and building electronics. Each component discussed in the list above (and others) has a specific symbol. These symbols are combined through various programs. Schematics are important for designing the circuits and there are many online circuit designing tools available to the users. These apps and software offer a virtual breadboard view where you can learn how to combine all the components of a circuit.
4. Welding

Even though you can do breadboarding without soldering, becoming familiar with the soldering technique can open up many possibilities for an electronics project. Furthermore, it is easy to learn and can help you explore a wide range of projects, from the simplest to the most complicated. To solder the components to a circuit, a soldering iron is used which contains the following parts -:
5. Desoldering Tools

Note: You can read this article on soldering and desoldering for details.
After learning soldering skills, it is necessary to have adequate knowledge of desoldering as well. This is important in cases where you need to make changes to the circuit, such as troubleshooting, repairs, or replacements. There are several tools for this purpose; Typically, a soldering wick or a vacuum pump is used together with the soldering iron.
In this process, the soldering iron is used to heat the part of the board where desoldering must be applied and then a device is placed to suck or remove the unwanted component. It is important to note that a soldering iron ranging between 15W-30W must be used, as higher power can damage the board and also the components with excess heat.
6. Using a multimeter

You can also read our tutorial on how to use a multimeter for continuity.
A multimeter is an important tool for measuring voltage, current, resistance and continuity of a circuit. It is also used to test a battery and troubleshoot problems found in an electrical device. Basically, there are three parts of a multimeter, including a screen (for the digital type), selection button, and some ports.
Additionally, the types of probes available for this tool also vary, such as alligator clips, IC hooks, test probes, and tweezers. These devices are available in a wide range, from low-cost ones with basic features to expensive ones with advanced features such as automatic shutdown and auto-scaling capabilities.
7. Hot glue guns
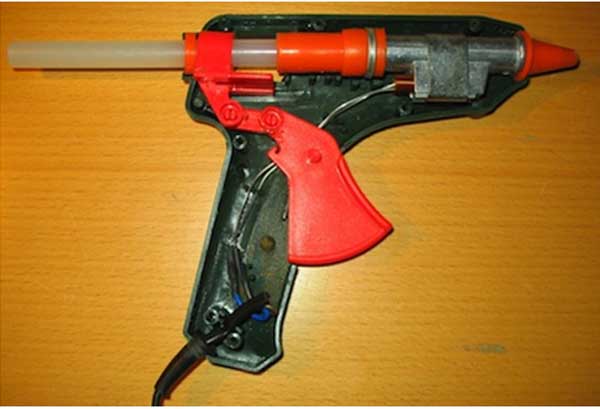
Hot glue guns are very useful in electronic projects whenever there is a need to glue certain components together. These guns contain plastic which acts as an insulator and therefore reduces the chance of a short circuit. It is available at a low cost and is easy to use.
The kit provides a gun and some glue sticks that are inserted into the gun. After that, when the trigger is pulled, hot glue flows from the nozzle. However, because of the heated glue, it is important to be careful as excess heat can damage the board and components. Another important thing is to keep the nozzle clean, removing any glue residue with the help of aluminum foil.
8. Liquid electrical tape

It is a fluid rubber compound used mainly when the insulation of a wire is broken. It prevents moisture from entering the area and is quite easy to apply. Before using it, you need to make sure that the place is completely free of moisture and that there are no cracks or loose parts.
To use this tape, simply stir the liquid and spread it in the desired location with the help of a brush. It is important to highlight that 30% of its compounds are volatile and therefore it should not be near any type of open flame. It's a great replacement for electrical tape and heat shrink tapes in tight enclosures.
9. Test

In addition to measuring voltage, current and resistance; There are several stages in which it is necessary to carry out tests to make sure that everything is going well in the project. Initially, the continuity test is performed in the Off position to ensure that one point on the board is connected to another point. It is also useful in detecting a short circuit condition.
Subsequently, the multimeter is used to measure the voltage and current at the desired points on the board. After that, the power is turned on and the code is tested for errors by determining the readings in the form of 0 and 1. In general, there are different phases depending on the complexity of the project, in which tests must be carried out until everything starts. working according to plans.
10. Working with yarn

When carrying out electronic projects, you will come across situations where you have to work on wires, cutting and stripping them. For this, there are several tools available on the market, but it is important to select a suitable tool so that no damage is caused to the components or circuit. Following is the list of wire strippers you can choose from.
11. Project power source

12. Ensuring security

Ensuring security is always important, regardless of the type of project and level of user experience. However, beginners need to pay special attention, as they do not have experience in handling situations. So, make sure you follow the following tips for this
• Wear safety glasses and gloves when the situation requires it.
• Make sure the power is off before working on the circuit.
You can read our blog and articles section for more topics on electronic engineering, industry and technology.


