
MicroPython is one of the best microcontroller firmware that supports a variety of embedded platforms. WiFi development boards like ESP8266 and ESP32 are among the ports supported by MicroPython. With MicroPython, it is extremely simple to implement high-level IoT applications. MicroPython has extensive support for network programming along with implementing all basic hardware functions. It combines low-level hardware support with high-level programming capabilities, which embedded C-based microcontroller ecosystems often lack. Plus, Python syntax makes embedded programming super simple, clean, and precise.
In this project, we will develop an online weather station configured in ESP8266/ESP32. The project uses ESP8266 as a microcontroller, obtaining sensor readings from the DHT-11 and, at the same time, benefits from MicroPython's network programming functions to connect and operate within an IoT network. This weather station works within the confines of a wireless LAN and transmits temperature and humidity as a functional TCP server within the network.
Prerequisites
Before proceeding, you must have configured uPyCraft IDE or Thonny IDE as your software development environment. Additionally, you must have loaded the MicroPython firmware for ESP8266/ESP32. You can find a guide for both tasks at this link. To do this project, you must know how to connect ESP8266/ESP32 to a WiFi network using MicroPython. You also need to know how to configure the ESP8266/ESP32 as a MicroPython TCP server.
Required components
- ESP8266/ESP32 x1
- USB cable to connect ESP to the computer
- DHT11 x1
- Breadboard x1
- Connecting wires/jumper wires
- Computer/Mobile x1
Circuit Connections
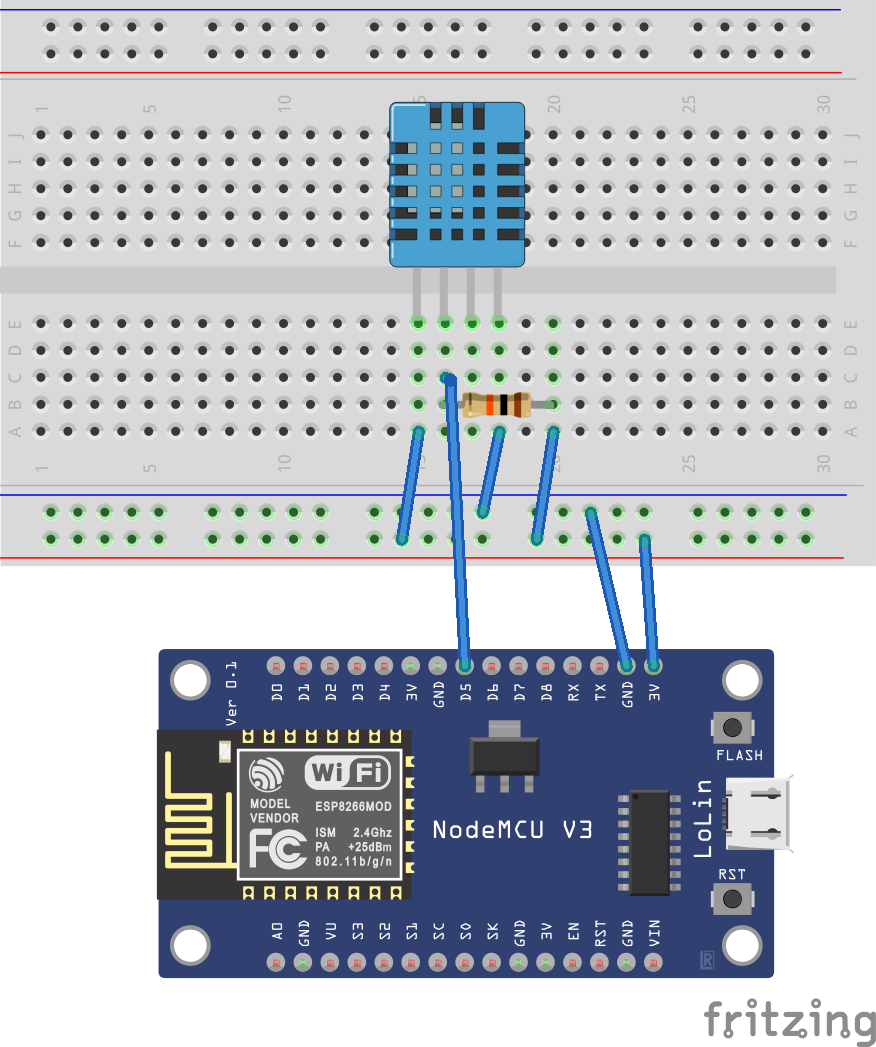
In this project, ESP8266/ESP32 acts as a TCP server hosting a simple HTML page. The DHT11 sensor is interfaced with ESP8266/ESP32. The board reads the temperature and humidity from DHT11 and publishes the readings to the hosted page. The circuit connections are only required to interface the DHT11 with the ESP8266/ESP32. DHT11 has the following pin diagram.

To learn more about the DHT11 sensor, check out this Arduino tutorial. To interface the DHT11 with the ESP8266, connect the VCC and GND pins of the DHT11 with the 3V and GND of the ESP8266. Connect the data pin of DHT11 with any GPIO of ESP8266. In this project, the data pin of DHT11 is connected to GPIO14 (D5) of ESP8266. The data pin is raised by connecting a 10K resistor between the data output and VCC.
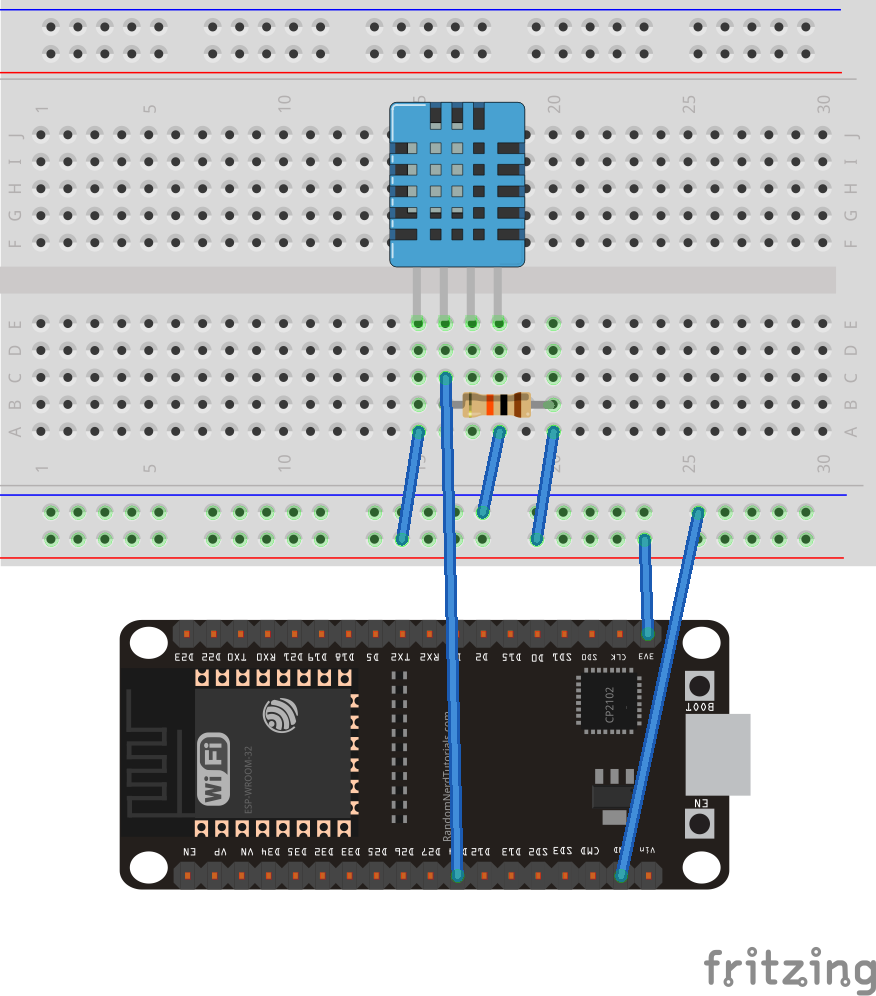
 If ESP32 is used, D14 is the GPIO14 in the ESP32. ESP32 will have the following circuit connections.
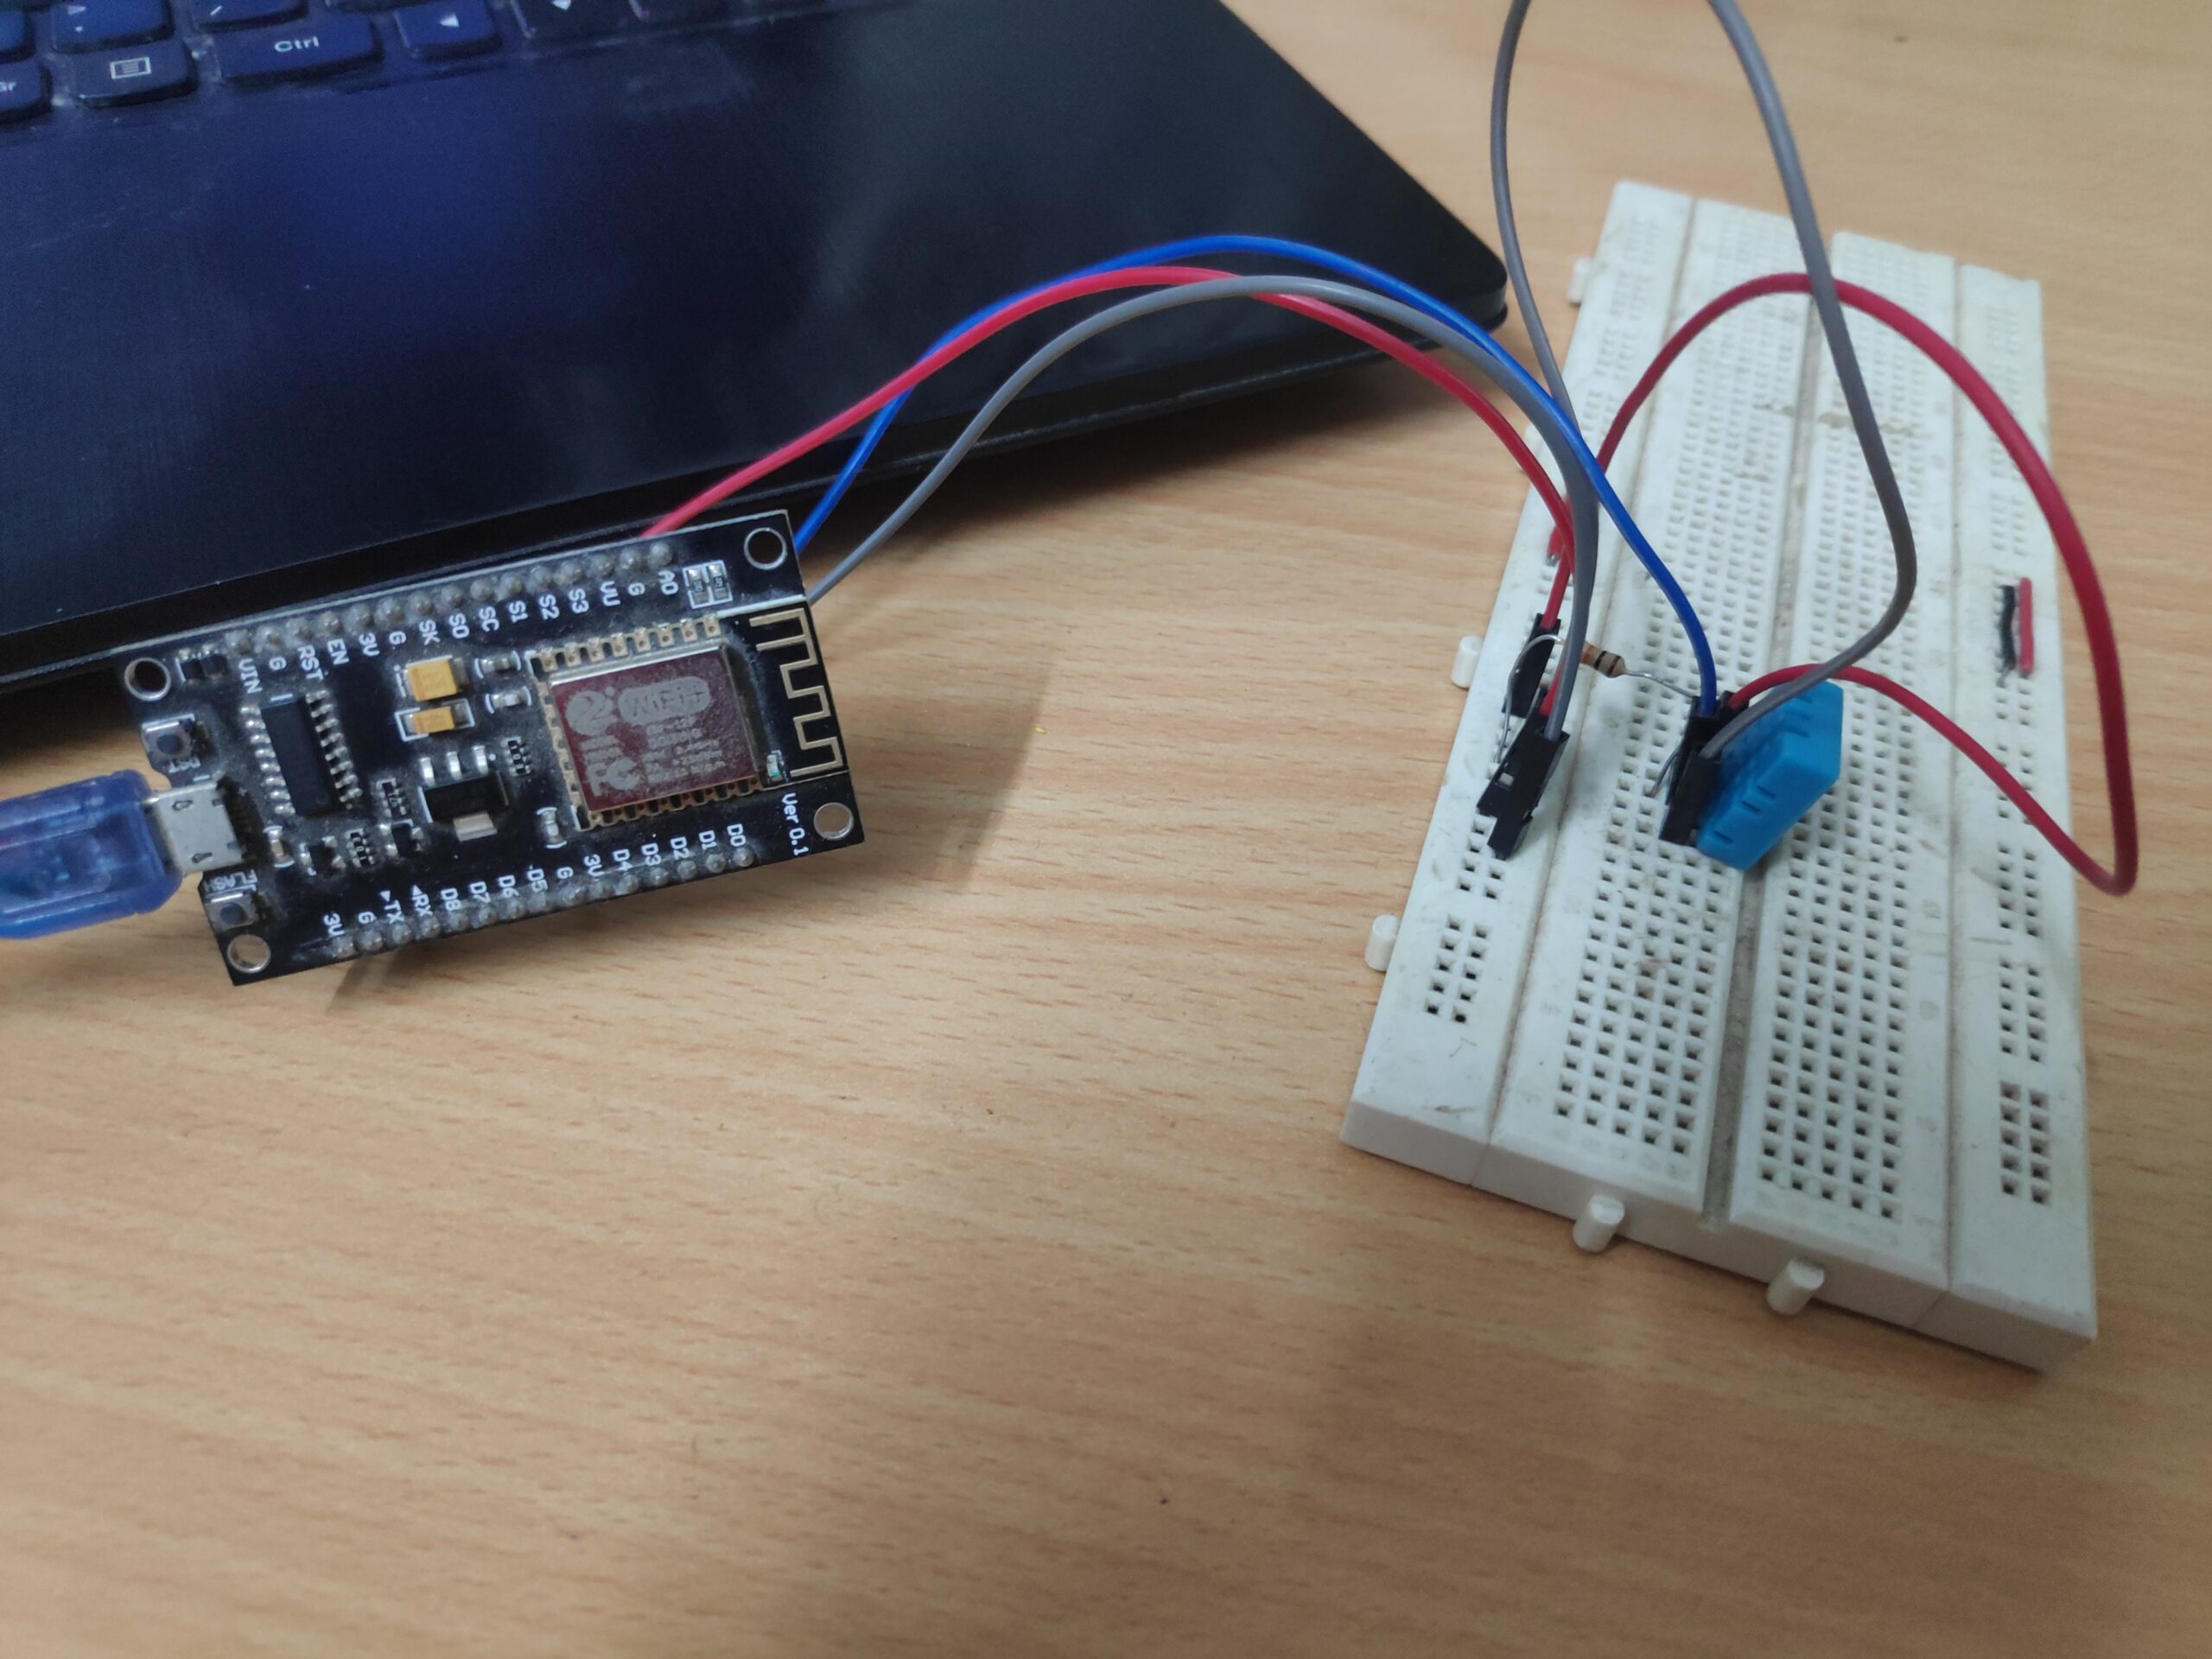
 After the circuit connections, the ESP8266 TCP server would look as follows.
MicroPython Script
How the project works
This ESP8266/ESP32-based online weather station reads temperature and humidity from the DHT11 sensor and publishes the readings to a web page in real time. The page is hosted by the ESP8266/ESP32 itself, for which the board is configured as a TCP server. The page can be accessed by any device, computer or cell phone that has a browser to access the internet via the HTTP protocol. The web page is hosted locally on the wireless LAN, so only devices connected to the same WiFi connection can access the web page.
The operation of the project is simple. The board reads the temperature and humidity from the DHT11 using MicroPython's built-in DHT module. The board connects to an available WiFi connection using the MicroPython network module. To host a web page and operate as a TCP server, the MicroPython socket module is used. ESP8266/ESP32 reads temperature and humidity and embeds the readings into the web page. The web page is returned as an HTTP response to any device accessing the localhost IP address.
The code
The code starts with importing a Usocket module. If ausocket module is not available, the default socket module is imported. Then the network module, machine module pin class and DHT module are imported. The network module is used to connect to a WiFi connection. The machine module pin class is used to interact with the DHT11 sensor. The dht module is used to obtain readings from DHT11. The esp module is imported and operating system-level errors are suppressed by calling the esp.osdebug(None) method. The gc module is imported and garbage collection is enabled by calling the gc.collect method. This frees up microcontroller resources (RAM) so variables and objects are not used.
The SSID and network key of the available WiFi connection are stored in the SSID and password variables. You will need to replace the WiFi SSID and password with the SSID and network key of your own WiFi connection in the following lines of code.
ssid = 'SSID'
password = 'PASSWORD'
A network.WLAN class object is instantiated, configuring the ESP8266/ESP32 as a WiFi station. The ESP8266/ESP32 as a WiFi station is activated by calling the station.active method. The card is connected to an available WiFi connection by calling the station.connect method. The connection to the WiFi network is checked by calling station.isconnected . After a successful connection to the WiFi network, a message is printed to the console and IP level configuration parameters are also printed to the console by calling station.ifconfig method. The first IP level parameter printed on the console is the IP address of the ESP8266/ESP32 station.
A variable sensor is declared to instantiate the DHT class object. The temp and hum variables are declared to store temperature and humidity readings. A user-defined function read_dht is defined to obtain temperature and humidity readings from DHT11. The function calls the Measure method to obtain readings from the DHT11 sensor. It uses the temperature and humidity methods to obtain temperature and humidity values respectively as float or integer. Temperature and humidity values are returned in global variables temp and hum, respectively.
A user-defined function web_page is defined to return an HTML page with temperature and humidity values stored in the temp and hum global variables embedded in the HTML page. An object of the socket class is instantiated and configured to use IPv4 address and TCP for network layer protocol. The object is bound to the localhost address using the bind method and enabled to listen to TCP clients by calling the listen method.
An infinite while loop starts. In the loop, the ESP8266/ESP32 TCP server is configured to accept HTTP requests from TCP clients on the same WiFi network by calling the s.connect method. HTTP requests from a connected TCP client are stored in a request variable by calling the conn.recv method. The message containing temperature and humidity readings is printed to the console, and the web page containing the embedded temperature and humidity values is returned as a response by calling the conn.send and conn.sendall methods. After returning the web page as a response, the connection to the TCP client is explicitly closed by calling the conn.close method.
Result
The web page with temperature and humidity readings from the DHT11 sensor is accessed by typing the IP address returned by the station.ifconfig method in the address bar of any browser. The ESP8266/ESP32 TCP server operating as an online weather station returns a personalized web page in response to an HTTP request from your computer/mobile browser. The following screenshot shows the page returned by the ESP8266/ESP32 online weather station.

Remember that the ESP8266/ESP32 weather station hosts the page locally, so the page can only be accessed by devices connected to the same WiFi connection. ESP8266/ESP32 is using the localhost IP address as the web server IP address.


