
Learn how to master Angular routing with our easy-to-follow tutorial! From basic concepts to advanced techniques, we have you covered. Start building better web apps today.

In a fast-paced world, delivering an engaging and responsive user experience is vital. Angular is a widely used front-end framework developed and maintained by Google. Over the years, Angular has gained popularity since its inception due to a vast feature set and robust community support. Routing is a crucial aspect of modern web applications that aids in dynamic user interfaces.
According to the State of JS 2021 Survey , Google's Angular framework had 48.8% usage as the second most popular web framework. Angular offers powerful routing features that make it easy to create complex navigation paths and manage dynamic content.
Without further ado, let's dive into the Angular router!
Basics of Angular Routing
Routing refers to navigation between different pages or views in a single-page application, a critical feature of Angular development services. In a SPA, the application content is loaded dynamically without the need to refresh the page. Angular, as part of its development services, uses the built-in router to handle routing in its applications. The Angular router maps URLs to components. Whenever a user clicks a link, the router returns the default route mapped to the URL and renders the appropriate application component.
The route configuration is usually defined in the app-routing.module.ts file. Each route has a path that maps to a component. For example, a route to a dashboard page would have the path /dashboard and be mapped to DashboardComponent.
The Angular router matches the URL path with the defined routes and loads the associated component at the router output. The router output acts as a placeholder where the content of the currently selected component is displayed.
Angular routing consists of several core components that work together to enable navigation within the application. These components include:
| Component | Description |
| Router Module | Provides policies and services required for routing. |
| Routes | These are individual routes defined in the app. Each route has a path linked to a component. |
| RouterOutlet | This is a directive used to define where the routed component should be displayed in the application. It is placed in the application component. |
| RouterLink | It is used to define links that trigger routing within an application. |
| Router | Provides methods for navigating between routes within an application. |
| Route activated | This is a service that provides information about the currently activated route. |
Routing Module
Developers can modularize the routing configuration in an application using the Routing Module. To create a router module you can use the Angular CLI to generate a new module with the routing flag.
The following command is used to generate the new module.
ng generate module app-routing --routing
After creating the Routing Module, you need to import it into the application module. Next, you will have to define the routes for the application by creating an array of routes. Each Route object in the routes array defines a path and component to render.
Once the routes are defined, you will have to configure them by calling the RouterModule's forRoot method. It returns a configured RouterModule, which must be imported into the application module.
Configuring Angular Routing

Let's look at implementing an Angular router in a real-world application. Imagine you are building a website for a restaurant that has multiple pages. It has a home page, a menu page and a contact page. You want to use an Angular router to display appropriate Angular components. By doing this, users can easily navigate between pages.
Prerequisites
To implement routing in Angular successfully, you must have the following:
- Node.js: The latest version of Node.js on your machine
- A code editor: Any IDE that supports Angular
- npm: Node Package Manager to install required dependencies
- Angular CLI: The latest version that provides Angular core
Create a new project
Create a new Angular project using the Angular CLI by running the command in your terminal.
ng new restaurant-website
You can now see a package.json file in your project directory, similar to the one below:

Note that the dependency versions are specified in the file above. These were the versions at the time of creating this guide.
Implementing Routing Module
In the app src file app.module.ts and import the RouterModule and Routes modules to implement application routing.
import { RouterModule, Routes } from '@angular/router';
Now add RouterModule to the imports array in the @NgModule decorator.
 @NgModule({
 imports: (
 RouterModule.forRoot(routes)
 ),
 ...
 })
Create a new file called app-routing.module.ts in the src app folder and add the following code for route configuration.
 import { NgModule } from '@angular/core';
 import { Routes, RouterModule } from '@angular/router';import { HomeComponent } from './home/home.component';
 import { MenuComponent } from './menu/menu.component';
 import { ContactComponent } from './contact/contact.component';
 export const routes: Routes = (
{ path: '', component: HomeComponent },
 { path: 'menu', component: MenuComponent },
 { path: 'contact', component: ContactComponent }
 );

 @NgModule({
 imports: (RouterModule.forRoot(routes)),
 exports: (RouterModule)
 })
 export class AppRoutingModule { }
Create three new components for the home page, menu page and contact page. Run the following commands:
ng generate component home
ng generate component menu
ng generate component contact
In the app.component.html file, add the RouterOutlet component to display the contents of the current route.
<router-outlet></router-outlet>
Open the home.component.html file, add the RouterLink directive to create a link to the menu page. This would be the first route when the application loads.
 <h2>Abc Restaurant</h2>
 <p>Welcome to our restaurant!
 We specialize in delicious food and great service.<br />
 Come visit us for a meal you won't forget.</p><br />
 <a routerLink="/menu">View Our Menu</a>
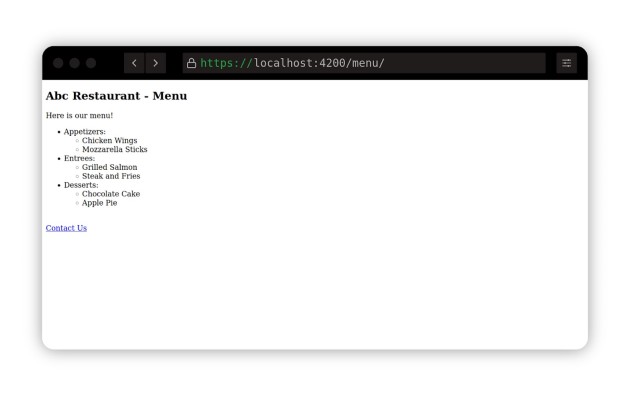
In the menu.component.html file, add the RouterLink directive to create a link to the contact page.
 <h2>Abc Restaurant - Menu</h2>
 <p>Here is our menu!</p>
 <ul>
 <li>Appetizers:
 <ul>
 <li>Chicken Wings</li>
 <li>Mozzarella Sticks</li>
 </ul>
 </li>
 <li>Among:
 <ul>
 <li>Grilled Salmon</li>
 <li>Steak and Fries</li>
 </ul>
 </li>
 <li>Desserts:
 <ul>
 <li>Chocolate Cake</li>
 <li>Apple Pie</li>
 </ul>
 </li>
 </ul><br /><a routerLink="/contact">Contact Us</a>
In the contact.component.html file, add the RouterLink directive to create a link back to the home page.
 <h2>Abc Restaurant - Contact</h2>
 <p>Address: 123 Main Street<br />
 Phone: 555-1234<br />
 Email: (email protected)<br />
 Hours of operation: Monday-Saturday, 11am-10pm</p><br />
 <a routerLink=" to Home</a>
Launch the application using the following command ng serve –open and navigate between the home, menu and contact pages using the links created with RouterLink.
This is what the app looks like in the browser:
Home page

Menu page
Contact page

If you look at your browser's address bar, you'll see that each page has a different URL path segment.
Advanced Angular Routing Concepts
Let's look at some advanced routing concepts in Angular.
1. Nested routes (child routes)
Nested routing allows developers to define a route within a route. The main purpose of this is to create a hierarchical navigation structure that properly shows the hierarchy of various components within the application. This makes navigation easier and makes router configuration more modular.
To configure child routes when creating routes, developers must first define a parent route. This parent route then contains the child routes. They are nested within the parent route using the children property. Let's look at the example below to see how this is done.
 const routes: Routes = (
 {
 path: 'products',
 component: ProductsComponent,
 children: (
 { path: ':id', component: ProductDetailsComponent },
 { path: '', component: ProductListComponent }
 )
 }
 );
2. Route Guards
Route Guards allow developers to control access to routes based on certain conditions. By establishing conditions, additional security and unauthorized access on certain routes is created.
There are three main types of route guards:
- canActivate: determines whether a route can be activated.
- canDeactivate: determines whether a route can be deactivated.
- canLoad: determines whether a route can be lazy loaded.
Let's look at the example below to see how to implement it.
 import { Injectable } from '@angular/core';
import { CanActivate, ActivatedRouteSnapshot, RouterStateSnapshot, UrlTree, Router } from '@angular/router';
 import { Observable } from 'rxjs';@Injectable({
 providedIn: 'root'
 })
 export class AuthGuard implements CanActivate {
 constructor(private router: Router) {}
 canActivate(
 next: ActivatedRouteSnapshot,
 state: RouterStateSnapshot): Observable<boolean UrlTree> Promise<boolean UrlTree> boolean UrlTree {
 const isLoggedIn = true; // Check if user is logged in
 if (isLoggedIn) {
 return true;
 } else {
 return this.router.parseUrl('/login');
 }
 }
 }
3. Lazy loading
Lazy loading allows developers to load modules on demand rather than loading them all at once. This helps to decrease the initial loading time of the application and therefore loads only the necessary modules at a time.
To implement lazy loading modules in angular, you will need to create a resource module for each resource in the application. Then the routes will be configured with the loadChilden property. Let's look at an example.
 const routes: Routes = (
 { path: '', component: HomeComponent },
 { path: 'customers', loadChildren: => import('./customers/customers.module').then(m => m.CustomersModule) },
 { path: 'orders', loadChildren: => import('./orders/orders.module').then(m => m.OrdersModule) },
 { path: '**', component: PageNotFoundComponent }
 );
4. Route parameters
Route parameters allow developers to pass data between components and routes. This allows dynamic navigation by providing context to the component using the parameter.
Route parameters are defined using the syntax : in the route path and can be mandatory or optional depending on the need. For example, /products/:id defines a route with a required id parameter.
Developers can use ActivatedRoute to access a route parameter. This provides access to the current route and its parameters. Route parameters are stored in the params property of the ActivatedRoute object.
Let's look at an example.
 const routes: Routes = (

 { path: 'products/:id', component: ProductDetailsComponent }
 );// ProductDetailsComponent
 import { Component, OnInit } from '@angular/core';
 import { ActivatedRoute } from '@angular/router';
 @Component({
 selector: 'app-product-details',
 templateUrl: './product-details.component.html',
 styleUrls: ('./product-details.component.css')
 })
 export class ProductDetailsComponent implements OnInit {
 productId: string;

 constructor(private route: ActivatedRoute) { }

 ngOnInit {
 this.route.params.subscribe(params => {
 this.productId = params('id');
 });
 }
 }
In the example above, the ProductDetailsComponent accesses the id parameter using the ActivatedRoute service and subscribes to changes using the observable parameters.
Best Practices for Angular Routing

Here are some best practices you should follow:
1. Organizing Routes and Modules
You should separate the routing module for each feature module to keep the code organized and easier to maintain. To improve the application flow, you can group related routes together. You must also implement lazy loading to load modules on demand. This increased the initial app load time. Additionally, it's important to use a naming convention for your routes that makes them easy to understand and follow. This helps avoid confusion for you and other developers who may be working on the project.
2. Handling route errors and 404 pages
You must use the wildcard route ** to capture all routes that do not match. To make the user experience more seamless, you can also create a custom component to display a 404 page when a route is not found and use the Router.navigate method to redirect the user to the custom 404 page.
3. Improving performance with route preloading
In route preloading you can use the PreloadAllModules strategy. This strategy preloads all modules in the background. Another strategy you can use is SelectivePreloadingStrategy. It only preloads specific modules that are likely to be used, thus reducing initial load time. Additionally, to avoid preloading modules that the user does not have access to, you can use the canLoad protector.
By following the best practices above, you can create an organized and optimized Angular application.
Testing angular router
Unit testing Angular routes means that you should test the routing configuration and verify that the route is navigating correctly. Integration Testing includes testing the behavior of components during navigation.
RouterTestingModule is used to implement unit tests. Let's look at an example implementation.
 import { RouterTestingModule } from '@angular/router/testing';
 import { TestBed } from '@angular/core/testing';
 import { Router } from '@angular/router';
 import { AppComponent } from './app.component';describe('AppComponent', => {
 let router: Router;
 let fixture;
 beforeEach( => {
 TestBed.configureTestingModule({
 imports: (RouterTestingModule.withRoutes( )),
 declarations: (AppComponent)
 });

 fixture = TestBed.createComponent(AppComponent);
 router = TestBed.inject(Router);
 });

 it('should navigate to the home route', => {
 spyOn(router, 'navigateByUrl');

 fixture.detectChanges;

 expect(router.navigateByUrl).toHaveBeenCalledWith("
 });
 });
To test the integration of your routes, you can use the Angular RouterTestingModule and the RouterOutlet component to verify that the expected components are loaded when navigating to a specific route. Let's look at the implementation.
 import { RouterTestingModule } from '@angular/router/testing';
 import { TestBed } from '@angular/core/testing';
 import { Router } from '@angular/router';
 import { AppComponent } from './app.component';
 import { HomeComponent } from './home/home.component';
 import { MenuComponent } from './menu/menu.component';
 import { ContactComponent } from './contact/contact.component';describe('AppComponent', => {
 let router: Router;
 let fixture;

 beforeEach( => {
 TestBed.configureTestingModule({
 imports: (
 RouterTestingModule.withRoutes((
 { path: '', component: HomeComponent },
 { path: 'menu', component: MenuComponent },
 { path: 'contact', component: ContactComponent }
 ))
 ),
 declarations: (
 AppComponent,
 HomeComponent,
 MenuComponent,
 ContactComponent
 )
 });

fixture = TestBed.createComponent(AppComponent);
 router = TestBed.inject(Router);
 });

 it('should load the home component when navigating to the home route', => {
 fixture.detectChanges;

 router.navigate((''));

 fixture.detectChanges;

 const compiled = fixture.debugElement.nativeElement;
 expect(compiled.querySelector('app-home')).toBeTruthy ;
 });

 it('should load the menu component when navigating to the menu route', => {
 fixture.detectChanges;

 router.navigate(('/menu'));

 fixture.detectChanges;

 const compiled = fixture.debugElement.nativeElement;
 expect(compiled.querySelector('app-menu')).toBeTruthy ;
 });

 it('should load the contact component when navigating to the contact route', => {
 fixture.detectChanges;

 router.navigate(('/contact'));

 fixture.detectChanges;

 const compiled = fixture.debugElement.nativeElement;
 expect(compiled.querySelector('app-contact')).toBeTruthy ;
 });
 });
Conclusion
Mastering Angular routing is an essential skill for any modern Angular web developer, including those involved in third-party Angular software development. Because client-side routing is the norm, it is critical to understand how to create efficient, dynamic routing in your applications. Angular routing provides a flexible and powerful toolset for all types of applications and use cases, making it particularly beneficial for outsourced Angular software development projects.
There are many resources available for further learning, including official Angular documentation and online tutorials. It is important to hire a company that offers high-quality Angular development services for your Angular project. Before doing this, it is also important to know whether React or Vue is the best option for your project, instead of Angular, as each project has different needs.
If you liked this article, check out:
- Angular Project Structure: Best Practices for Files and Folders
- Dependency Injection in Angular: A Comprehensive Guide
- Mastering Angular Data Binding: A Comprehensive Guide for Experts
- Top Angular UI Component Libraries and Frameworks
- What is Angular and why should your company consider it for development?
- Today's best Javascript frameworks
- Angular for business
- What is the best framework for web development?