This tutorial explains how to automate a bottle of hand sanitizer. Disinfectants can be found for use in many public places (and especially recently, due to the COVID-19 pandemic). However, each press on the lid leaves various types of germs. One way to avoid this is to automate the bottle so that users never have to touch the cap to receive the sanitizer.
The idea is simple: whenever a user places their hand under the disinfectant bottle, a small amount of liquid disinfectant is automatically dispensed. This is similar to public hand dryers. Whenever hands are placed under it, hot air is activated to dry them.
To detect movement, two types of sensors are currently available: passive infrared (PIR) and ultrasonic. Ultrasonic sensors are best suited for this application. Its range is up to one meter and we can adjust it according to our needs.
For this project, we will use the HC-SR04 ultrasonic sensor. HC-SR04 is a popular ultrasonic sensor that can be connected to a variety of microcontrollers. Let's use the Arduino Uno.
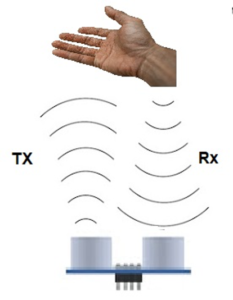
A typical ultrasonic sensor object detection scheme is shown here:

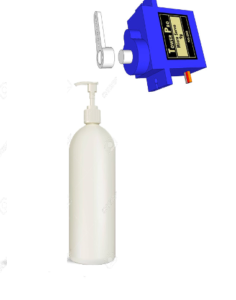
I decided to use a servo motor for this project. My choice is the Tower Pro SG90 servo motor, which can produce enough torque to press the bottle cap down.
The servo motor arm will rotate 90 degrees for one second whenever an object is detected by the ultrasonic sensor. It will press the lid down and release it after a second. That's enough time to dispense just a few drops of hand sanitizer.
When assembling this project, make sure the bottle and servo motor are secured and placed securely in a package or wrapper. Motor placement and angle are very important. Positioning errors will result in a defective device.
It's important to note that you can use a solenoid instead of a servo motor. However, the solenoid consumes more energy, so I chose a servo motor for the project.
A circuit diagram of the project is shown below. The ultrasonic sensor is connected to pins 2 and 3 of the Arduino. The servo motor is connected to the PWM pin of the Arduino.
The entire system is powered by the Arduino power output – its regulator can meet the power requirements of the entire circuit. This is important because the servo motor consumes a lot of power. But since we are not carrying any weight (just pressing the lid), its power consumption will not reach the circuit's critical limit.

Project code
I used the servo library in the code. Ultrasonic library can also be included for greater feasibility. For the ultrasonic sensor in this project, I wrote my own code.
The ultrasonic trigger pin is connected to Arduino pin 2 and the echo pin is connected to pin 3. The servo motor PWM pin is connected to Arduino PWM pin 9.
Function Ultra reads the object's status by converting time into distance. If an object is present in front of the ultrasonic sensor and its distance is less than 10 cm, it will rotate the servo arm (or in our case, press the sanitizer cap).
Ideally, a single press will result in enough disinfectant for each user. But if multiple presses are required, simply modify the code to press the lid at intervals, including some delays between additional lid presses.

Let's DIY the project above: Where to buy parts?
- Arduino: Mouser
- Ultrasonic Sensor: Mouser
- Servo motor: Mouser
(tagsToTranslate)Arduino


