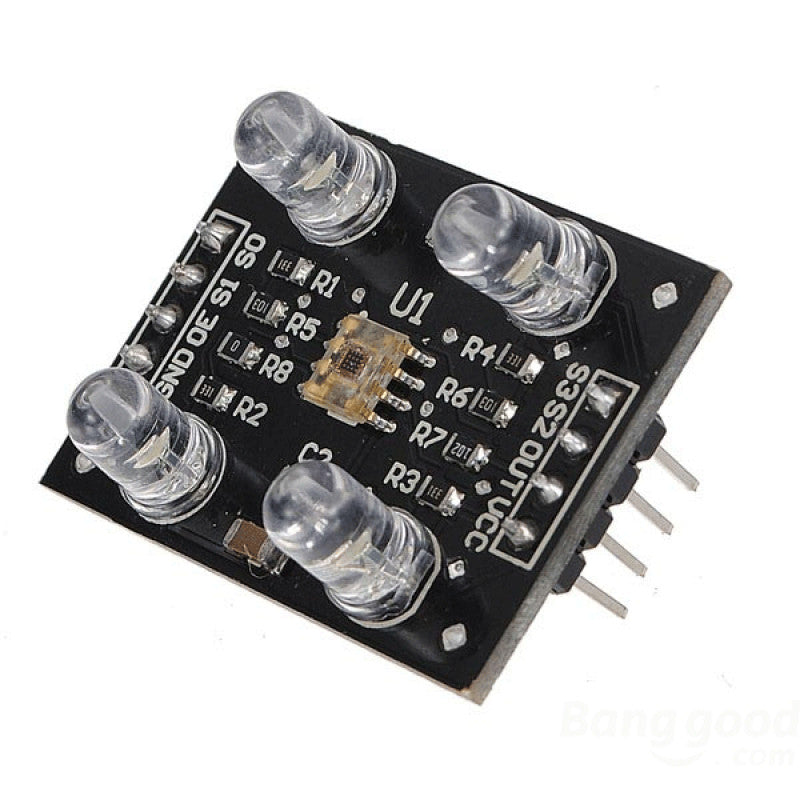
Color detection is the process of identifying and distinguishing colors in an image, video, scene, or object. Many embedded and robotic applications require this feature as it is useful for sorting, sorting, reading test strips, path determination, and more.
Two standard sensors used for color detection include TCS230 or TCS3200. The TCS3200 recognizes various colors based on their wavelength and is easy to interface with any microcontroller using GPIO. The TCS230 is slightly more sensitive, detecting a narrower range of colors with greater accuracy.
In this project, we will interface the TCS230/TCS3200 sensor (either one can be used) with the Arduino Mega, calibrate the sensor and derive the RGB values for specific colors.
Required components
- Arduino UNO/Arduino Mega x1
- TCS230/TCS3200 x1 color sensor
- Connection wires/DuPont
Color recognition sensors
The TCS230 and TCS3200 sensors detect and measure the intensity of light at different wavelengths to determine the color of an object. They can detect multiple colors using an array of photodiodes with different filters.
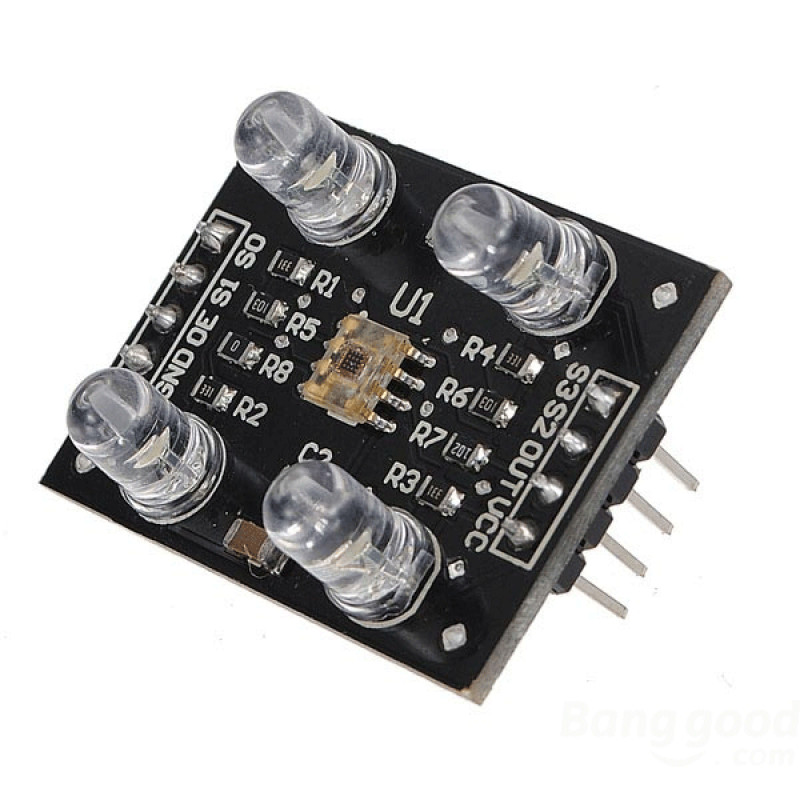
The TCS230/TCS3200 contains four white LEDs that illuminate the object in front of you.
Typically, color recognition sensors have four channels: red, green, blue and transparent (no filter). The TCS3200 has a photodiode array with four filters. In total, it has 16 photodiodes with red, green and blue filters that are sensitive to red, green and blue wavelengths; and has 16 photodiodes without filters.
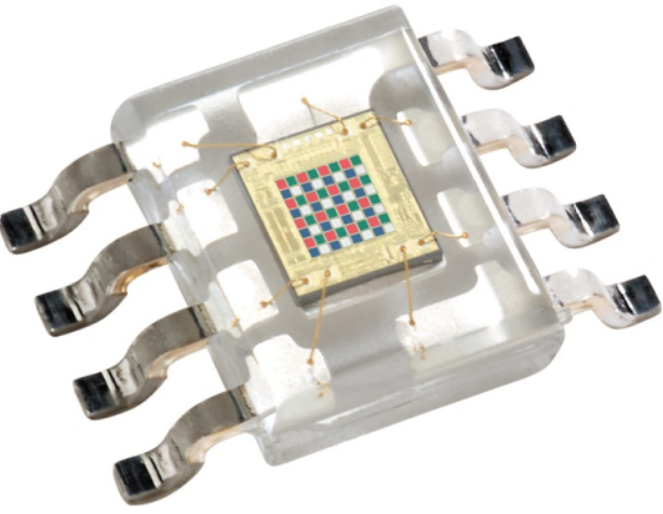
These sensors control the integration time during which they collect light. This allows them flexibility in adapting to different lighting conditions for greater color recognition accuracy. TCS230/TCS3200 provide analog output signals proportional to the light intensity of each color channel. They also have a frequency-to-voltage converter that converts the color information into a voltage signal, which can be easily measured.
Additionally, the TCS230/TCS3200 uses a modulation and filtering technique to eliminate interference from ambient light, further improving color detection accuracy. By selectively choosing photodiode filter readings, color strength can be identified.
These sensors operate at a voltage of 2.7 ~ 5.5 V DC and have the pin diagram below.
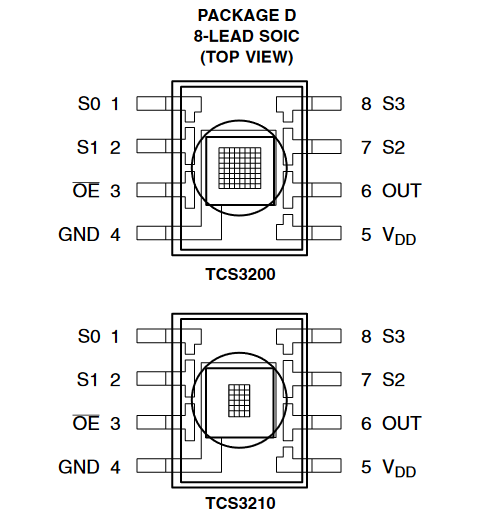
TCS230/TCS3200 pin configuration description:

Pins S2 and S3 are used to read the light intensity of a specific color. The photodiodes are connected in parallel, so setting S2 and S3 to LOW and HIGH in different combinations allows the photodiodes to be matched to the corresponding colors.
The colors are selected according to the following table.
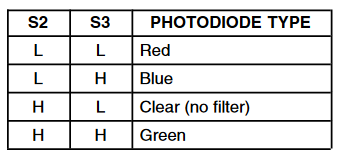
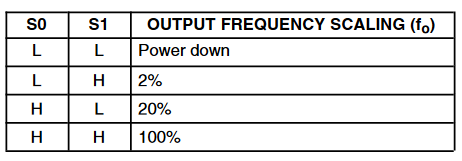
Pins S0 and Si scale the output frequency to 100%, 20%, or 2% of preset parameters. Output scaling optimizes sensor readings for different microcontrollers or frequency counters.
When using Arduino, 20% is typical. Sizing using pins S0 and S1 is done according to the following table.
Circuit Connections
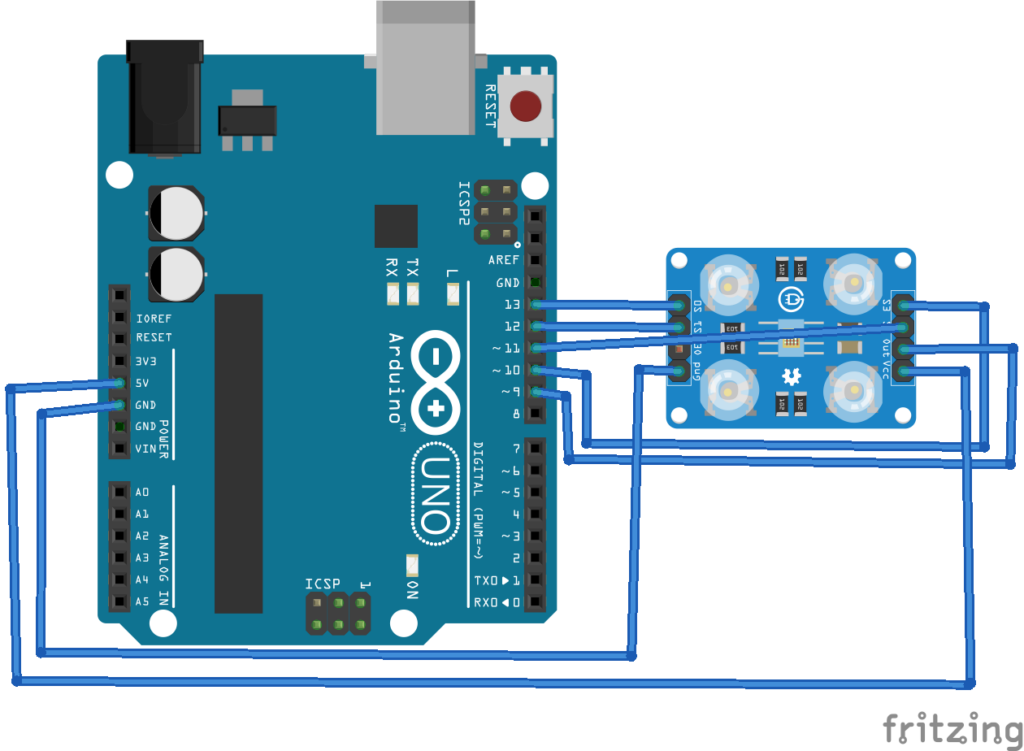
For this project, we will connect the TCS230/TCS3200 color sensor to the Arduino Mega as follows:
- Connect S0, S1, S2, S3 and output pins of TCS230/TCS3200 with GPIO13, GPIO12, GPIO11, GPIO10 and GPIO9 of Arduino respectively.
- Then, connect the VCC and GND pins of the TCS230/TCS3200 with the 5Vout and ground pins of the Arduino, respectively.
Arduino Sketch
How it works
The Arduino reads the light intensity of each color using the TCS230/TCS3200 sensor by choosing the red, green and blue channels one after the other. The “read” values are mapped to their appropriate calibrated values for an RBG color output. Please note that the RGB color value is only obtained after calibration.
The sensor is affected by ambient light. Therefore, color detection calibration is only possible after ambient light calibration. These RGB values do not correspond to true RGB color values, but they are a decent and valuable estimate for classifying or selecting objects.
Calibration
The TCS230/TCS3200 sensor must be calibrated in the same light in which it will be used. Print the colors red (#FF0000), green (#00FF00), and blue (#0000FF) on one sheet, along with a test color, as shown in the image below.
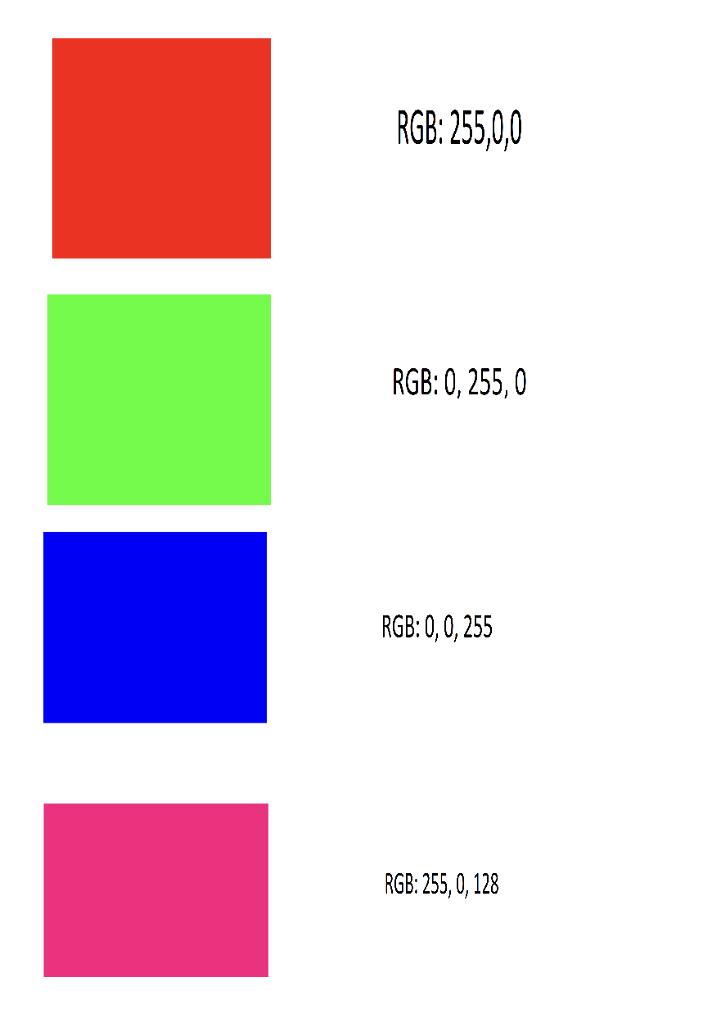
First, turn the sensor to “true red” and record the readings for the red, green, and blue channels. Repeat for the “true green” and “true blue” colors.
When the sensor is in true red color, the red channel frequency output will be at the lowest level. When true green or true blue, the frequency output will be at maximum for either color. The lowest frequency is mapped to 255 and the highest recorded frequency is mapped to 0.
After obtaining the minimum and maximum values for each color, map them onto the sketch using the map function. This has already been done in the sketch above. But you will need to do this based on the lighting in your room. This way, the sensor will be calibrated for the ambient light conditions under your project's operating conditions.
The code
The sketch begins by defining the pin assignments for the TCS230/TCS3200 color sensor. Next, the variables for storing the RGB values are declared. In the setup function, the pins connected to S0, S1, S2 and S3 are defined as digital outputs and the pin connected to TCS230/TCS3200 is defined as digital input. Pin S0 is set to HIGH and S1 is set to LOW – selecting a 20% scale, which is more suitable for Arduino. The baud rate for serial communication is set to 9600 bps.
In the loop function, the Arduino first selects the sensor's red channel by setting pins S2 and S3 to LOW. It reads the frequency of the red color, mapping its calibrated values using the map function. The red filter value is printed on the serial port. The Arduino then selects the green channel of the sensor by setting pins S2 and S3 to HIGH. It reads the frequency of the green color, mapping its calibrated values using the map function. The green filter value is printed on the serial port.
Finally, the Arduino selects the blue channel of the sensor by setting pin S2 to LOW and pin S3 to HIGH. It reads the frequency of the blue color, mapping it to its calibrated values using the map function. The value for the blue filter is printed on the serial port.
This provides an approximate RGB color value, which is useful when selecting or classifying objects.
Video demonstration

