Almost every device we use today – from smartphones, tablets, wearables and even many of our home appliances – connects to the Internet through a home (or office) WiFi network. Internet access for smart devices is typically managed through a web interface or mobile app.
Likewise, when we are away from home, we will access WiFi on our mobile devices by connecting to a specific network and entering the password. However, managing Internet access can be more challenging with self-built Internet of Things (IoT) devices. This is because these credentials are often hard-coded into IoT devices.
But what if a MicroPython port as simple as the ESP32 could serve as a universal WiFi manager? This would allow all IoT-connected devices (including our smartphones, laptops and wearables) to connect to random WiFi networks – without entering passwords every time.
A WiFi manager configured on the ESP32 will scan for available networks and store credentials for current and future use, saving time and energy.
Required components
- ESP32 or ESP8266 x1 board
Prerequisites
You must have loaded MicroPython firmware for ESP32/ESP8266 and installed uPyCraft IDE or Thonny IDE on your computer. Click here to learn how to install uPyCraft IDE and upload MicroPython firmware for ESP32/ESP8266.
Circuit Connections
There are no connections required. You just need to install and configure the ESP32/ESP8266 to work as a WiFi manager.
The MicroPython library
For this project, we will use the WiFi manager library built by Tayfunulu. It is available on Github through this link. The library source code is below.
To upload the WiFi manager library to ESP32/ESP8266, connect the ESP board to your computer via a Micro-USB cable. Open uPyCraft IDE and navigate to File->New. Copy the WiFi manager library source code to the new file and click the save button.
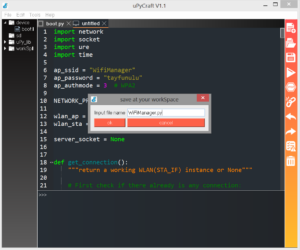
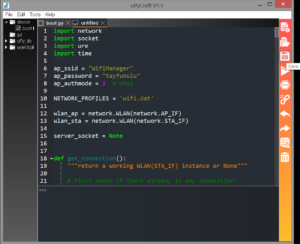 Name the new file 'WiFiManager.py' and save it by clicking OK.
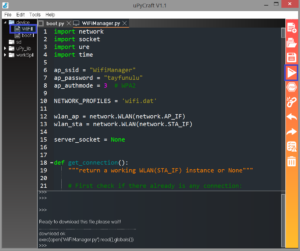
Click the 'Download and Run' button to upload the library to the ESP board.
 The MicroPython script
The WiFi manager library must be implemented in the main application code in MicroPython firmware. To do this, create a new file by navigating to File->New and save it as 'main.py.'
Copy the code below to main.py. Then upload it to the ESP board by clicking the 'Download and Run' button.
H how WiFi manager works
When the ESP board is initialized for the first time after uploading the code, it is defined as a WiFi access point. This point is seen as the 'WiFiManager', which can be connected to a computer or cell phone.
The password to connect to WiFiManager is 'tayfunulu'. The ESP WiFiManager password and SSID can be changed by modifying WiFiManager.py.
After connecting to WiFiManager, open your dashboard by accessing the IP address 192.168.4.1. Available WiFi connections will be displayed on the web page. Select a WiFi connection and enter your network key to configure the connection to the ESP card. Once the correct credentials are entered, the WiFi connection can be accessed by any device by connecting to WiFiManager.
The code
The application's main code imports the WiFiManager library. Available WiFi connections are checked by calling the WiFiManager.get_connection method. If there is no WiFi network available, the message “Unable to initialize network connection” will be printed on the console. Otherwise, WiFi connections will be accessible at 192.168.4.1.
When the ESP card first boots as an access point, it leaves a socket open – which can crash the ESP card. To avoid this, the socket connection is managed by a 'try-except' exception handler.
The application's main code then hosts the web page for connecting to an available WiFi connection, as well as a web page that controls the LED on the ESP board.
Testing the WiFi manager
After loading the main application code, reset the ESP board by pressing the RESET button. The ESP WiFiManager will be activated and a message will be printed on the MicroPython console.
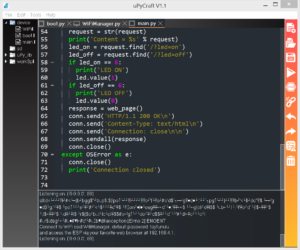
Then open WiFi settings on your computer or smartphone and connect to the WiFiManager network.
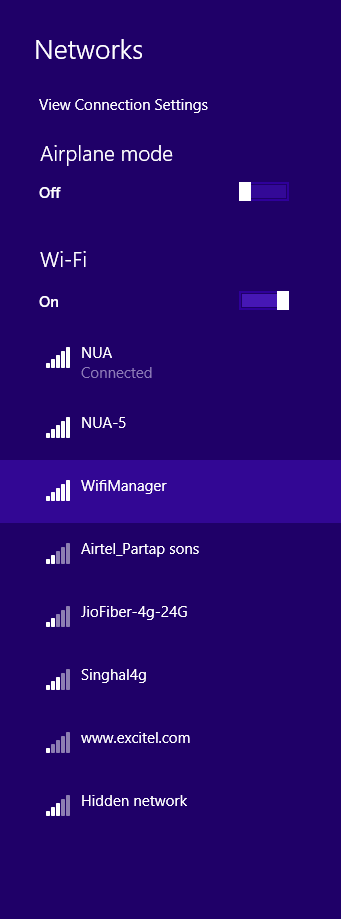
After connecting to the WiFiManager network, open the URL 192.168.4.1 in a web browser. You will see available WiFi network connections. Select one and enter your password. Then save the credentials in WiFiManager by clicking the submit button.
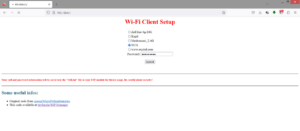
The ESP card is now connected to the WiFi network. Any other devices you have can also directly access all available WiFi networks by connecting to WiFiManager without entering a password or hardcoding credentials into the application code.
Conclusion
The WiFi manager built into this project saves time by making WiFi easily accessible to all your smart devices including laptops and smartphones. This way, you will no longer need to enter a username and password for each one; nor will you need to hardcode WiFi credentials on each device. A WiFi manager configured on the ESP32 searches for available networks and stores credentials for current and future use.

