Gardening is a favorite pastime for many – and a healthy one at that. In fact, a recent study found that even a small vegetable garden offers mood-enhancing qualities similar to those provided by physical exercise.
However, one of the main concerns for many new or novice gardeners is how often and how much they should water their plants. Others may need to leave their garden unattended for a period of time and require assistance with watering. So, what if it were possible to ensure that plants were watered automatically and at the same time guarantee the ideal amount, at the ideal time?
Well… with the right system in place, this is possible.
The following project works by automatically watering plants when needed. The circuit is built using a soil moisture sensor and Arduino. As its name suggests, this sensor tracks the moisture content of the soil and, via Arduino, a pump that supplies water to the plants is controlled.
To avoid over- or under-watering, the soil is never completely dry or completely wet. On the contrary, the humidity level is maintained at a reasonable level. Personally, I have successfully built and used this system in my vegetable garden, which has a few potted plants.
Soil moisture sensors are placed in the pots and a mini submersible water pump (12 V) is placed inside a water tank. Its water output is made into the pots through a nozzle that has drip irrigation. When the soil in any of the pots begins to dry, the pump automatically turns on and the plant is gently watered.
As soon as the soil receives an adequate level of moisture, the pump automatically turns off. This system ensured that all my plants were properly watered, whenever necessary and without my help!
If you want a similar system for your vegetable garden, simply follow the instructions below. First, you will need to collect the necessary items to get started.
What is necessary…
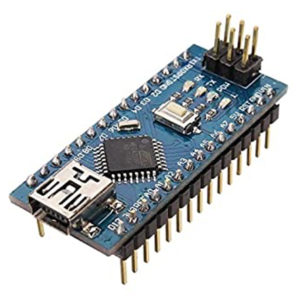
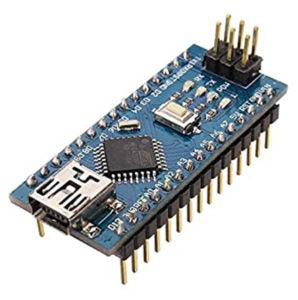
1. Arduino NANO

2. A soil moisture sensor

3. An Arduino relay module

4. A 12 V battery – 1 AH or more

5. A mini submersible water pump

Circuit Diagram

As shown in the diagram above, this circuit requires just a few components. The main ones include the Arduino NANO board, a soil moisture sensor, a mini water pump and the battery.
Now, this is how it works…
- The humidity sensor provides analog voltage output, therefore, it must be connected to the Arduino's A0 and A1 analog input pins – which receive 5V Vcc power from the board.
- The relay is used to turn on/off the water pump. It is connected between the “NO” terminal (normally open) and the circuit ground.
- The Arduino activates the relay through the NPN BC547 transistor. The Arduino digital pin D2 is used to turn on/off the relay using the transistor. (The transistor is connected in the switch configuration.)
- The relay and water pump operate on 12V, which is supplied by the battery.
- The battery also supplies the Arduino's 12V VIN pin.
Note: Only two sensors are shown in the diagram, but it is possible to connect eight sensors to eight Arduino analog input pins (A0 – A7).
Circuit operation
The operation of the circuit is quite simple: when the soil starts to dry, the sensor will send it to the Arduino board, which turns on the water pump. Once the soil is adequately watered, the Arduino turns off the water pump. And that.
- The soil moisture sensor has variable resistance. This means that its resistance varies according to changes in conductivity between the two sensor rods. When these rods are inserted into the ground, their conductivity changes according to the soil's moisture content. If the soil is dry, the conductivity is lower (and the resistance is high). On the other hand, if the soil is quite moist, conductivity is high (and resistance is low). Thus, the sensor resistance changes from high to low, or from “max” to “min”, depending on the soil moisture (an inverse proportionality). This change in resistance is converted into an analog voltage output and as soil moisture increases, the analog output voltage decreases and vice versa.
- The sensor output voltage is supplied to the Arduino as an analog input. The Arduino board will then convert it into a digital value and measure the soil moisture level (from 0 to 100%).
- If the humidity level is less than the set threshold level (say 10 or 20%), it will turn on the relay through the transistor, turning on the pump.
- As the pump flows, the soil begins to moisten. The Arduino will continuously read the soil moisture level from both sensors.
- When a set humidity level is reached (say 90 or 95%) on both sensor rods, the Arduino turns OFF the relay, which turns off the pump.
- This cycle is continuous, so the plant is watered when the soil becomes dry.
For this project, I only used two sensors. But you can use a maximum of eight in different plant pots.
This circuit works because the program is downloaded (or embedded) into the Arduino microcontroller.
Here is the Arduino C program, which is written and compiled in the Arduino IDE software.
Software program
#define sin1 A0
#define sin2 A1
int led1=3,led2=4,led3=5, pump_rly=2;
null configuration
{
// put your configuration code here, to run once:
pinMode(led1,OUTPUT);
pinMode(led2,OUTPUT);
pinMode(led3,OUTPUT);
pinMode(pump_rly,OUTPUT);
digitalWrite(led1,LOW);
digitalWrite(led2,LOW);
digitalWrite(led3,LOW);
digitalWrite(pump_rly,LOW);
Serial.begin(9600);
Serial.println(“automatic irrigation system using arduino”);
}
empty loop
{
//put your main code here, to run repeatedly:
int sen1_value, sen2_value, soil_moisture_level_1, soil_moisture_level_2;
sen1_value = analogRead(sen1);
sen2_value = analogRead(sen2);
soil_moisture_level_1 = map(sen1_value,200,1020,100,1);
soil_moisture_level_2 = map(sen2_value,200,1020,100,1);
Serial.print(“Soil moisture level in POT 1: “);
Serial.print(soil_moisture_level_1);
Serial.println('%');
Serial.print(“Soil moisture level in POT 2: “);
Serial.print(soil_moisture_level_2);
Serial.println('%');
if(soil_moisture_level_1<10)
{
digitalWrite(led1,HIGH);
Serial.println(“the humidity level in POT 1 is low”);
}
else if(soil_moisture_level_1>90)
{
digitalWrite(led1,LOW);
Serial.println(“humidity level in POT 1 is adequate”);
}
if(soil_moisture_level_2<10)
{
digitalWrite(led2,HIGH);
Serial.println(“the humidity level in POT 2 is low”);
}
else if(soil_moisture_level_2>90)
{
digitalWrite(led2,LOW);
Serial.println(“humidity level in POT 2 is adequate”);
}
/* if(sin3_value>500)
{
digitalWrite(led3,HIGH);
Serial.println(“the humidity level in POT 3 is low”);
}
else if(sin3_value<50)
{
digitalWrite(led3,LOW);
Serial.println(“humidity level in POT 3 is adequate”);
}*/
if((soil_moisture_level_1<10) (soil_moisture_level_2<10))
{
Serial.println(“PUMP ON”);
digitalWrite(pump_rly,HIGH);
}
if((soil_moisture_level_1>94) && (soil_moisture_level_2>94))
{
Serial.println(“PUMP OFF”);
digitalWrite(pump_rly,LOW);
}
delay(3000);
}
(tagsToTranslate)Arduino

