
Increase the performance of your Node JS with caching techniques! Learn how to implement caching in your projects and improve the speed of your application.

Are you tired of slow and resource-intensive database queries in your Node.js application? You can get rid of these problems and improve performance by caching your node js application. Caching is an important technique in software development that has been used to improve application performance, leading to an efficient data retrieval process, providing an intermediate storage mechanism. It involves storing frequently accessed data and objects in a temporary storage area so that they can quickly get the data retrieved when needed.
This article will cover the basics of caching, an overview of the Redis server, the implementation of caching in Redis, and the different solutions available in the market. By the end of this article, you will better understand the scenarios in which caching is useful, what to cache, and the appropriate techniques for implementing caching in your Node.js applications based on your specific use case.
What is Node.js?

Node.js is an open source server-side JavaScript runtime environment built on Google Chrome's V8 JavaScript engine that allows developers to write server-side code using JavaScript syntax instead of another language like Java or Python . It makes life easier for front-end developers who are familiar with client-side programming by allowing them to work on back-end code and vice versa, allowing back-end developers who are more comfortable working on server-side tasks , such as databases or APIs, readily access the same languages and libraries available for web browsers, which means less time spent learning new technologies just because you switched between client/server-side coding.
This makes NodeJS highly popular among modern web application frameworks as introduced in 2009 by Ryan Dahl due largely to the fact that it utilizes non-blocking asynchronous I/O operations, which allow programs written in Node. js features much better resource utilization than traditional synchronous methods where all requests must wait until a request completes.
Why cache data in the first place?

Caching data is a common practice for an efficient data recovery process. Cached data reduces latency when accessing large data sets. By keeping recently requested items on hand, retrieval times are faster than if they had to be retrieved from their source every time a request is made. Additionally, this allows for more efficient use of resources, as multiple requests for similar requested data can be handled with just one query, rather than making separate requests each time.
For example, if an application needs hourly weather information, caching this data would save time because new forecasts would not need to be downloaded repeatedly throughout the day. Instead, they could retrieve data at the beginning of each hour using data cached in memory.
Another benefit of caching is improved scalability, as fewer remote calls need to be made, which reduces server load and expands capacity, allowing more users to access without decreasing response times due to excessive pressure on system resources as it leads to caching of frequently queried data. It also ensures that when traffic spikes occur due to increased demand, there will still be sufficient levels of service available as the cache stores high-frequency queries locally, thus avoiding slowdowns associated with outages from remote sources such as APIs or databases. which may not have been designed to expect large numbers of simultaneous calls to be made at once.
Caching also increases security by preventing sensitive user information, such as passwords or credit card details, from being exposed on open networks where unauthorized parties can intercept it before it reaches its intended target – another additional layer of protection which can prevent malicious attacks on systems hosting confidential customer records. making sure that only those authorized to access what's inside
Cached data can provide cost savings as numerous data store and fetch operations do not need to take place, resulting in lower resource usage while maintaining the same level of service quality expected by customers who expect fast, responsive experiences , regardless of how many people are using a particular product or service.
Cache Types
There are several types of cache that can be used in various contexts, including client-side caching, server-side caching, and content delivery networks (CDNs). Each type of cache has benefits and is suited to different use cases, so it's important to understand their differences to choose the right caching strategy for your specific needs.
| Cache type | Definition | Examples |
| Client-side cache | Caching web pages and resources on the user's computer. | Browser cache of images, CSS and JavaScript |
| Server-Side Caching | Store website or application components on an external server. | Memcached, Redis and LevelDB |
| Content Delivery Networks (CDNs) | Large distributed systems that serve cached static content. | Cloudflare, Akamai and Amazon CloudFront |
The table describes the advantages and disadvantages of each cache type in terms of factors such as capacity, availability, scalability, and implementation complexity. Ultimately, the choice of caching strategy will depend on the specific needs and requirements of a given project or application.
When to use Redis for caching?

Redis cache is a type of database storage that provides high-speed access to data stored in memory. Redis caches are an excellent choice for applications where large data must be retrieved and stored quickly. This makes them particularly suitable for web-based applications, such as those used by e-commerce websites or content management systems (CMS).
When deciding to use Redis caching, it's important to consider the size and complexity of your application. For example, if you have a small website with minimal traffic, there may be no need for Redis caching as its benefits may not outweigh the cost involved in setting up the system. However, using Redis may make sense if you have a larger website with regular visitors or customers who require fast response times from your server.
Another factor when considering using Redis cache is how frequently data needs to be accessed and updated on the server side, making data access operations faster. If data changes frequently, using Redis can provide better performance compared to other methods such as disk-based database due to its ability to handle multiple requests simultaneously without significantly slowing down. It also allows developers to have more control over how updates are handled to ensure that new information is distributed among all connected clients quickly and reliably, rather than waiting until each request is processed before updating it in all servers simultaneously, which may take longer depending on network latency. etc.
Furthermore, another important benefit offered by using Redis cache is scalability; This means that if your site experiences sudden increases in user base or activity levels, expanding capacity through additional nodes becomes much simpler than having a traditional database setup done manually, which consumes time and resources from other aspects, such as creating new features/functionalities for users, etc.
Because cached versions of objects remain stored in RAM, page load times will generally decrease along with increased throughput due again to reduced latency associated with retrieving information directly from disk drives versus memory locations where everything happens almost instantly, thus leading to further improvements in overall responsiveness. viewed by end users, making their interactions smoother and faster, which helps create better experiences overall, regardless of the device through which they are viewing things – mobile phones, tablets, laptops, desktops, etc.
Implement caching in Node JS

Let's say we have an e-commerce website displaying a list of users. Each time the URL is accessed, the application queries the database to find the most recent users, which can be slow and resource-intensive. We can use Redis cache to store database query results and serve them directly from the cache for subsequent requests.
Here's how you can implement Redis caching in a Node.js application:
Prerequisites
- Redis: Redis is an in-memory data structure store that can be used as a database, cache, and message broker.
- Node.js: Node.js is an open-source, cross-platform JavaScript runtime environment that allows developers to create server-side applications using JavaScript.
- Redis Client for Node.js: To use Redis on Node.js, you must install a Redis client library like “redis” through npm.
- Basic knowledge of Redis commands: Before running caching with Redis, you need to have a basic understanding of Redis commands like SET, GET and EXPIRE, which are used to store, retrieve and expire data respectively.
Step 1: Install Redis server
You can download the installer using the official Redis website . Follow your operating system's instructions to install Redis.
Alternatively, you can use a package manager to install Redis. For example, on Ubuntu or Debian Linux, you can use the following command:
sudo apt-get install redis-server
On macOS, you can use Homebrew to install Redis:
brew install redis
On Linux, after installing Redis, you can start the Redis server by running the following command in a terminal:
redis-server
On macOS, you can start the Redis server by running the following command in a terminal:
redis-server /usr/local/etc/redis.conf
On Windows, after the website is installed, you can start the Redis server by running the following command in a Command Prompt window:
redis-server.exe
This starts Redis with default settings.
Step 2: Create a new Node.js project.
- Create a new directory for your project and navigate to it in your terminal.
- Run the following command to create a new package.json file:
npm init -y
Your package.json file should look like this:
 {
 "name": "redis-nodejs",
 "version": "1.0.0",
 "description": "",
 "main": "index.js",
 "scripts": {
  "test": "echo \"Error: no test specified\" && exit 1"
 },
 "keywords": ,
 "author": "",
 "license": "ISC",
 }
Step 3: Install required dependencies
You will then need to install the following packages:
- express: a web server framework for Node.js.
- node-redis: a Redis client that allows you to store and access data in Redis.
Install the Express web framework and Redis client for Node.js using the following command:
npm install express redis axios
Your package.json file should look like this after installing the required packages:
 {
 "name": "redis-nodejs",
 "version": "1.0.0",
 "description": "",
 "main": "index.js",
 "scripts": {
  "test": "echo \"Error: no test specified\" && exit 1"
 },
 "keywords": ,
 "author": "",
 "license": "ISC",
 "dependencies": {
  "axios": "^1.3.4",
  "express": "^4.18.2",
  "redis": "^4.6.5"
 }
 }
Step 4: Configure a Redis client in your Node.js application
In your Node.js application, create a new file called server.js and add the following code to it:
 const express = require('express');
 const redis = require('redis');

 const { createClient } = require('redis');

const app = express;
 const port = process.env.PORT 3000;
In the code snippet above, you import the modules needed to configure an Express server and a Redis client in Node.js.
Then create an instance of the Express application using const app = express and set the port variable to the value of the environment variable defined in the .env file, or 3000 if it is not defined.
Now you're ready to start building your caching system using Redis and Express.
This code configures a Redis client using the Node.js Redis library and connects to a Redis server.
Step 5: Create a Redis client and connect to a Redis server
Now add the following code to the server.js file:
 let redisClient;

 (async => {
 redisClient = createClient;

 redisClient.on("error", (error) => console.error(`Error : ${error}`));

 await redisClient.connect;
 }) ;
The first line declares a variable called redisClient, which will store the Redis client object.
The code then defines an immediately invoked function expression (IIFE) using the async/await syntax, which does the following:
- Creates a Redis client using the createClient function. This function is provided by the Node.js Redis library and creates a new Redis client object that can be used to interact with a Redis server.
- Registers an error handler on the Redis client object, which logs any errors to the console.
- Calls the connect method on the Redis client object using await, which establishes a connection to the Redis server. This method returns a promise, so it needs to be waited for.
Step 6: Fetch data from an external API
Now add the following function to fetch data from the API.
 async function fetchApiData {
  const apiResponse = await axios.get(
   `
  );
  console.log("Request sent to the API");
  return apiResponse.data;
 }
Step 7: Caching Node JS Server Requests
Add the following getUsersData function, which first extracts the users parameter from the request object using req.params.users. It then declares two variables results and isCached, initializing the latter to false, as there would initially be no cache.
 async function getUsersData(req, res) {
  const users = req.params.users;
  let results;
  let isCached = false;

  try {
    const cacheResults = await redisClient.get(users);
    if (cacheResults) {
      isCached = true;
      results = JSON.parse(cacheResults);
    } else {
      results = await fetchApiData;
    if (results.length === 0) {
      throw "API returned an empty array";
    }
      await redisClient.set(users, JSON.stringify(results));
    }

    res.send({
      fromCache: isCached,
      data: results,
    });
  } catch (error) {
    console.error(error);
res.status(404).send("Data unavailable");
 }
 }
The function then attempts to retrieve cached results from a Redis database using the redisClient.get(users) function call. If cached results exist, the isCached variable is set to true and the cached results are parsed from a JSON string using JSON.parse(cacheResults).
If no cached results are found, the function calls another asynchronous function fetchApiData to obtain results. If fetchApiData returns an empty array, an exception will be thrown with the message “API returned an empty array”.
If fetchApiData returns non-empty results, the function stores the results as a JSON string in the Redis cache using redisClient.set(users, JSON.stringify(results)).
Finally, the function sends a response to the client with an object containing the isCached variable and the results data, using res.send({ fromCache: isCached, data: results }). If an exception is detected during the execution of the try block, the function logs an error to the console and sends a 404 response with the message “Data unavailable” using res.status(404).send(“Data unavailable”).
Step 8: Configure application routes
Add the following routes to the app.
 app.get("/users/:users", getUsersData);

 app.listen(port, => {
 console.log(`App listening on port ${port}`);
 });
The consolidated server.js file should look something like this.
 const express = require('express');
 const redis = require('redis');
 const { createClient } = require('redis');

 const app = express;
 const port = process.env.PORT 3000;

 let redisClient;

 (async => {
 redisClient = createClient;

 redisClient.on("error", (error) => console.error(`Error : ${error}`));

 await redisClient.connect;
 }) ;

async function fetchApiData {
 const apiResponse = await axios.get(
 `
 );
 console.log("Request sent to the API");
 return apiResponse.data;
 }

 async function getUsersData(req, res) {
 const users = req.params.users;
 let results;
 let isCached = false;

 try {
 const cacheResults = await redisClient.get(users);
 if (cacheResults) {
 isCached = true;
 results = JSON.parse(cacheResults);
 } else {
 results = await fetchApiData;
 if (results.length === 0) {
 throw "API returned an empty array";
 }
 await redisClient.set(users, JSON.stringify(results));
 }

 res.send({
 fromCache: isCached,
 data: results,
 });
 } catch (error) {
 console.error(error);
 res.status(404).send("Data unavailable");
 }
 }

app.get("/users/:users", getUsersData);

 app.listen(port, => {
 console.log(`App listening on port ${port}`);
 });
Step 9: Start the server and test the Redis cache
Start the server by running the following command in your terminal:
node server.js
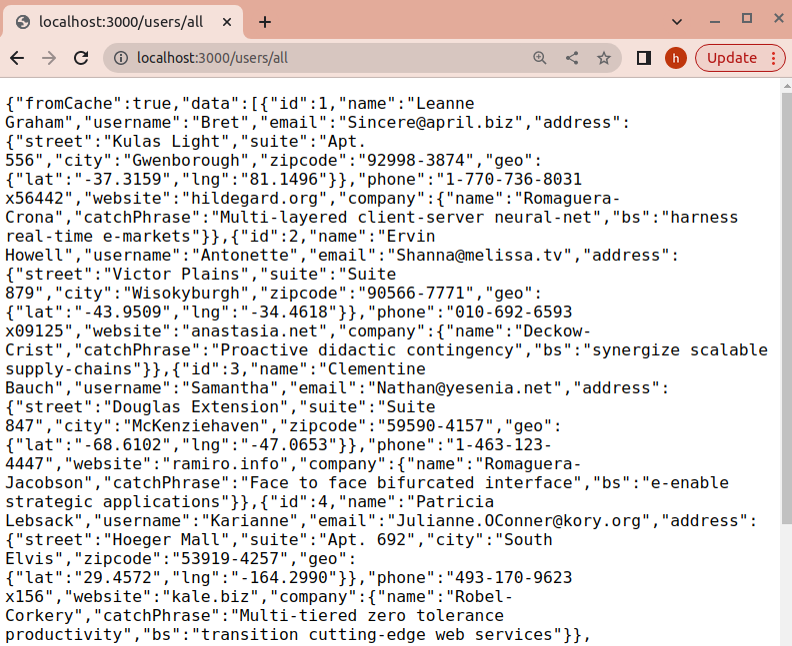
Step 10: Accessing the Recovered Data
You will have to visit to see the requested data. The server will fetch data.

Reload the page a few times. Now you can see that the requested data shows fromCache is true. This means you see the cache data.
And that! With these steps, you should now have a basic caching implementation using Redis with Node.js in your ecommerce application.
Alternatives
Redis is a popular and powerful in-memory data structure store. It has become increasingly popular as an alternative to traditional database systems due to its scalability, high performance and flexibility. Redis may not always be the best solution for every specific application or use case. There are several alternatives to Redis in Node.js, each with features, advantages and limitations. Here are some of the most popular alternatives to Redis:
Memcached
Memcached is a high-performance distributed memory object caching system. It is designed to cache frequently accessed data in memory to reduce the time an application must fetch data from a database or other source. Memcached is often used for large-scale web applications that require access to the same data at high speed.
One of the advantages of Memcached over Redis is its simplicity. It's easy to use and takes up little memory space, making it ideal for smaller projects or resource-constrained applications. However, Memcached does not offer some of Redis' more advanced features, such as persistence or advanced data types.
MongoDB
MongoDB is a popular NoSQL database that can be used as an alternative to Redis. MongoDB is designed to store and manage large amounts of unstructured data, making it a good choice for applications that require data storage flexibility.
One of the advantages of MongoDB over Redis is its scalability. MongoDB can handle large amounts of data and is designed to scale horizontally across multiple servers. It also offers more advanced query capabilities than Redis, making it a better choice for complex data retrieval applications.
Apache Cassandra
Apache Cassandra is a highly scalable NoSQL database that can be used as an alternative to Redis. Cassandra is designed to handle large amounts of data across multiple servers and can provide high availability and fault tolerance.
One of the advantages of Cassandra over Redis is its scalability. Cassandra can handle large amounts of data and is designed to scale horizontally across multiple servers. It also offers more advanced query capabilities than Redis, making it a better choice for complex data retrieval applications.
LevelDB
LevelDB is an open source key-value store that can be used as an alternative to Redis. LevelDB is designed to be lightweight and fast, making it a good choice for smaller projects or resource-constrained applications.
One of the advantages of LevelDB over Redis is its simplicity. It's easy to use and takes up little memory space, making it ideal for smaller projects or resource-constrained applications. However, LevelDB does not offer some of Redis' more advanced features, such as persistence or advanced data types.
In conclusion, choosing an alternative to Redis on Node.js will depend on your project's specific requirements, such as data size, scalability, and required query capabilities. Each alternative has its own set of features and limitations, and it is essential to evaluate them based on the specific needs of your project.
Conclusion
In conclusion, caching with Redis is an excellent way to optimize data access operations in Node.js applications. With the ability to quickly store and retrieve data, caching can significantly improve application performance and user experience. Additionally, Redis offers several useful features such as replication, clustering, transactions, pub/sub messaging, and more that can help developers build advanced architectures for distributed systems.
It also provides high availability solutions that allow you to deploy your application across multiple servers or cloud providers without worrying about downtime or latency issues due to network failures or other system issues. All of these advantages make Redis one of the most popular choices for caching in Node.js applications today, as described in a typical Node job description.
If you liked this article, check out our other guides below;
- Change Node Version: A Step-by-Step Guide
- Node JS Cache: Increasing Performance and Efficiency
- Unlock the power of Node.JS microservices
- Unlocking the Power of Websocket Nodejs
- Best Text Editors and Node JS IDE for App Development