Soldering is one of the most basic skills needed to tackle electronics projects. While beginners can work just fine with breadboards and other simple-to-operate components, once they learn how to solder, they will have access to a whole new world of innovative ideas and possibilities.
As we discussed earlier, PCBs are a little more complex to handle than breadboards, likewise, soldering is also a crucial skill to learn for beginners. That's why we've created some soldering tips and guidance for electronics engineers. So, if you are afraid of even touching the soldering iron, these dos and don'ts will definitely help you a lot in your projects.
Let's start with the basic understanding of the welding procedure and the list of necessary tools.
What is welding?

Welding: what is it and how is it done? (Image courtesy: Digital Trends)
Welding is the process of joining two pieces of metal by heating them to a suitable temperature. This is done using a filler material that cools to form a bond between the two pieces.
Soldering Tools
To weld the necessary items, you need to pay attention to the tools that are very important throughout the procedure. They are listed below-
Welding wire:

Welding wire (image courtesy: teknuclei.com)
It is the alloy that is usually available as long, thin wire in spools or tubes. In conventional form, solder contains lead, tin and some other trace metals. However, with the harmful effects of lead, another category of lead-free solder was later introduced, which is used in certain countries.
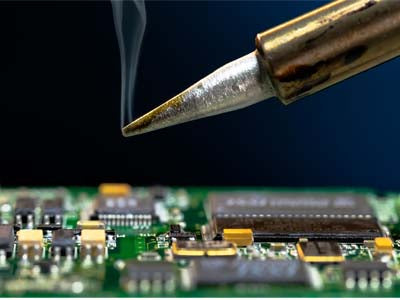
Soldering Iron:

Soldering iron (image courtesy: eBay)
The most basic tool for soldering components is a soldering iron. There are several types of soldering irons, but the functionality is almost the same in all of them. Furthermore, it has different parts explained below:
Soldering Tip:

Soldering tips – beveled, tapered, chisel (image courtesy: Adafruit Industries)
The tip is the part of the iron that heats up and allows the solder to flow around the two components that will be joined. Contrary to the belief that the tip transfers the solder, it transfers heat which increases the temperature of the metal components and the solder melts accordingly.
Often the tip of a soldering iron can be changed as needed. It is mainly of three types: beveled, conical and chisel.
Wand:

Soldering wand (image courtesy: snapdeal.com)
This part of the iron holds the tip and is handled by the user. It is made from various insulating materials to prevent heat from the tip from being transferred to the outside of the stick. In addition, it also contains metal wires and contacts that transfer heat from the base to the tip. Due to this dual function of heating and preventing burns, it is very important that you use a high quality wand.
Basis:

Soldering base – analog and digital (image courtesy: Sparkfun.com)
It is the soldering iron control box that regulates the temperatures. In analog it is done with the help of dials while there is a button equipped in digital ones. It basically consists of a large transformer and other control components that facilitate variation in the heat of the tip.
Stand up:

Soldering iron holder (image courtesy: Adafruit Industries)
The stand is used to house the iron when it is kept in ideal conditions. This is because leaving an iron unattended on a table can cause a fire. These holders have an automatic shut-off function that reduces the temperature of the tip when the wand is kept in the cradle. This, in turn, prevents tip wear over time.
brass sponge
Over time and with continuous use, the tip tends to oxidize and turn black, not accepting solder. Furthermore, in the case of lead-free solder, impurities from the solder accumulate at the tip causing this problem. This is why a sponge is used to clean the tip and prevent it from fraying. Previously a damp sponge was used, but now a brass sponge is common.
Flow Pen

Flux pen (image courtesy: Alibaba.com)
It is the chemical agent that facilitates the flow of lead-free solder. It is used when certain components are very difficult to solder so that it looks like a proper solder joint.
Vacuum pump for desoldering
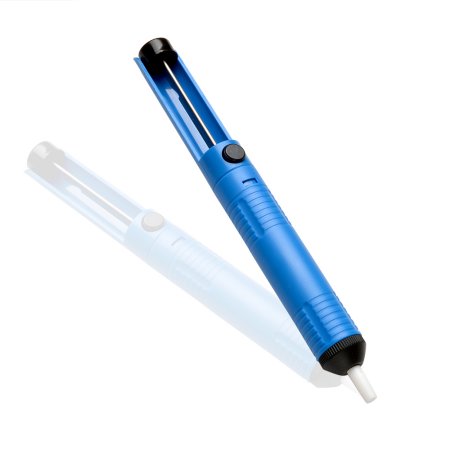
Vacuum pump for desoldering (image courtesy: Walmart)
It is a tool used to desolder components by removing solder left in through holes.
Solder wick

Solder Wick (image courtesy: Amazon)
It is used to erase extra pieces of solder when desoldering components. Containing thin braided copper wire, this wick is placed over a fitting and the opposite side is heated with an iron.
Tips
To ensure effective soldering and reduce the chances of damage, there are some soldering tips that can be very useful for electronics engineers, especially beginners. Here we are listing some valuable welding tips:
1. First of all, it's important to understand what kind of tools you really need for your projects. Since there are several types of tips and solders, you should have small tips and thin solder.

Soldering iron tips (image courtesy: SRA)
2. Before starting your first project, it is best to practice soldering on some old electronic equipment so that you do not have to bear any losses.

Practice soldering on old electronic equipment
(Image courtesy: shutterstock.com)
3. There are welding kits available with training materials so you can improve your welding skills. So start with some cheap test components on a test prototype board.

Soldering iron kit (image courtesy: feala.com)
4. Be careful when soldering PCB-mounted components and IC chips, as excessive heat may damage or break the sensitive part or burn a trace of the circuit board. Instead of soldering the component directly, solder a socket to the circuit board and insert the component into the socket.

Excessive heat damages the circuit board trace (image courtesy: Billm )
5. It is always advisable to wear safety glasses before handling solder as hot solder can splash into your eyes and cause serious injury.

Safety glasses (image courtesy: mtmc.co.uk)
6. Always work in a well-ventilated environment, as solder fumes are harmful to health, especially when it comes to lead solder. Work outdoors or use fans while welding.

Practice welding in a well-ventilated area (image courtesy: Pinterest)
7. It goes without saying that soldering irons are hot and therefore you must be careful not to place them on the table while it is still hot. Spread a non-flammable material in your work area so that the hot solder does not run away, as it could cause a fire.

Using non-flammable material at the soldering station (Image courtesy: WorkingSilver)
8. As mentioned above, there are two varieties of solder: leaded and lead-free. While you are free to choose any of them as per your preference, it is important to know that although lead-free solder is safer as it is non-toxic, lead-containing solder is believed to perform relatively better.

Lead-free and lead-free solder
9. If you have unlabeled solder and want to know which one has lead and which one doesn't, just heat it up. When it cools, the lead solder appears shiny while the other appears corroded.

Identification of leaded and lead-free solder (image courtesy: ChrisFix)
10. When soldering wires, use rosin paste flux to prevent the wire from oxidizing. It is a non-acidic paste obtained from tree sap. Coat the wire with this paste before soldering and it will protect against oxidation.

Rosin Paste Flux (image courtesy: Amazon)
11. If you are working with thin wires and small components, a soldering iron is quite convenient to use, especially when working on circuit boards and tight spaces. However, a soldering gun is suitable for both thin and thick wires as it is more powerful.

Soldering gun (image courtesy: Sears)
12. A soldering gun has specialized tips that cost $5 each. So, if you want to use a soldering gun but find it too expensive, take some 7-strand uninsulated electrical wire and cut smaller wires measuring 5 to 6 inches long. Bend these wires into exactly the same shape as the store-bought ends using the soldering gun at a very economical rate.

Expert Soldering Gun Tips (Image Courtesy: ChrisFix)
13. If you are working in a remote area without electricity, you can use a portable butane torch along with an adapter that fits on top. This device can easily melt solder.

Butane welding torch (image courtesy: wonderfulengineering.com)
14. When using a hand tool to hold the wires in place, cover the end of the alligator clips with shrink tubing. This is because the bare clips are sharp enough to cut the wire's insulation, leaving it exposed.

The end of the alligator clips covered with shrink tubes (Image courtesy: eBay)
15. To prolong the life of the soldering tip, keep it clean and tinned. Heat the tip and add some solder to coat it. Then clean with a damp sponge removing everything except a thin layer of solder. This would help make the tip last longer and also speed up heat transfer.

Tinned soldering tip (image courtesy: Control Chat)
16. If you want to make the welded joint last longer (in the case of wire), rub some silicone paste on the joint and slide some heat shrink tubing over it. Then use a heat gun to heat the tube, starting in the middle and moving it outward. This would remove all the extra silicone from the tube. This would make the joint much more stable and water free.

Covering the welded joint with heat shrink tube to make it stable
(Image courtesy: ChrisFix)
17. Do not touch the welded joint until it has completely cooled. Because the solder is still in liquid form, disturbing the joint can create cracks in the solder or air gaps.

Cracks appearing at solder joints (image courtesy: E28-535i.com)
18. Instead of dripping solder directly onto the wire, place the tip under the wire and run a little solder between the tip and the wire. Otherwise, the solder will not be able to penetrate the wire, resulting in a poor electrical connection.

Place the tip below the wire and feed the solder in between (Image courtesy: ChrisFix)
19. The wires at the tops of the solder joints must be cut, otherwise, if they come into contact with nearby traces, a short circuit may occur.

Trimming the tops of solder joints (Image courtesy: Adafruit)
20. Always make sure that the melted solder does not look like a bubble which could cause a cold solder joint. The more smoothly it adheres to the PCB and components, the better the connection.

Cold solder joint (image courtesy: Allpar)