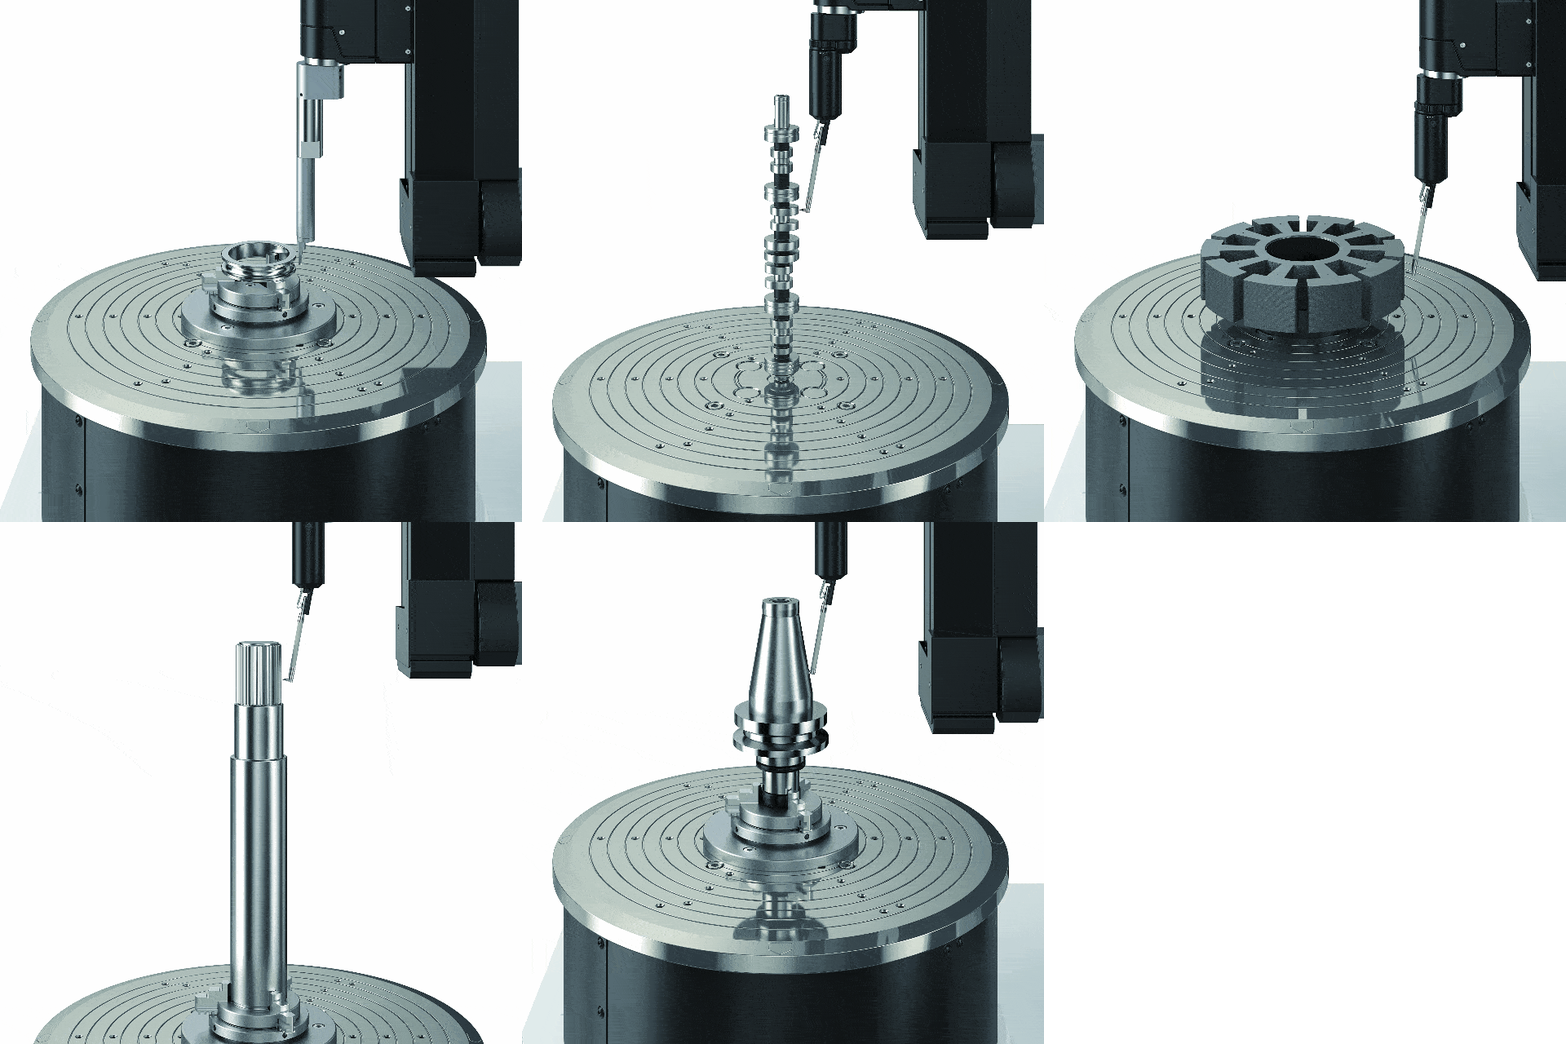
“Round”
In JIS B0621-1984, the definition and expression of shape and position deviation, roundness is defined as “the deviation of the geometric circle from a circular body”. The representation method is recorded as “when the circularity of a circular body (C) is sandwiched by two concentric geometric circles, the minimum gap between the two concentric circles is expressed as the difference in radius of the two circles (f), and the Circularity is expressed in millimeters or micrometers.
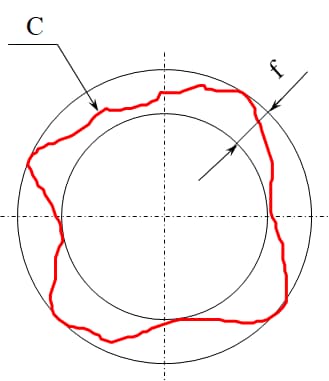
For rotating components, the immediate problem to be addressed is how to evaluate their true circular shape, which starts with “circularity tolerance”.
What is “roundness tolerance”?
The roundness tolerance zone refers to the tolerance zone between two concentric circles of the same section. As shown in the figure, the extracted circumference must be limited within the tolerance zone between two coplanar concentric circles with a radius difference of t.
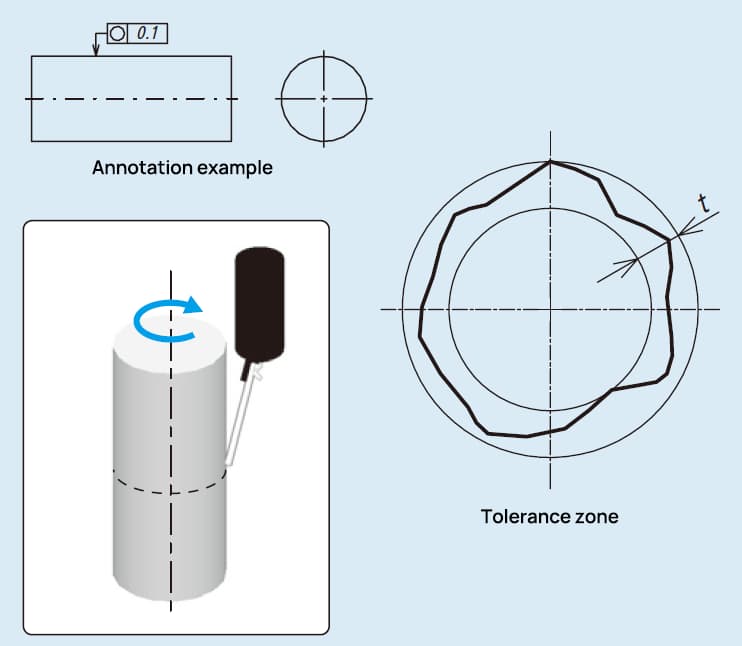
Why does tolerance to circularity and cylindricity occur? There are usually these reasons:
- Vibration of processing machines causing low roundness and cylindricity;
- Deterioration of the rotating part of the processing machine, leading to poor roundness and cylindricity;
- Bad shape of the central hole, leading to poor roundness and cylindricity;
- Roundness and cylindricity are poor due to deformation from previous processing when grinding with centerless grinding machine;
- Inadequate clamping device or clamping method of annular parts, causing distortion of the workpiece;
- Poor roundness caused by wear, poor installation and vibration of cutting tools;
- Deformation caused by heat treatment after finishing.
What are the methods for measuring and evaluating circularity?
Neighborhood assessment
There are several methods for assessing circularity, each with its unique characteristics and advantages. The method to be used is typically selected based on the specific requirements of the workpiece.
Simple measurement methods
As:
Diameter method

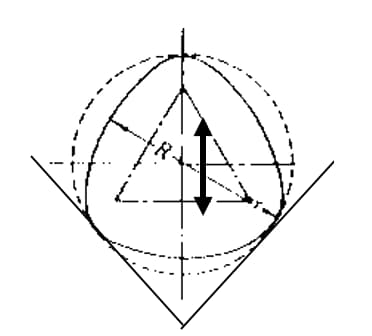
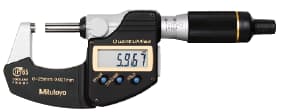
Roundness can be measured directly using tools such as micrometers. This method is simple and easy to perform. However, when evaluating triangular and pentagonal circles of equal diameters, it is easy to measure them as circular if they are not, leading to incorrect results.
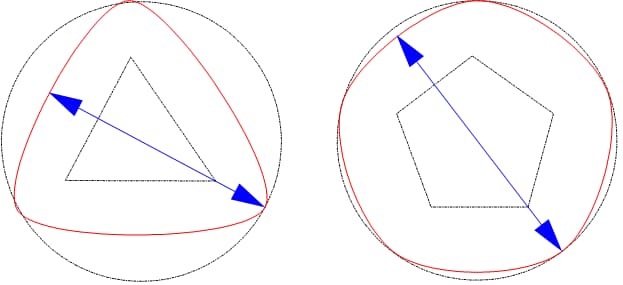
Three-point method
The three-point method can obtain roundness data through (V-block + micrometer/gauge + bench).
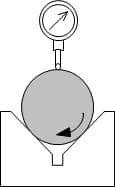
However, the three-point method may result in incorrect measurements due to differences in the tangent line at the selected fulcrum and difficulties in determining the center of the reference point. Additionally, errors may occur during measurement due to the up and down movement with the rotation of the object being measured.
Measurement methods based on relevant standards
As:
Radius method
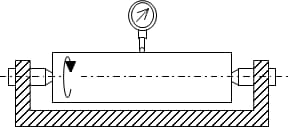
The radius method evaluates circularity using the difference between the maximum and minimum radius obtained after rotating the part for one cycle. As shown in the figure, measurement results can also be easily affected by the horizontal operation of the part.
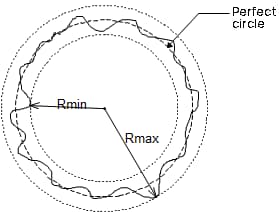
The tolerance zone is between two concentric circles in the same section
Core method
Compared with the center method, the radius method is mainly used for more precise measurement needs. The circularity detection data depends on the reference circle. Different test circle evaluation methods will result in different center positions of the reference circle, thus affecting the axial position of the measured circular feature.
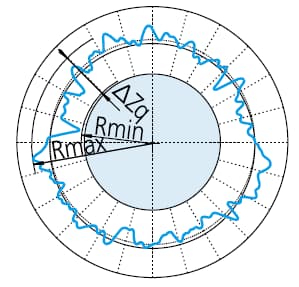
- LSC least square circle
To determine circularity, the measured contour is fitted to a circle and the sum of the squares of the deviation of the contour data from the circle is minimized. Then, the circularity value is defined as the difference between the maximum deviation (the highest peak value to the lowest valley value) of the contour and the circle.
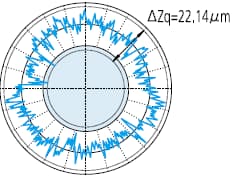
ΔZq =Rmax-Rmin, symbol that represents the circularity value through the LSC
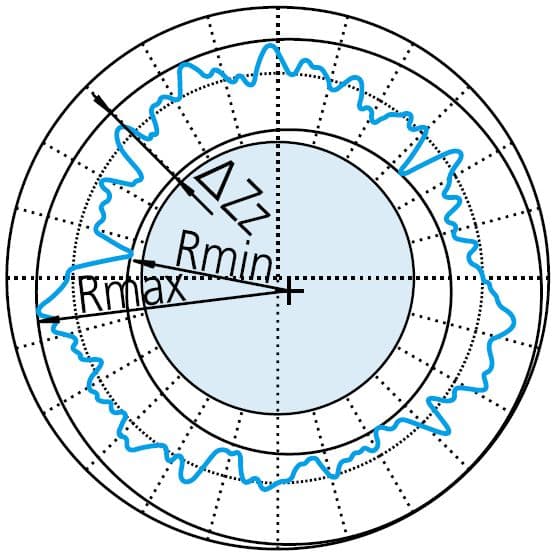
- MZC minimum area circle
To minimize the radial difference, two concentric circles are placed around the measured contour. The circularity value is defined as the radial gap between the two circles.
ΔZz =Rmax-Rmin, symbol that represents the circularity value through MZC
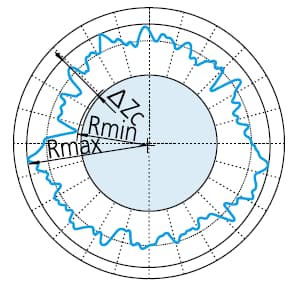
- Minimum circumscribed circle MCC
First, create the smallest circle that surrounds the measured profile. Then, the circularity value is defined as the maximum deviation between the contour and the circle. This method is commonly used to evaluate shafts, rods, and similar objects.
ΔZc =Rmax-Rmin, the symbol of rounding value through MCC.
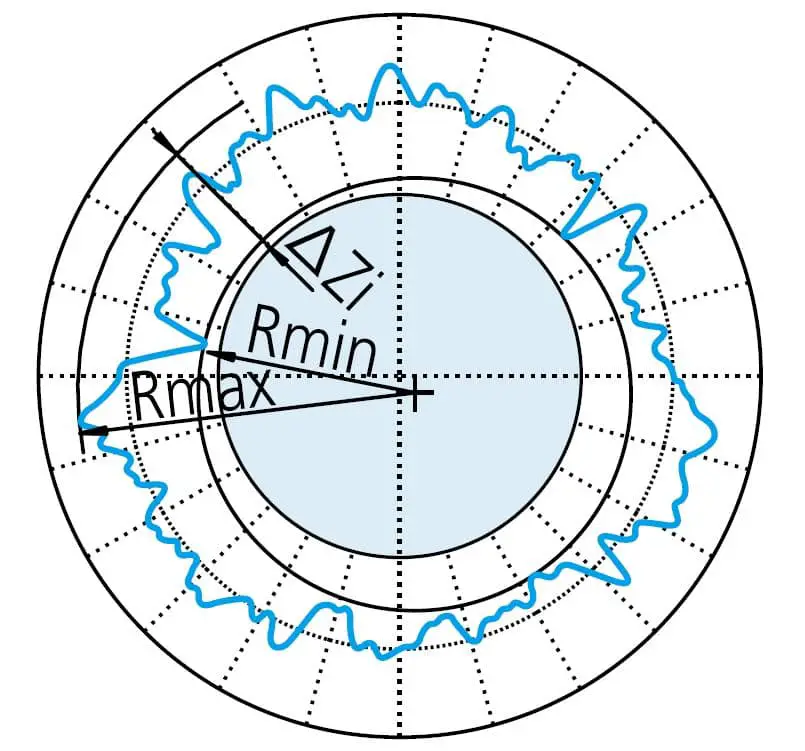
- Maximum Enrolled Circle MIC
Create the largest circle that can enclose the measured profile. Then, the circularity value is defined as the maximum deviation between the contour and the circle.
ΔZi =Rmax-Rmin, the symbol indicating the roundness value through MIC.
When evaluating roundness, the obtained contour is normally filtered to reduce or eliminate the influence of unnecessary noise.
Influence of the filter on the measured contour
Filtering methods and defined filtering cutoff values (UPR: fluctuations per rotation) may vary depending on specific measurement requirements. The figure below illustrates the various effects of filter settings on the measured contour.
No filter:
Low Pass Filter:

Bandpass Filter:

As evaluators, what can these numbers tell us?
Measurement chart analysis

Figure: measurement results graph
1 UPR component
1 UPR: only one wave is retained after filtering:
The 1UPR component indicates the eccentricity of the part in relation to the axis of rotation of the measuring instrument.
The amplitude of the waveform depends on your level setting.

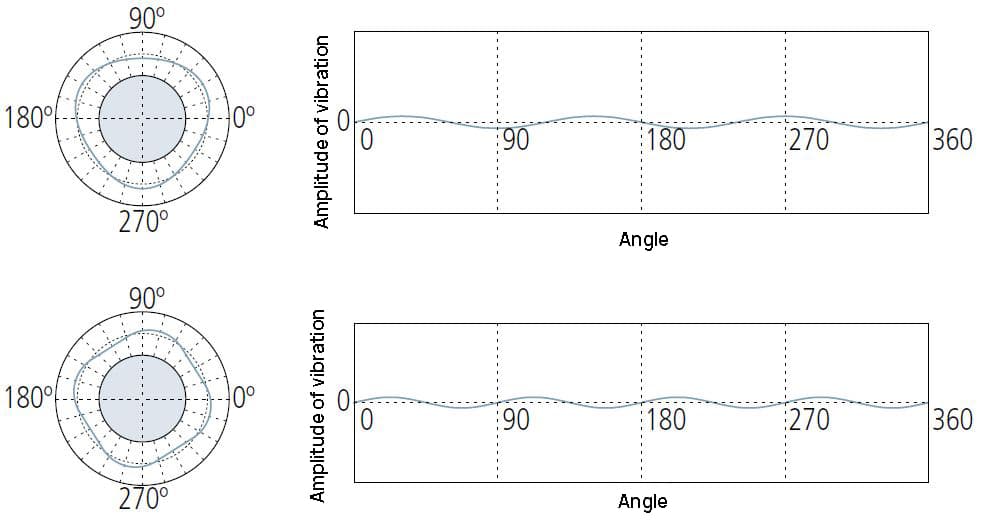
2 UPR component
2UPR components may indicate:
① Insufficient level adjustment of measuring instruments;
② Circular eccentricity caused by incorrect installation of the part on the machine tool forming its shape;
③ The shape of the workpiece is oval, for example in the IC engine piston.

3~5 UPR component
It may indicate:
① Deformation caused by too tight holding chuck on the measuring instrument.
② Relaxation deformation caused by the release of stress when unloading from the fixed chuck of the processing machine tool.
UPR 5~15 component
It generally refers to unbalanced factors in the processing method or part production process.
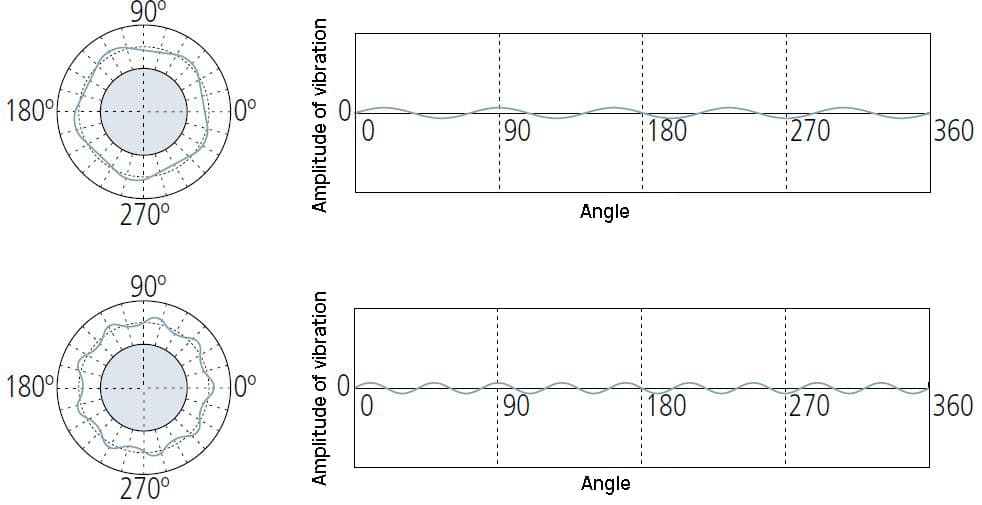
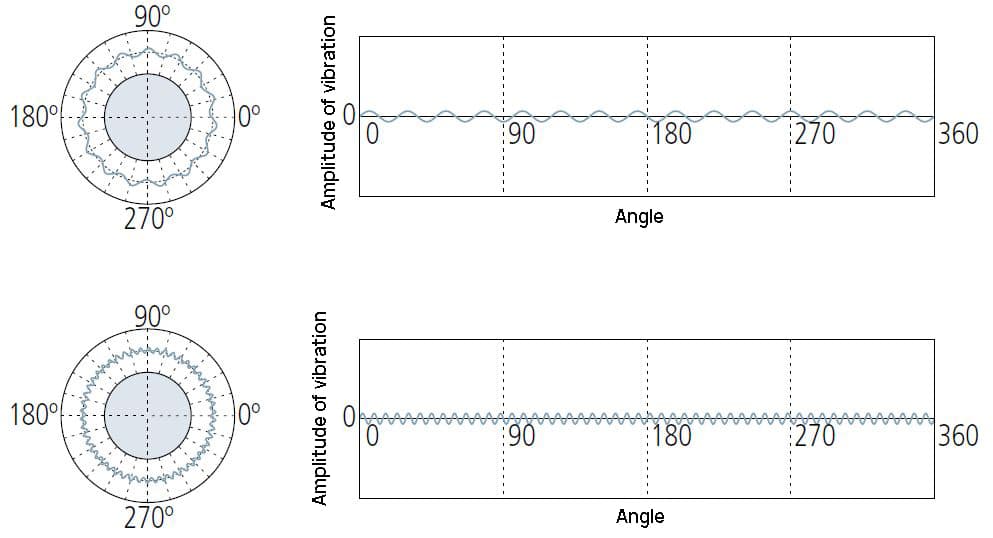
15 (more) UPR components
15 (or more) UPR conditions are generally caused by their own causes, such as tool vibration, machine vibration, coolant transfer effect, material inhomogeneity, etc.
Main parameters for evaluating roundness
| Parameter | Meaning |
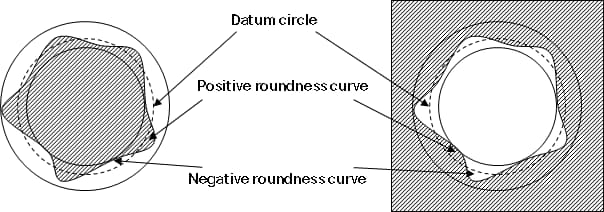
| ROnt | The measured circularity value represents the difference between the maximum value of the positive circularity curve and the minimum value of the negative circularity curve or the sum of the absolute values. |
| RONp | The measured peak height of the rounding curve represents the maximum value of the positive rounding curve. |
| RONV | The measured circularity value represents the absolute value of the minimum value of the negative circularity curve. |
| RONq | The double root mean square roundness measure represents the double root mean square of the circularity curve. |
Finally, let's take a look at what tools and instruments are available to measure circularity?
Common tools/instruments for assessing roundness
Micrometer:
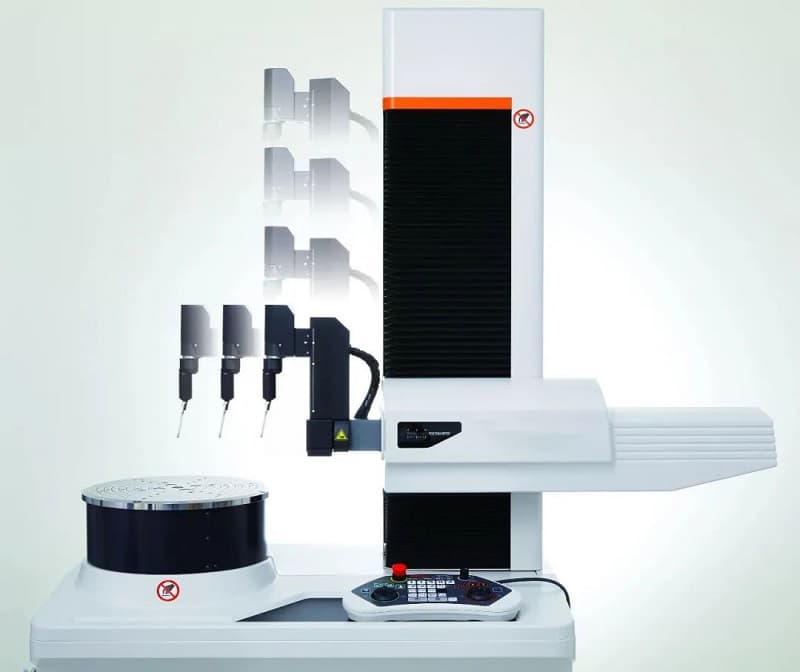
Roundness Measuring Instrument:
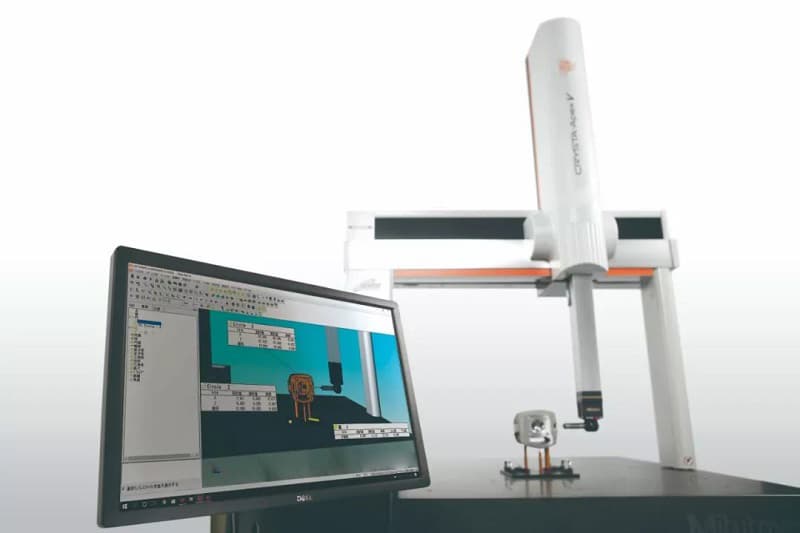
Coordinate Measuring Machine:
Space is limited and you can leave a message and criticize topics not covered.
Conclusion
After reading this article, I hope you have gained a deeper understanding of rounding. If you have any further questions, feel free to leave a comment below.


