The bending phenomenon of forgings in industrial forging production was analyzed based on previous production examples. This article analyzes and explains the form, causes and methods of local control and elimination of wrinkles from different perspectives, such as: B. Forming process, cutting, use of release agents and surface defects of the steel. These are practical methods for on-site quality control. The article also covers new production lines, new forging production methods and other content.
With the introduction of automated forging production lines and precision equipment (Figure 1), our company's forging level has improved significantly, and forgings are developing towards small-margin and precision forging. The use of robots has replaced some workers, and the continuous production time of the automatic forging production line reaches 6 seconds. The accompanying precision cutting machine can cut about 20 parts per minute, greatly improving the forging production capacity with high efficiency. The improvement in the level of automation has placed greater demands on various aspects of support and also requires controllable defects in the forging process. Otherwise, there will be huge losses. While visible and measurable defects are easy to control, hidden defects are difficult.
1. Ask questions
1.1 Definition of convolution
The implementation of closed forging in the company's forging workshop, as well as the development of processes such as refined surplus forgings, precision tooth forging and oil groove forging, have raised the level of forging technology to a new level. The main shape defects of forgings are insufficient filling, wrinkles, out-of-tolerance coaxiality, collision, oil groove deformation, etc. Among them, forging bending is the most difficult to control because it is not easy to detect – the melting of metal deformation and flow with oxidized surface metal forms. Bending reduces the load-bearing surface of the component and often becomes a source of fatigue during operation due to the stress concentration here. Bent parts often expand at the end of bending during subsequent processes (mainly during heat treatment), forming cracks in the expanded part. The end is pointed and its surface generally does not show oxidation or decarburization phenomenon. Wrinkles have become a cause of cracking, so wrinkles cause significant damage to forged parts. Technical documents specify that wrinkles are generally not permitted in forgings. 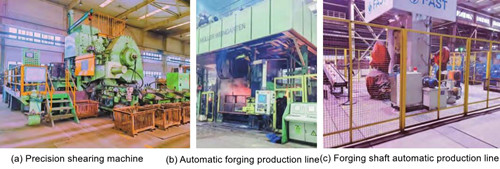
Figure.1 Precision automation equipment
1.2 Current situation
The production of forgings in the forging workshop is the first process of processing the factory's product, followed by rough turning, fine turning and heat treatment of the product. For forged parts or finished products, quality problems may be caused by subsequent inadequate processes, improper use and maintenance, design and material selection problems, and other defects such as cracks. The quality analysis of forgings is shown in Figure 2. Defects caused by heat treatment, surface treatment and cold processing are eliminated at the enterprise, with other defects being inherent in the forgings themselves. The company must identify defects in construction, material selection and maintenance. 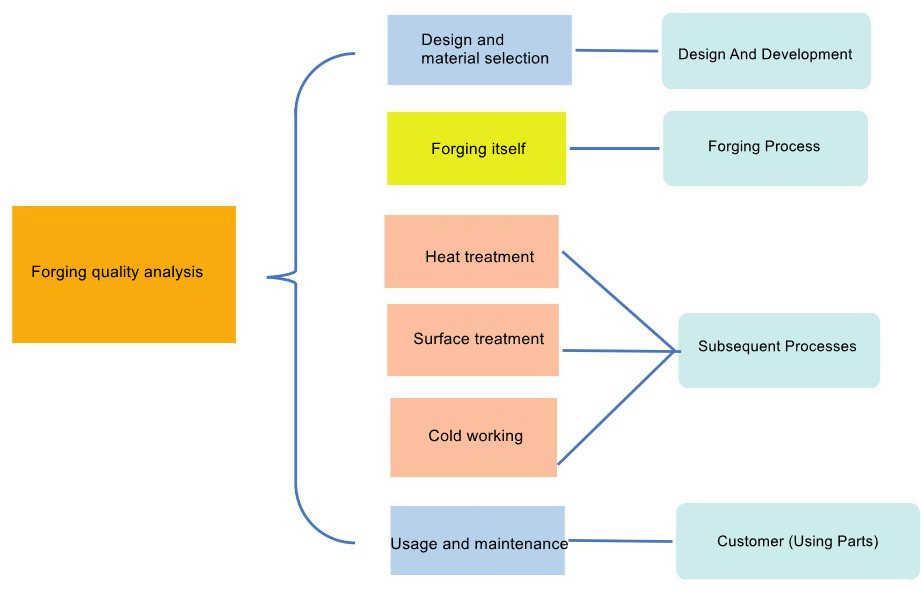
Figure.2 Quality analysis of forgings
As forging wrinkles are difficult to detect by visual inspection and to distinguish from cracks that appear in subsequent processes, making analysis difficult, they should be inspected as early as possible in the forging process. However, due to its complex causes and hidden defects, it is difficult to prevent transmission. Based on strengthening inter-process communication and supporting the previous process, the blacksmith shop often helps identify defects and works together to find and solve problems, brainstorms and works together to “remove falsehoods and ensure authenticity to preserve ”. Using advanced co-casting quality management method BIQ (BuiltIn Quality), wrinkles are analyzed layer by layer from various aspects such as phenomenon, cause, occurrence and elimination to improve the quality of forgings.
In July 2016, while dealing with feedback issues in the gear processing shop, technical personnel discovered visual defects in the batch of precision machined parts (material 8620H), as shown in Figure 3. The characteristics were uneven distribution and lack of oxidation or darkening of the product. The technical team determined that this was caused by a process other than forging and sent it for inspection confirmation, thus avoiding a lot of separation work. Due to the significant additional effort and impact caused by suspected “cracks and wrinkles” in the forging shop, shop technicians must analyze and be “confident” about the causes of wrinkles in the forging process.
2. Find and fix problems
As shown in Figure 4, based on the actual production in our factory, technical personnel summarized the causes of bending in forging production, which mainly occurs in the following aspects. 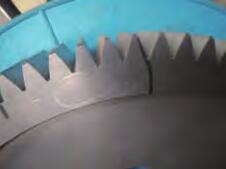
Figure.3 Visual defects 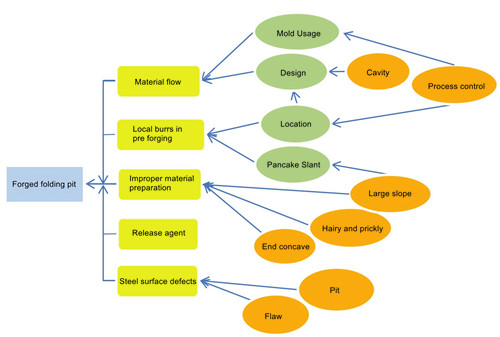
Figure 4 Factors for the formation of bends in forged parts
Table 1 Various wrinkles of common shape
| Article | phenomenon | Example part | illustration | To describe | Analysis of the causes on site | Deletion method |
| 1 | Partial bending of convex and rounded corners of forgings | Figure 5 | The “double eyelid” phenomenon in the local area of the forging arc; Local existence along the circumferential direction | Due to metal convection, the tilt of the mold is not suitable: the mold design has small rounded corners (not suitable) | Check the shape and design | |
| two | Image folded in the circular arc area | 12051083 | Figure 6 | Discontinuity of the form sheet with sharp corners: production of a certain quantity; Local existence along the circumferential direction | Deformation when mold corners collapse | Check and replace the mold |
| 3 | Crimping | 0,654,5000.00 Equipment | Figure 7 | The “crescent” ingot is pressed locally along the circumferential direction at the end face of the forging: a stepped forging adjacent to two steps in the lower forming stage occasionally produces edge oxidation and a small number of parts: present locally along the circumferential direction of forging forging | The convex and rounded corners of the upper mold are shaved and bent, and the rounded corners are small (not suitable); Improper mold tilt: Blank tilt or unaligned operation | Pay attention to the guidance; project improvement; Feedback on empty questions: pay attention to standardized operation |
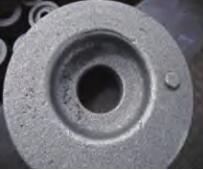
Figure 5: Bending on the convex curve of forged parts
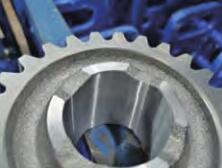
Figure 6: Bending caused by collapse of the mold arc
2.1 Forging Forming Bending
Forged bends can form by convection and convergence of two (or more) metal wires. It can also be a rapid, massive flow of metal that causes adjacent surfaces and layers of metal to flow, causing the two to converge. They can also result from bending and backflow of the metal. They can also be caused by local deformation of some metal and pressure on another part of the metal, which usually happens in the rounded area. Our company uses DEFORM-3D simulation software in forging projects, mainly to analyze the trend of metal flow. It can effectively analyze the metal flow situation in design work and play a preventive role in the formation of wrinkles. Some common wrinkle formations are listed in Table 1.
Closed forging, pre-forged burrs pressed into forgings, foreign objects pressed into forgings
The forging is closed and forged in a hot forging press (Figure 8). Three stages are carried out: upsetting, pre-forging and final forging. Due to the uneven distribution of material when cutting rotary forgings, burrs can be removed locally during preforging. During final forging, the protrusions on the outer circle of the upper face of the forging are bent to form a fold. Foreign objects falling from the die cavity can also cause wrinkles if they are pushed through edges in the face or other parts of the forging. An example of press bending is shown in Table 2. 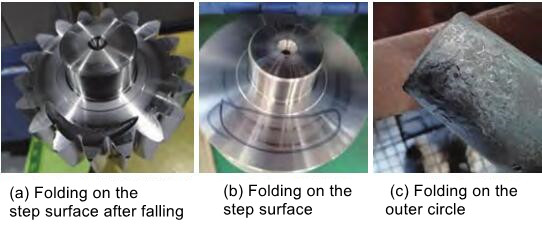
Figure 7: Scratches and wrinkles 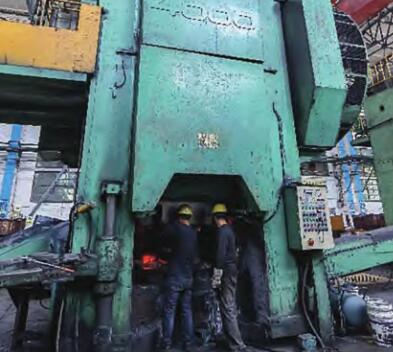
Figure 8: Hot forging press
Table 2: Press Fold Example
| Article | phenomenon | illustration | To describe | Analysis of the causes on site | Deletion method |
| 1 | Pre-forging flash presses | Figure 9 | At the maximum outer circle of the upper face of the forging, there is a local area | The large tilt of the end face of the blank leads to the tilt of the disturbed round cake (for individual parts); The shape of the compressed part is not suitable (it collapses) and the round cake is irregular (it produces a certain amount); Poor forge positioning (produces a certain amount) | Check billet quality: improve design or make on-site adjustments |
| two | Pressure injury caused by a foreign body | Figure 10 | Foreign objects falling into the mold cavity are pressed irregularly into the shape and position of the forging surface, resulting in individual parts | Foreign objects such as burrs fall into the mold cavity | Check and clean foreign matter in the mold cavity and punching area |
Table 3 Examples of shear defects
| Article | phenomenon | illustration | To describe | Analysis of the causes on site | Deletion method |
| 1 | The blank is cut and flattened, and the final surface has a large slope (horseshoe) with burrs | Figure 12 (Material 8620H) | Create multiple pieces; creases are easy to occur (if the mating part of the forging has a rounded corner) | Bl the floor is not pressed well (there is a risk of residue) | Adjustment; Choosing the residue |
| two | Folds and large burrs in the cross section of the workpiece | Before cutting the blank, there are folds, the cutting is not perpendicular to the axis, and the burrs are large and thick, resulting in wrinkles; Local area along the perimeter during forging | The distance between the blades is large and the cutting edge is round and blunt due to tool wear; Heavy wear on the retaining block | Adjustment; Replacing cutting tools and clamping blocks | |
| 3 | Delving deeper into the empty face | Figure 13 (Material 8620H) | cracks that produce a certain amount; Easily causes wrinkling: locally along the perimeter of the forging | The gap between the blades is small and the cracks in the metal section do not coincide, resulting in secondary shear and pullout of some end metals. | Adjusting the blade distance |
| 4 | Crack formation in the shear section of 20CrMnTi steel | After standing for a few hours, the central part of the forehead cracks; Task | Alloy steel has high internal shear stress and flattening deformation | The shear base uses an induction heater to heat the billet during feeding, and hot shearing is carried out |
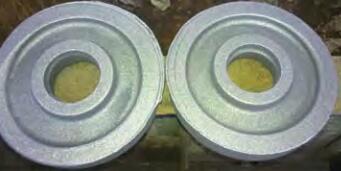
Figure 9: Extrusion flash presses and bends
2.2 Face defects and forging defects caused by shear billets
Precision shears are an efficient and automated cutting device. Table 3 lists the defects commonly found in our company's old scissors. Wanyang precision shears introduced in the second and third stages of material preparation in our forging workshop have a support device below the upper edge of the blade holder, which significantly improves the cutting quality compared to the old shears, as per shown in Figure 11.
In the material preparation section, the final surface of the material cut by the circular saw is of good quality and the weight of the material section is accurate. Common band saws have low precision and tend to cut materials with large end slopes. For some narrow radius forgings in production, such as: For example, export part 23160 (secondary casing intermediate shaft drive gear, material 8620RH), even the smallest shear burr (which meets the shear quality requirements) will cause wrinkling. According to the analysis, the radii of this type of forging are narrow and the horizontal flow area of the burrs is small. Due to the obstruction to the flow, they accumulate in the forging spokes. On site, this type of product goes from cutting and cutting to sawing and cutting to eliminate burrs and wrinkles from the spokes of this product. 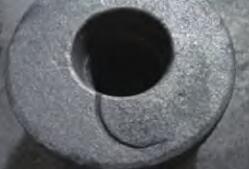
Figure 10: Pressure injury caused by a foreign body 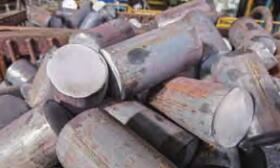
Figure 11. Cross section of a good quality shear material 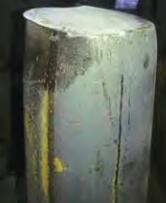
Figure 12: Chamfering and flattening the ends 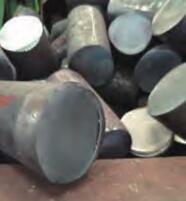
Figure.13 Shear cracks
2.3 Wrinkling caused by release agent failure in automatic production line
The company's automatic forging production line (Figure 14) is the most automated production line in the forging workshop. The stamped forgings are automatically transferred to the normalizing furnace, and the two moving beams of the main machine replace manual operation, greatly improving production capacity. Mainly produces compressed round cake pieces. In addition to traditional wrinkles caused by forging, occasional lubricant failure during automatic spray lubrication results in wrinkles caused by blocked metal flow (Figure 15). The overall shape is irregular, but such defects rarely occur.
2.4 Spiral folds during the lamination process
Our company's cross wedge rolling is a rotational forming process in which shaft parts are rolled through local continuous plastic forming. Compared with forging forming, it has low workload, light equipment weight, high productivity, high product precision, good working environment, and is easy to mechanize and automate. Due to the shape characteristics of cross-wedge rolling, it is easy to occur surface defects caused by the shape, such as spiral dents and porosity in the center. These defects are significantly different from the outer spiral continuous curvature, and in the outer spiral continuous curvature, it is obvious that they are caused by cracks in the raw material. The symmetric or asymmetric continuous line that appears in 67051105 (two axes), as shown in Figure 16, is characterized by a long range and few parts (usually made in one piece, sometimes concentrated in a specific thermal number of steel). During production, operators carefully observe and isolate defective parts and provide feedback to supervisors. 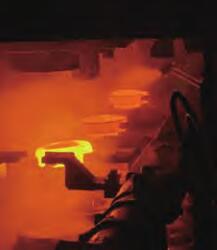
Figure 14: Automatic modeling of the production line 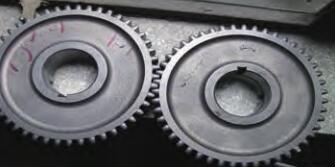
Figure.15 Disc bending
The sawn section used in the manufacture of the cross-wedge mill (Figure 17) must be subjected to magnetic particle inspection to remove defective materials if surface cracks occur during rolling. Internal defects in steel have a significant impact on the quality of rolled parts, and ultrasonic flaw detectors are generally used for center quality inspection of rolled parts in production.
2.5 Other defects such as cracks caused by pressing steel surface defects on the surface of forgings
The surface defects of rolled steel purchased from the factory are not easy to detect during production due to rust (also known as yellow film material) and rolling oxidation (blue film material). However, some surface defects may be noticed during spreading and sawing preparation. Common steel surface defects and the subsequent process defects they cause are listed in Table 4. 
Figure.16 Shaft surface buckling 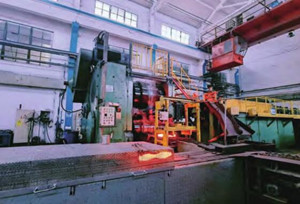
Figure 17: Production line for cross wedge rolling
Table 4 Examples of steel defects and subsequent defects
| Article | phenomenon | Example part | illustration | To describe | Analysis of the causes on site | Deletion method | |
| 1 | Defects identified during cutting and preparation of the material | Material section outer circular well | Part Number: 0.654 5000.00 (Gear) |
Figure 18 Figure 19 |
Spiral depressions or large depressions on the outer surface of the material | There are holes on the surface of the steel | isolation and feedback; Isolation occurs mainly during the material preparation process |
| Cracks on the outer circle of the material section | Figure 20 | Vertical crack in the outer circle | Cracks on the steel surface | ||||
| two | Steel rolls and bends | Figure 13 (Material 8620H) | Surface wrinkles that cause forging folds: not visually noticeable | Difficult to distinguish after forging | Insulation during material preparation or forging | ||
| 3 | Defects in the forging process | Cracks in turned round cakes |
Material: 17NiCrMo6-4 Part Number: 15621115-1 (Second Shaft Overdrive Transmission) |
Figure 21 | Tap the outer circle of a round cake with vertical cracks: usually a round cake drum | Cracks on the steel surface | Isolation: Responsibility is identified and surface cracks in the steel are often hidden during the stamping process |
| 4 | Axial cracks on the outer circle of forgings |
Part Number: 11741050 (Third Gear Intermediate Shaft) Material: 20crMnTiH3 |
Figure 22 | Axial cracks in the molding; A specific part or furnace will have a large number of thin axial lines on the outer circle | Isolation and identification of responsibility | ||
| Radial cracks on the face of forged parts | Figure 23 | Create individual parts: radial and individual parts | |||||
| 5 | Defects in the processing process | Direct delivery in black grained leather | Figure 24 | Superficial scars, oxidation and darkening | Steel surface wells (sawed for material preparation, not forged but turned) | Isolation and identification of responsibility | |
| 6 | Visual defects (discovered during processing) | Figure 25 | Visual fabric defects that occur during continuous cutting of metal during machining without visual observation of oxidation; Difficult points and organizational discontinuity | Isolation; Submit a metallographic analysis to determine if it is an organizational definition | |||
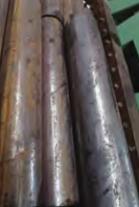
Figure 18 Spiral depressions on the steel surface 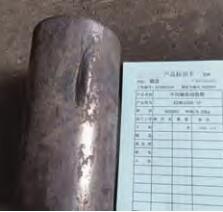
Figure.19 Steel surface wells
The above analysis of steel surface defects did not carry out an in-depth study of the causes. Instead, error phenomena were classified only in detail to facilitate comparison and testing by operators in production. After heating and forging, the surface defects of the steel press on the forging surface and resemble the appearance of forging folds, resulting in quality risks. Forging must eliminate material problems and confounding “factors” to effectively analyze the entire process. The blacksmith shop encourages employees to actively think about the visual issues of materials, rewards individuals with significant contributions, and sends them to the company for awards. This significantly increases employee enthusiasm and allows you to quickly discover and resolve material problems. The company's materials center and quality inspection department can quickly identify internal and external material defects through advanced physical and chemical methods. 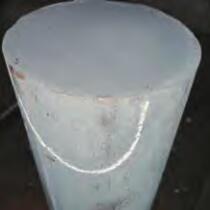
Figure 20 Fine axial cracks on the steel surface 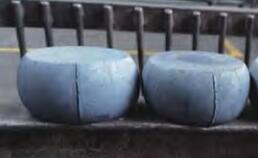
Fig. 21 Vertical cracks in the drum formed as part of a round cake 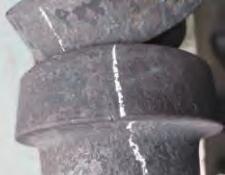
Figure 22 Axial cracks on the outer circle of forged parts 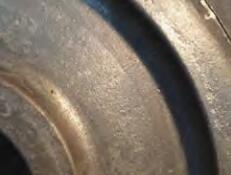
Figure 23 Radial thin lines on the face of forgings 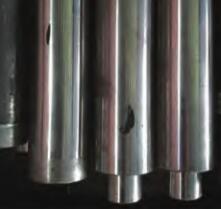
Figure 24: Surface voids of direct feed parts 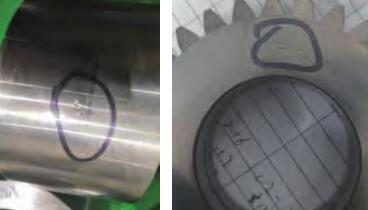
Figure 25 Visible defects during processing


